Leaderboard

Popular Content
Showing content with the highest reputation on 03/01/25 in all areas
-
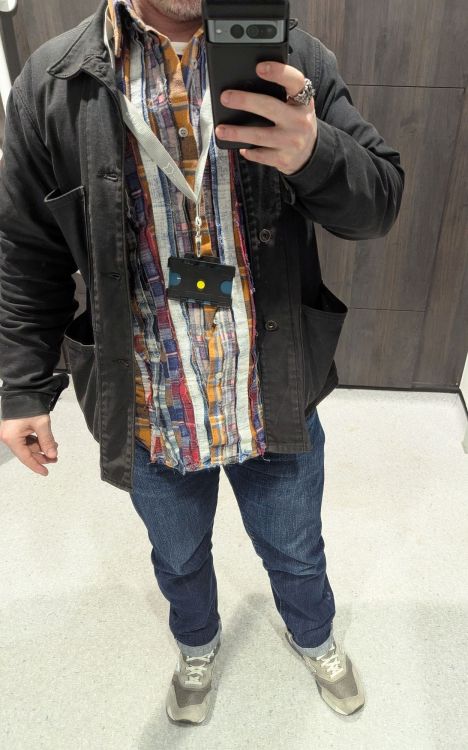
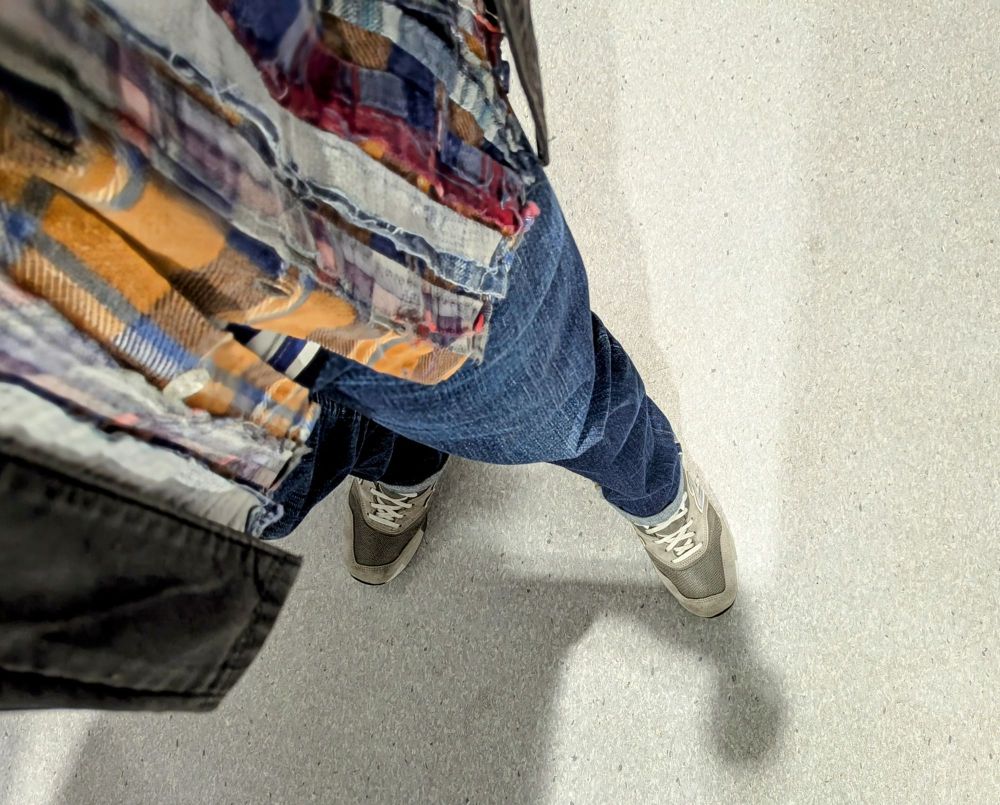
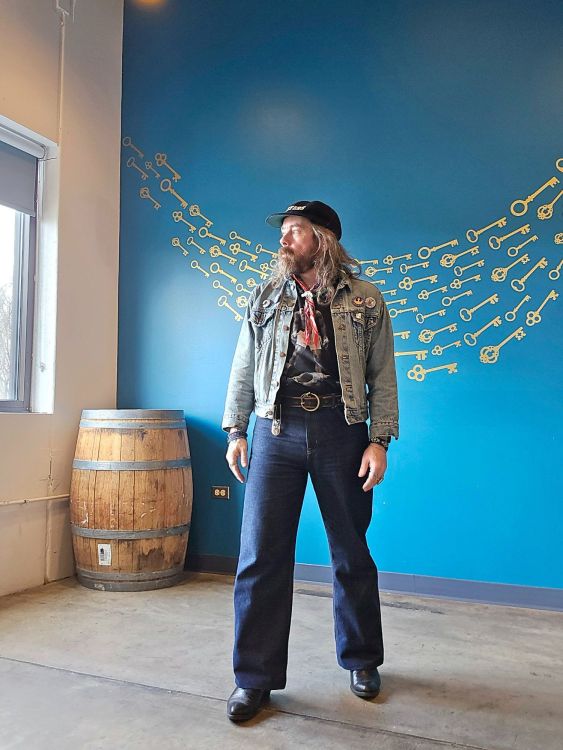
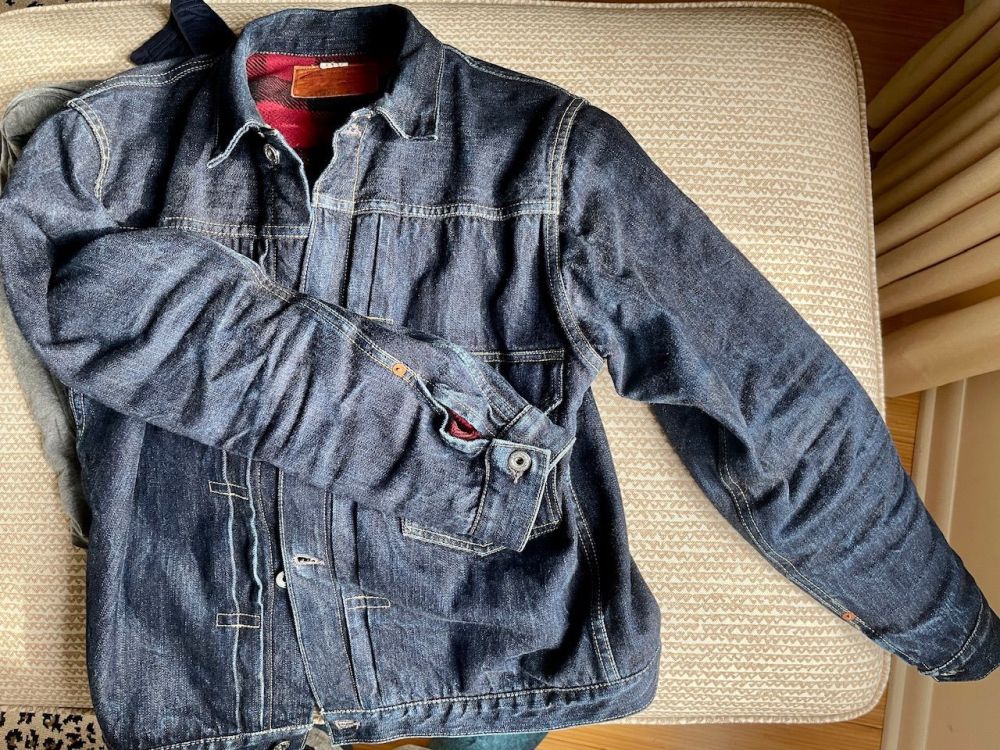
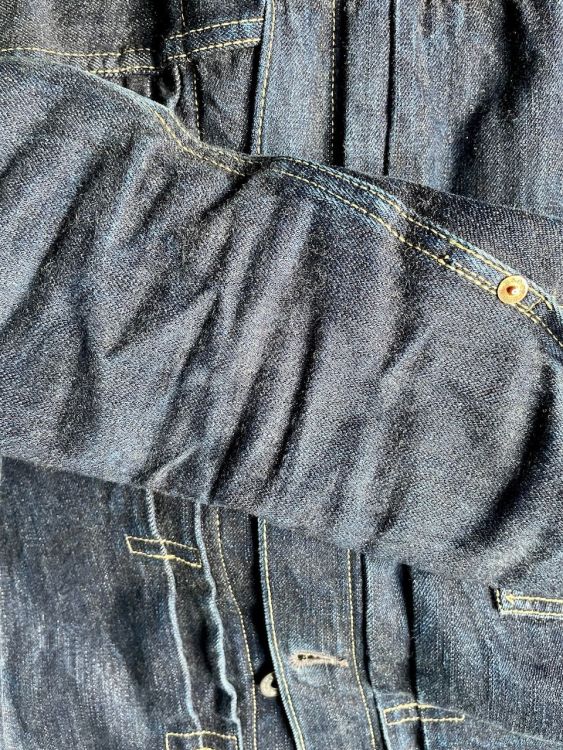
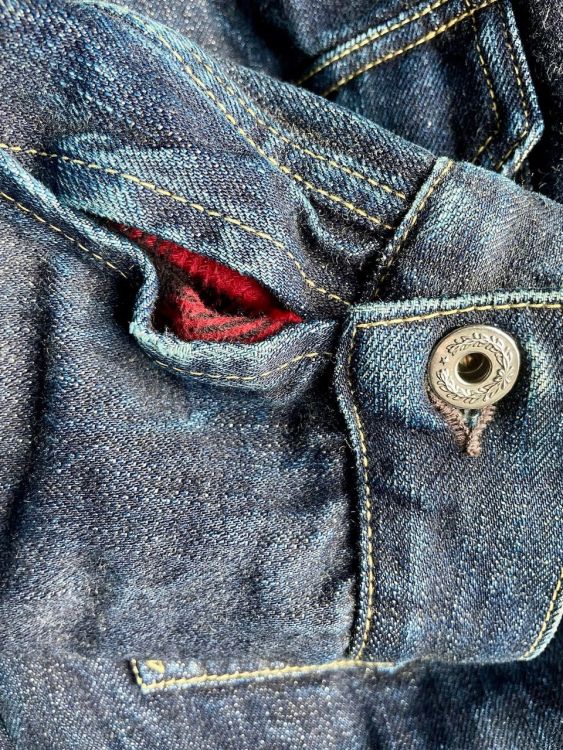
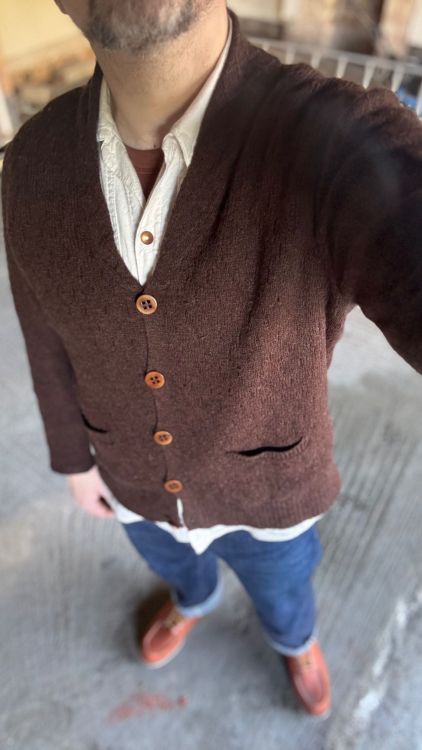
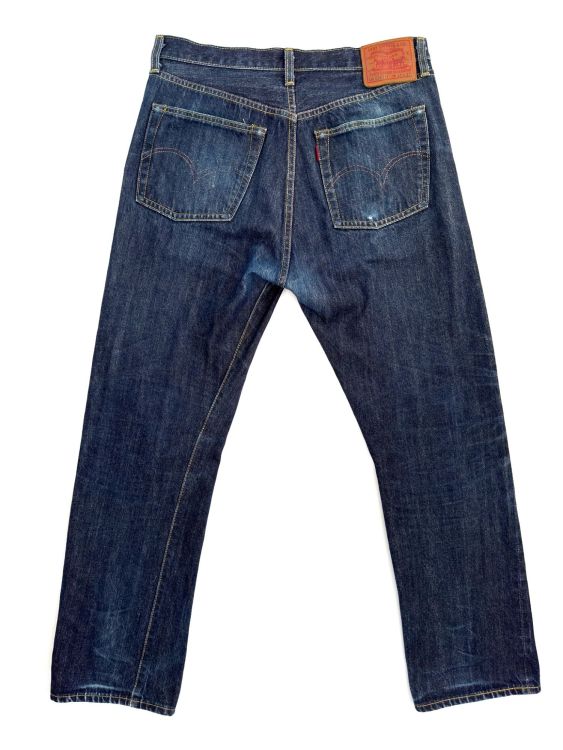
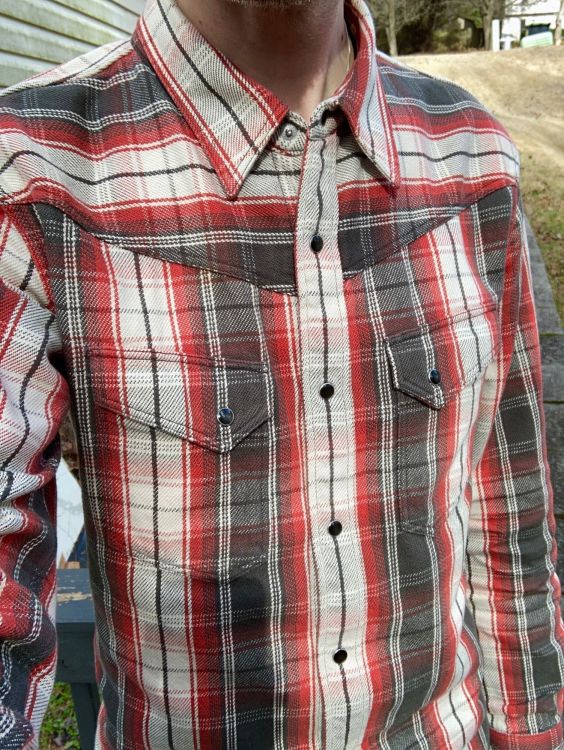
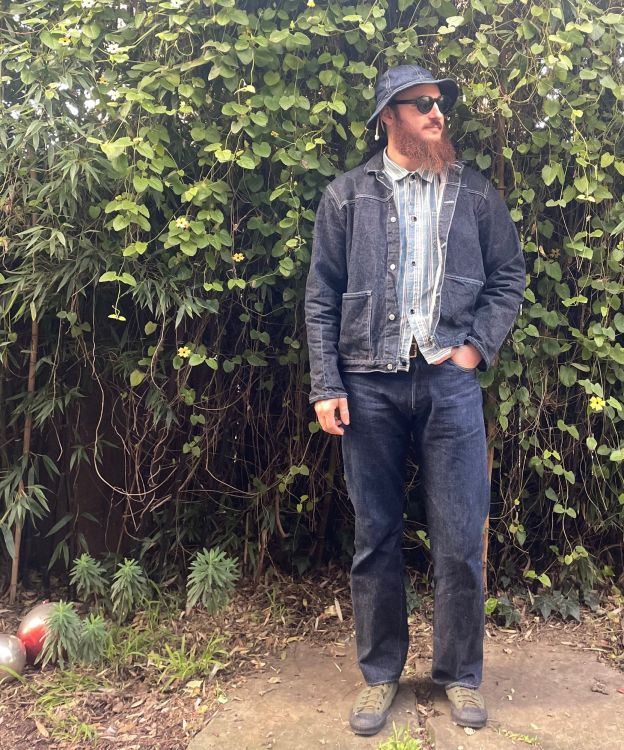
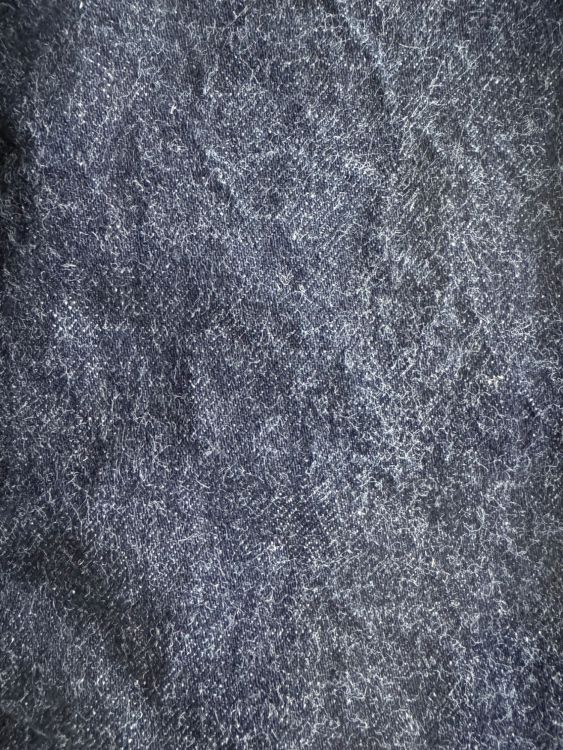
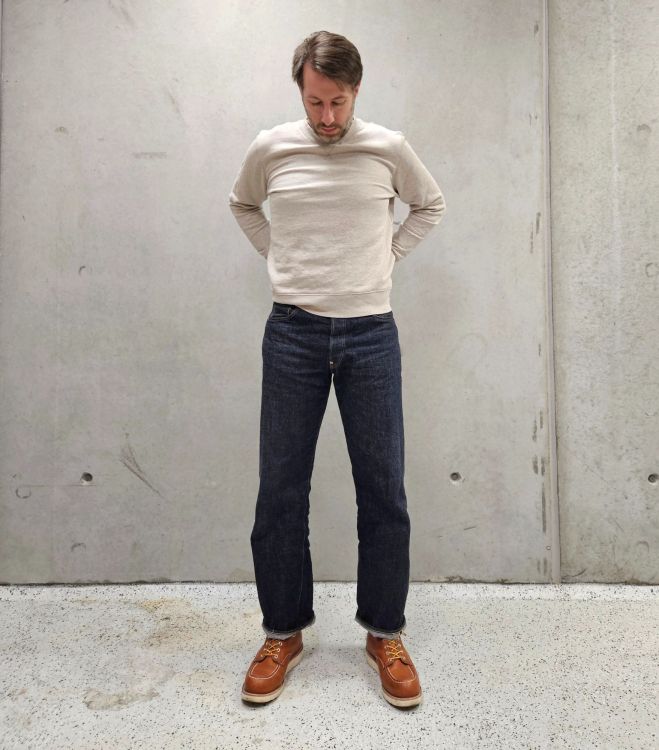
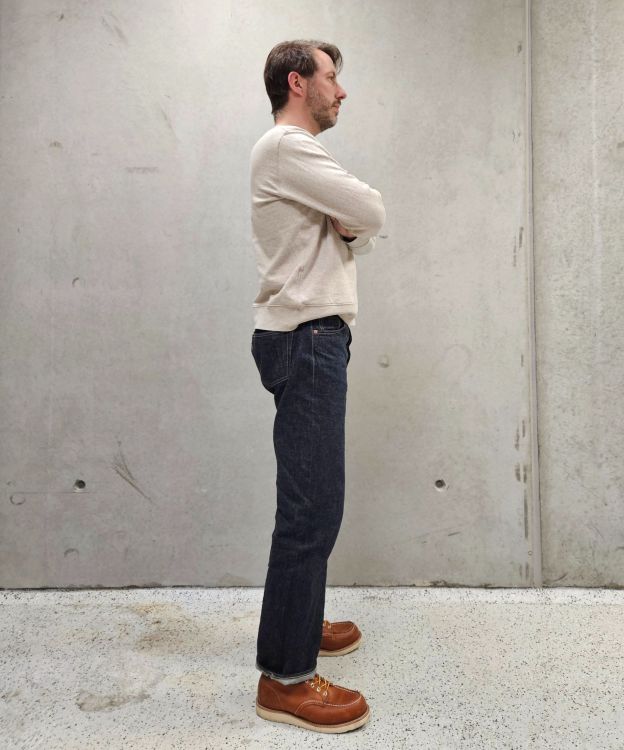
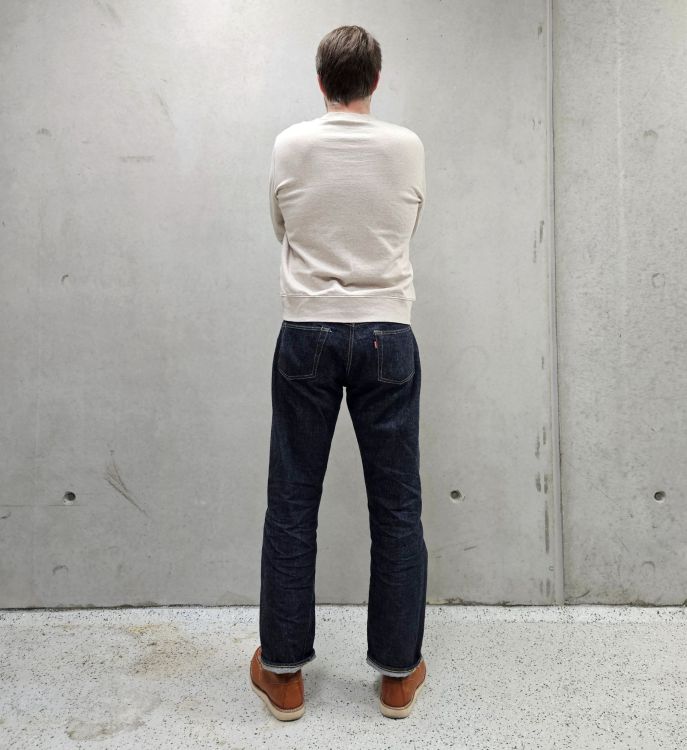
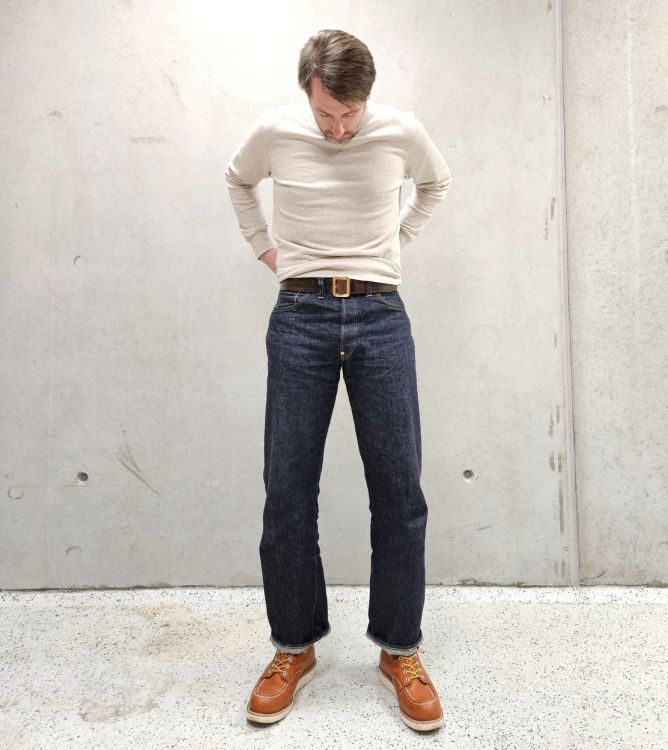
Love this jacket. I can wear it with any pair of jeans in my closet, and it looks... correct. Knowing how fast this denim fades, I'm sure I'll see some fun wear and tear soon.11 points
-
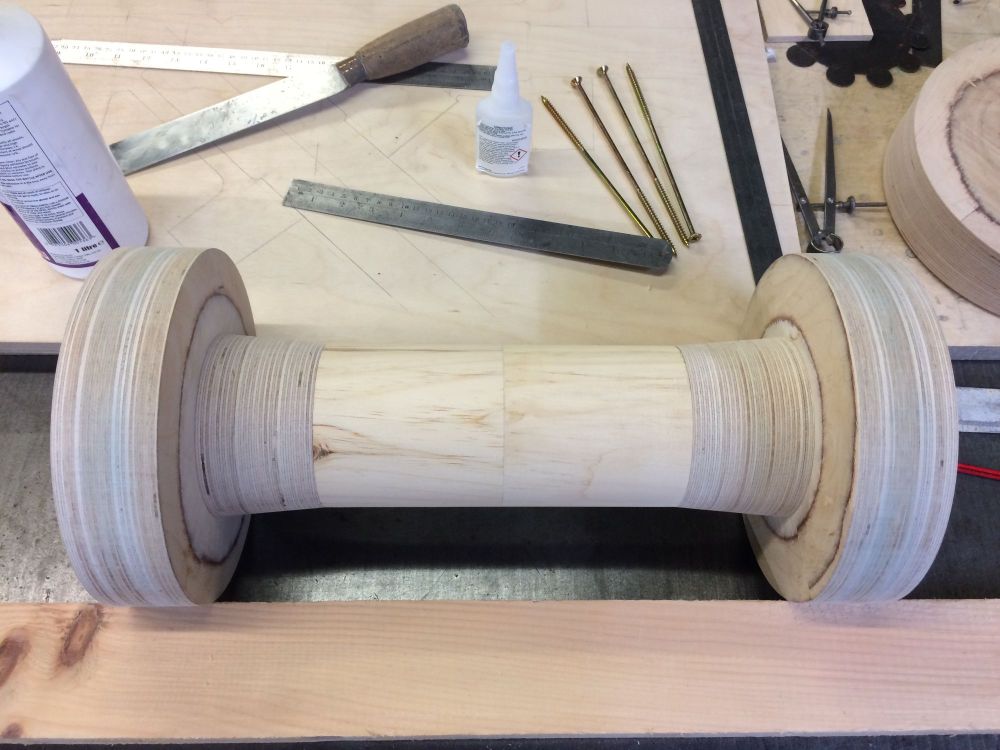
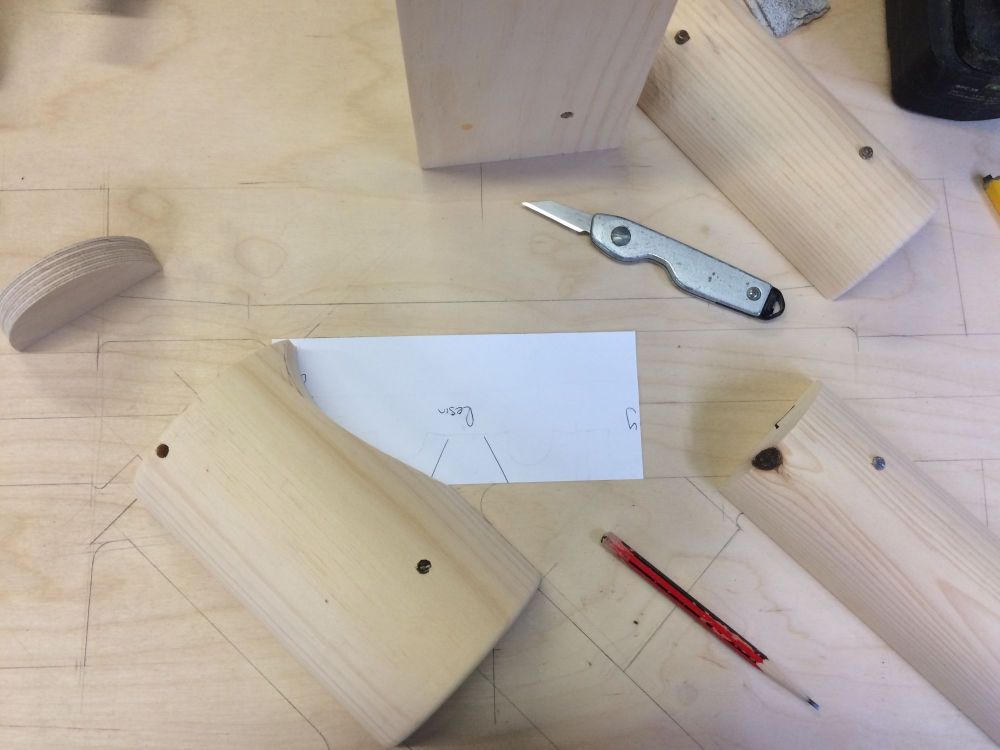
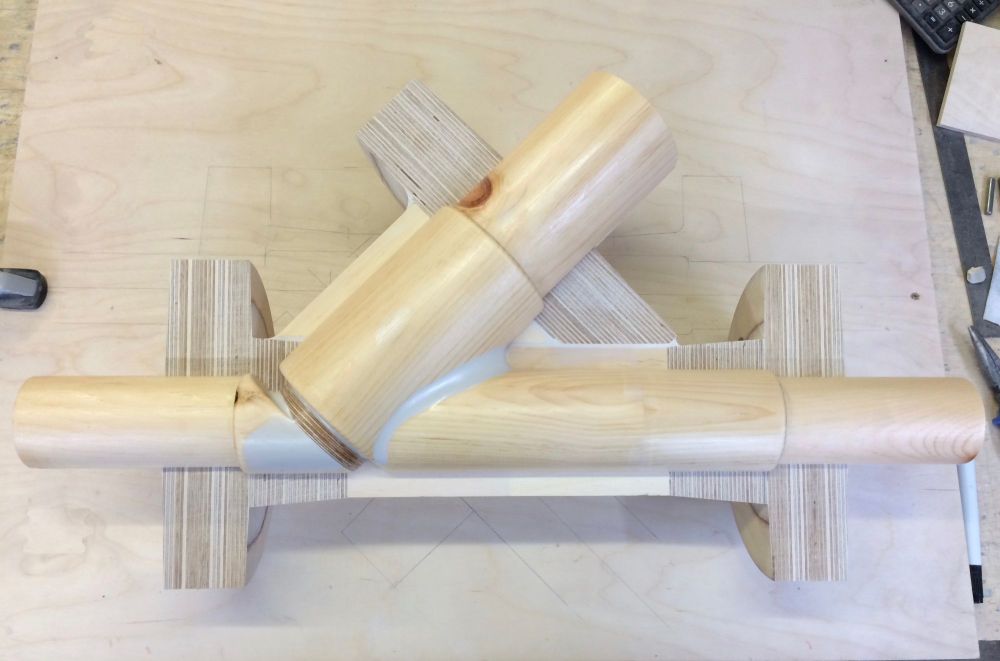
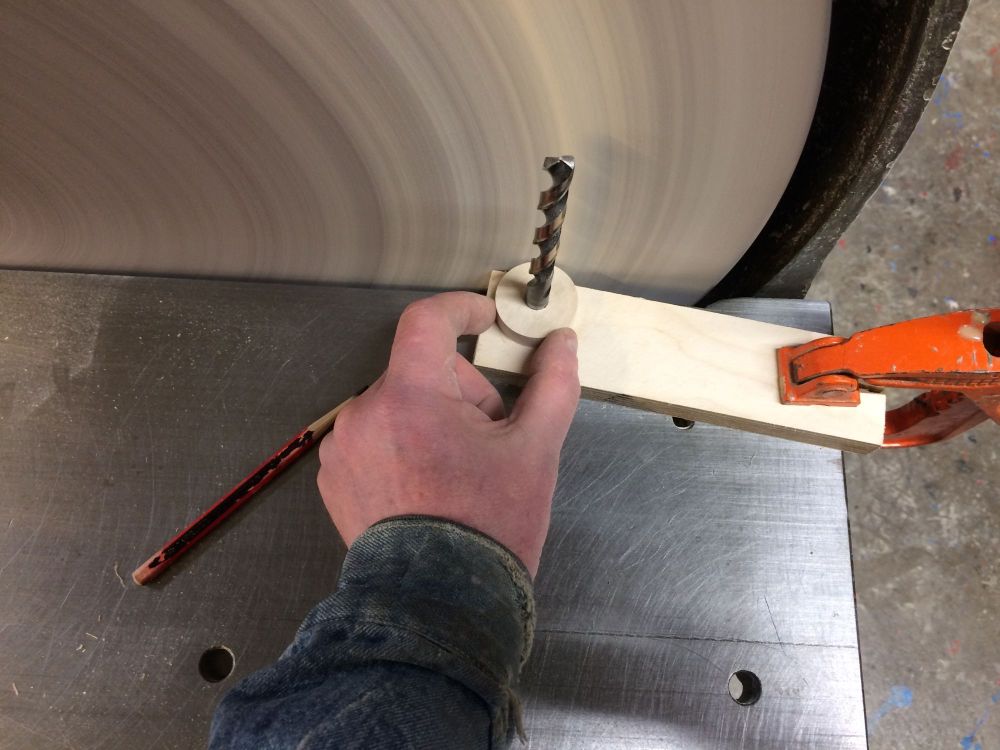
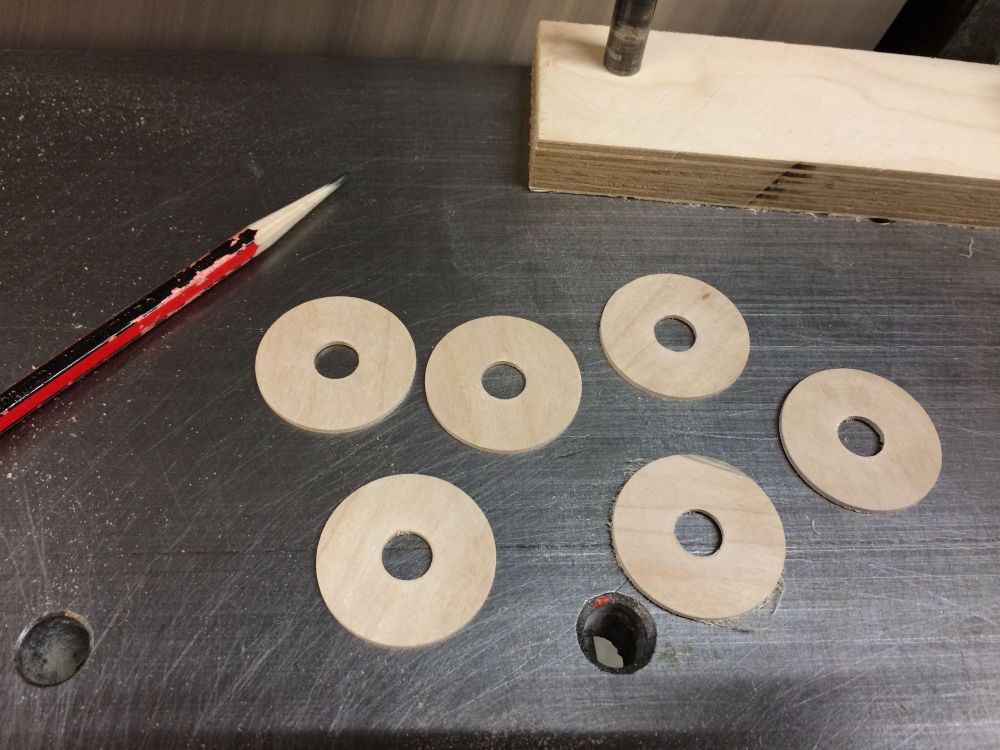
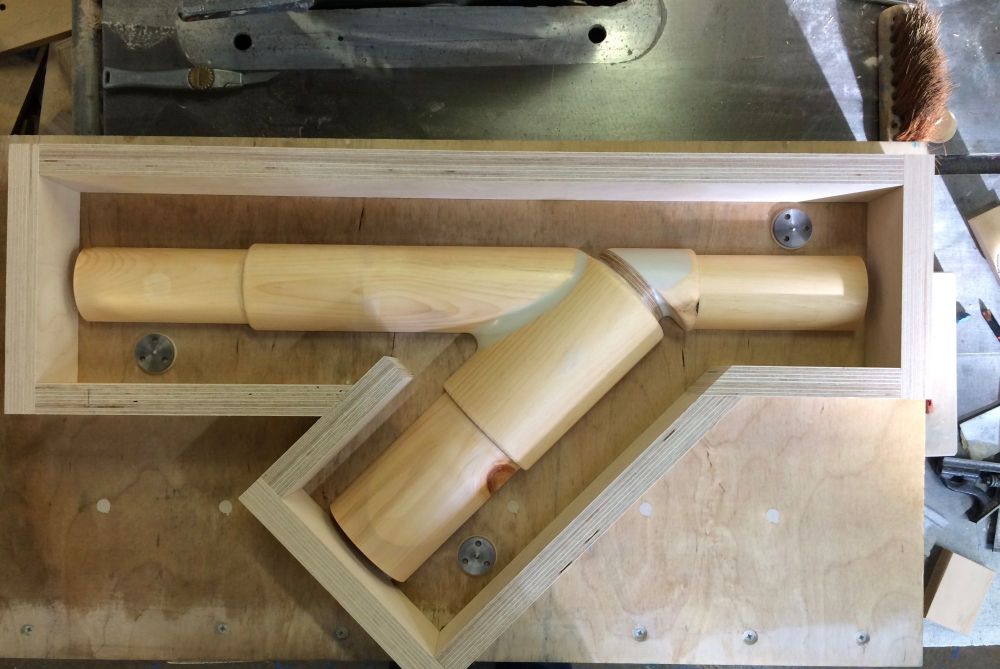
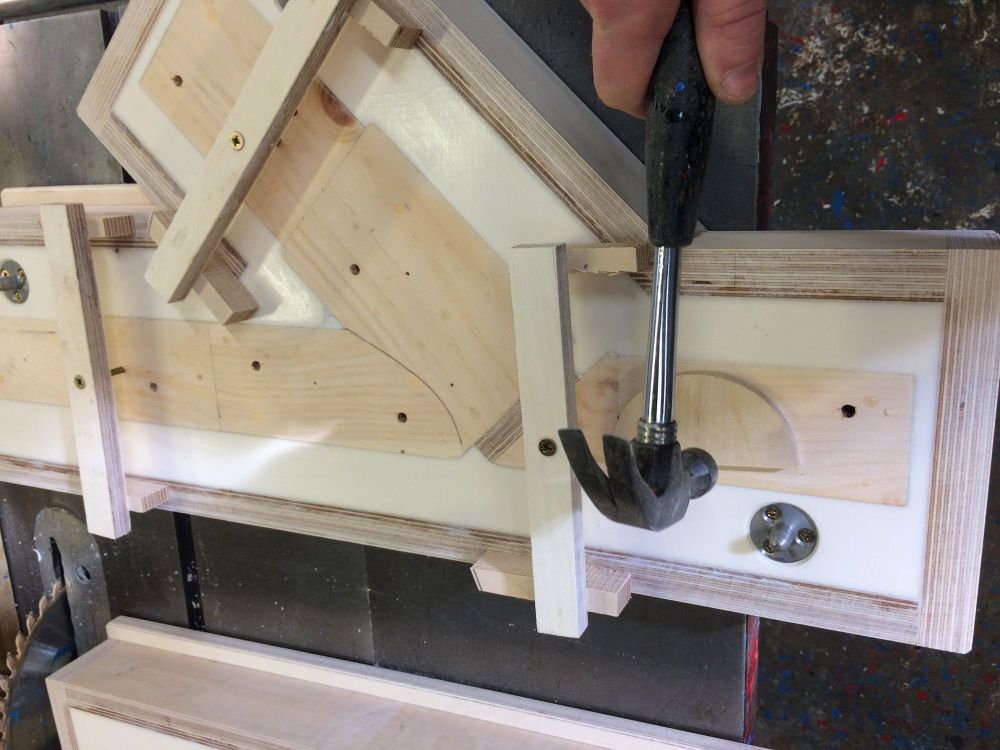
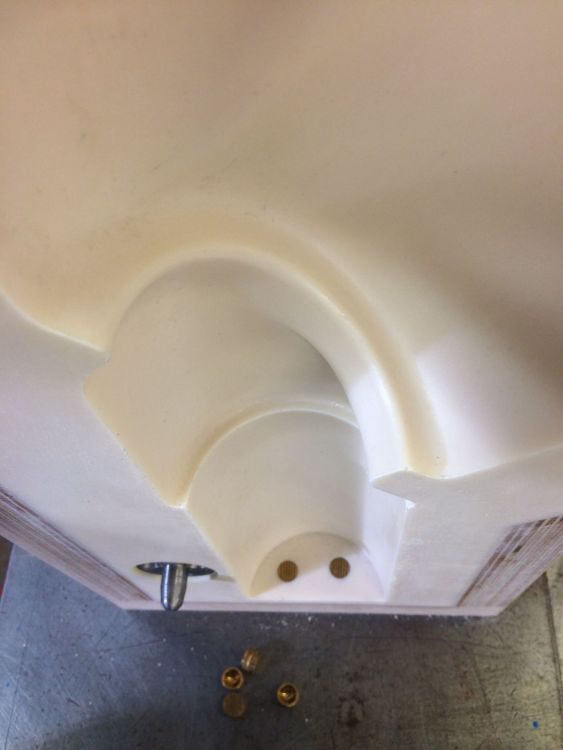
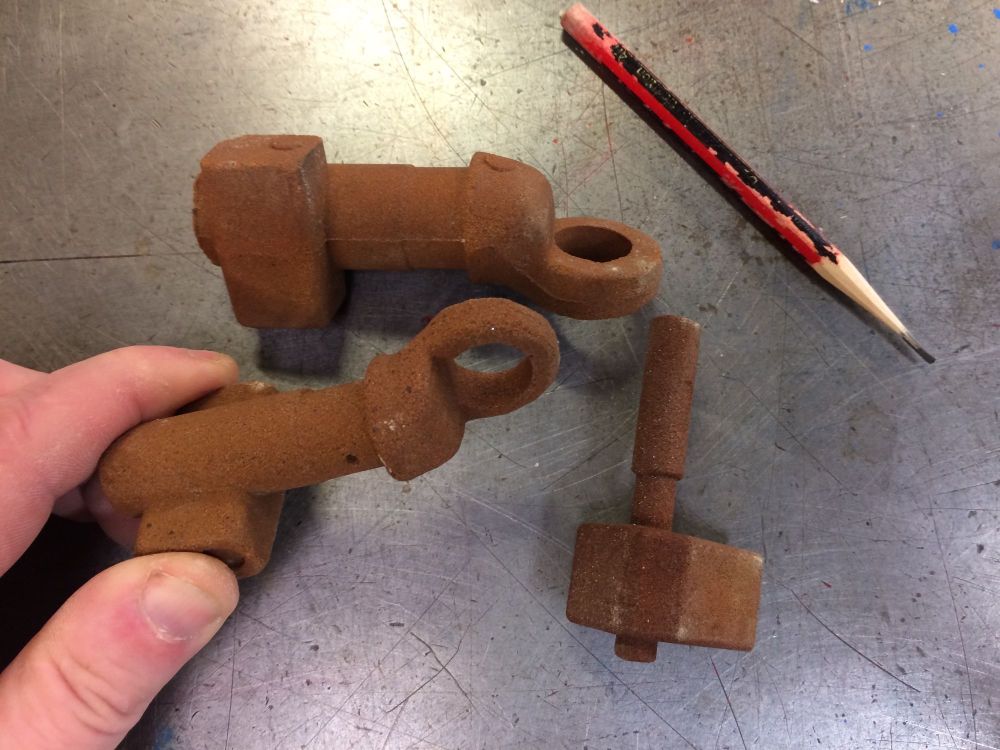
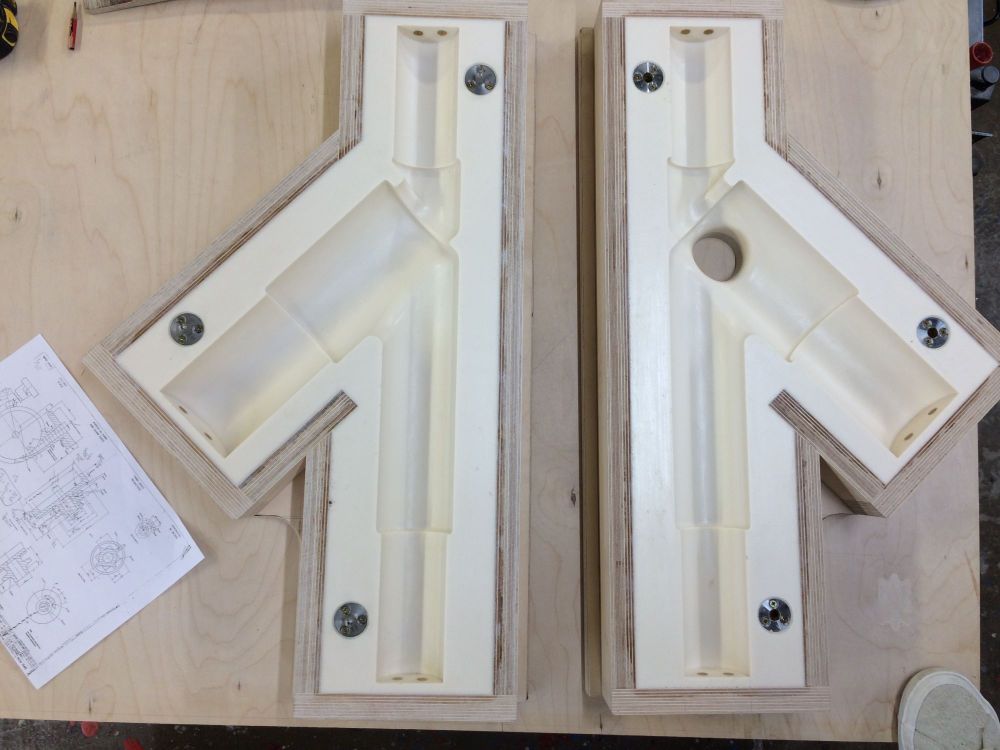
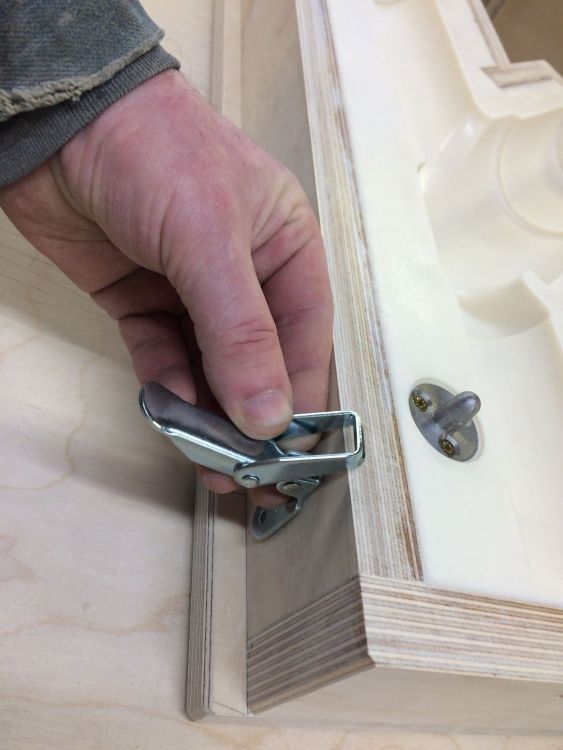
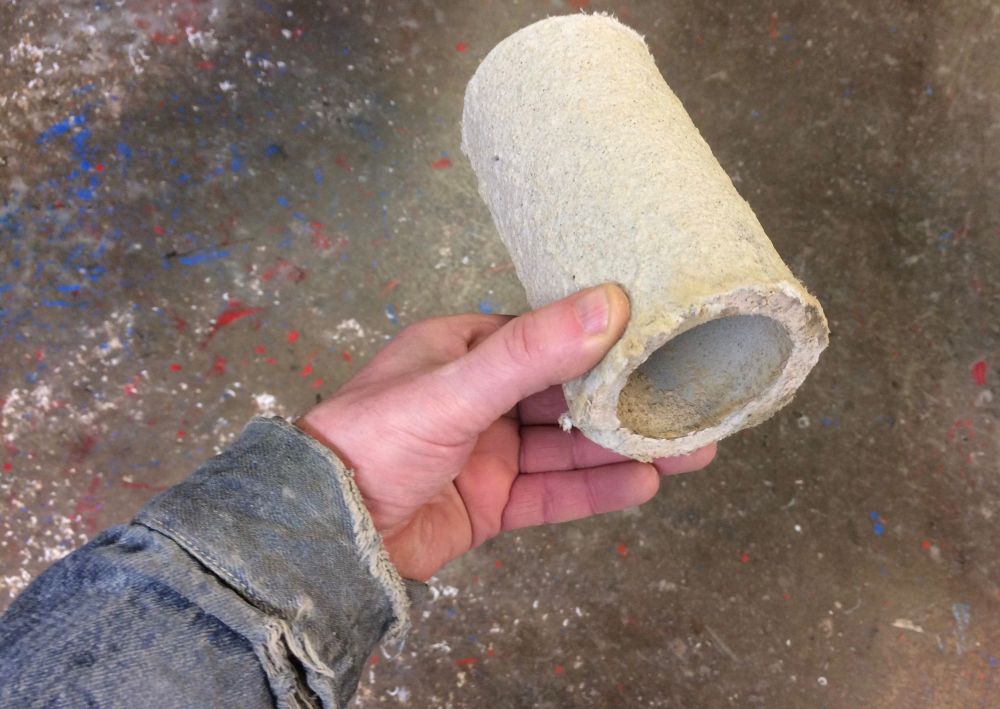
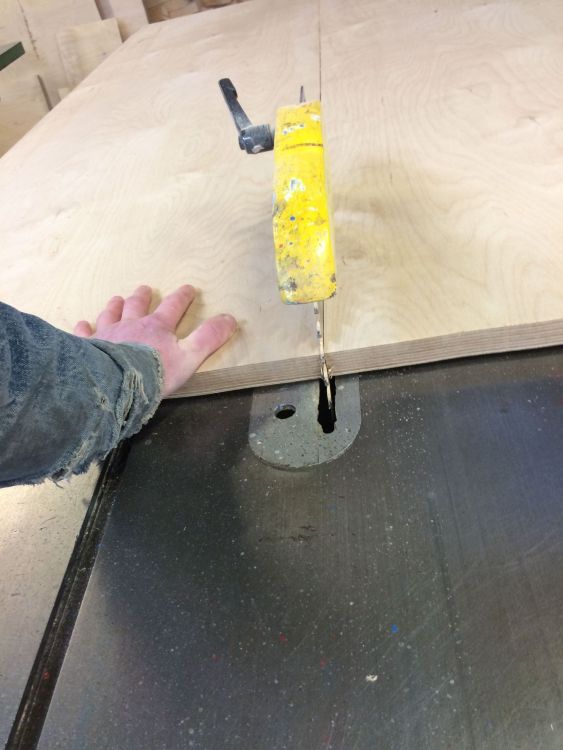
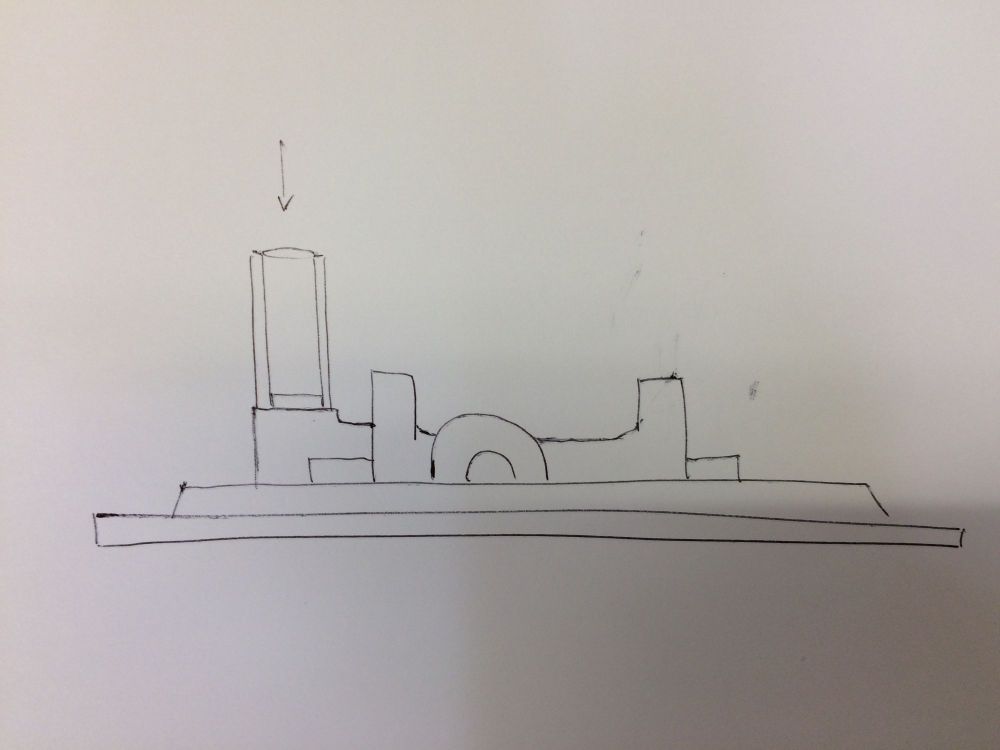
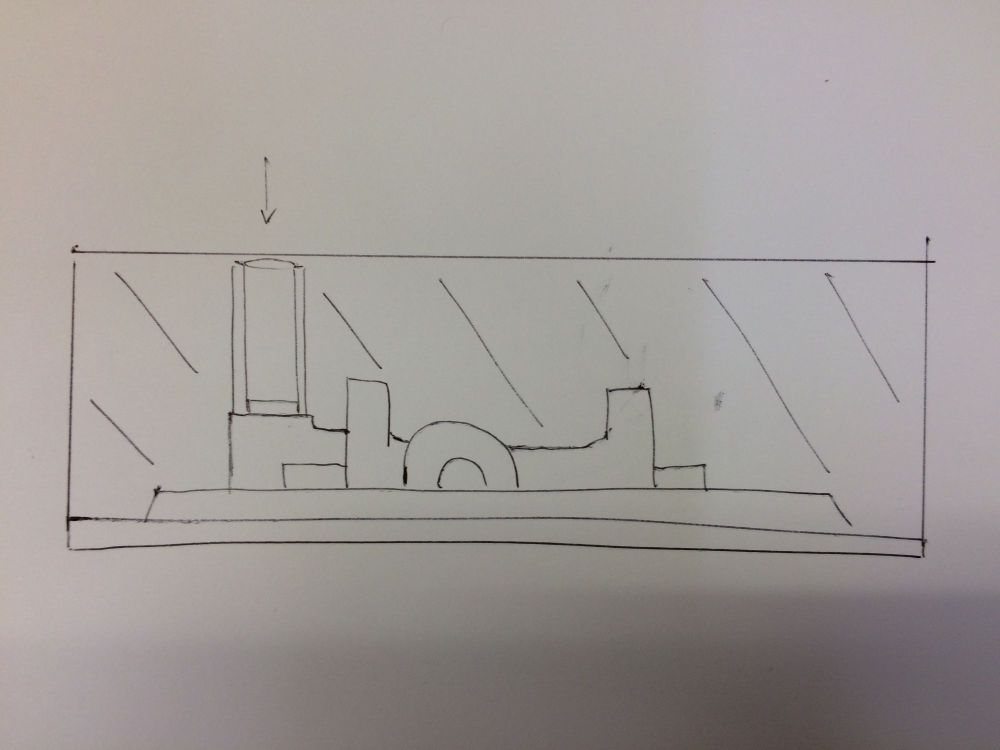
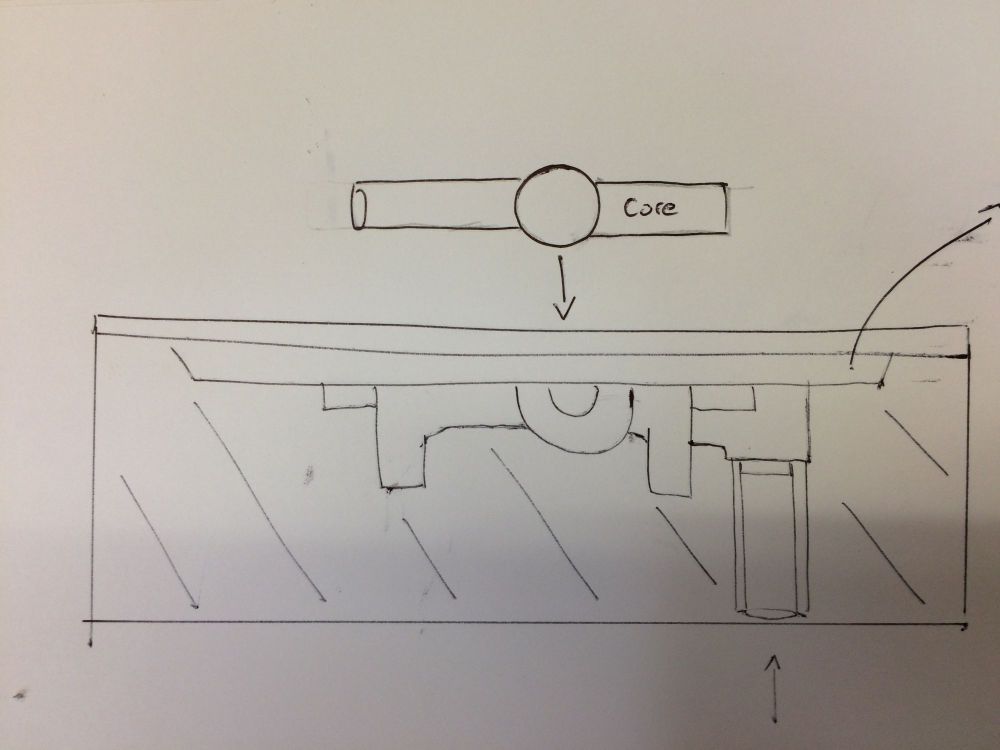
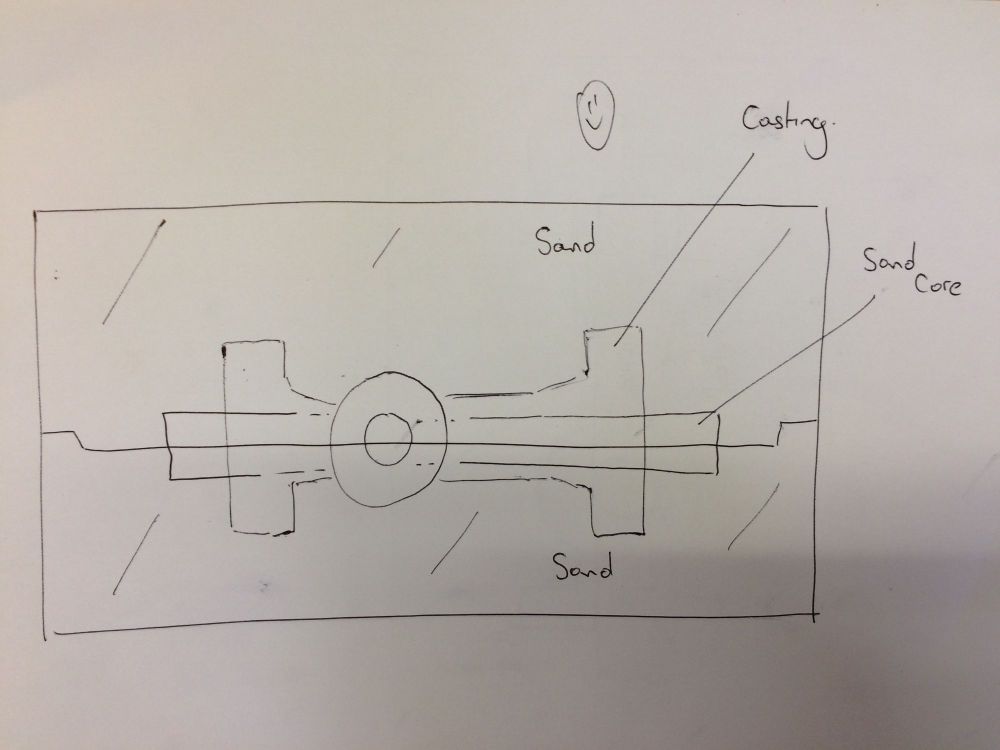
I've been doing a bit of old school pattern making this week.. I started making a pattern for a valve angle body.. it's going to be cast in WCB grade carbon but because molten metal is weird shit.. i'm making the outside of the pattern in 1/38 contraction (for every 38mm i will add 1mm) to allow for the shrinkage so when the casting cools it will be dimensionally correct at standard.. but the inside of the casting will be made at 1/48 contraction because internal dimensions behave differently to external dimensions even though it's the same material the flanges being thicker tend to contract at 1/38 on the outer face but will contract at 1/60 between the flanges.. it's fkin nuts how liquid metal behaves but i haven't got time to explain metallurgy 101 today.. Started making the core / internal shape.. the wall thickness of the casting needs to be 15mm so all these allowances i'm making need to be made wrong at this stage but absolutely correct when cast.. It's made in halves and doweled together using perfectly round silver steel pegs Dusty Warehouse 506 repro in action ..finish building the former / positive which creates the (negative) internal shape for the liquid to flow through the pump Both halves fit together.. the pink is car body filler, it's easier to create radius's and developments.. ie- the plywood disc is a diameter and the pine is a diameter.. but once the pine has been cut at 45 degrees, it ceases to be a diameter on the angled face, so one needs blending from one shape into the other.. i'm just trying to feel how the liquid would flow through the pump without restricting flow rate.. of creating turbulence at high pressure.. ..half of the core on the joint of half of pattern to double check the wall thicknesses.. this will make more sense on the sketches at the bottom.. The core needs to be very slightly smaller than the print (the print doesn't actually exist, it's just there to support/position the core within the cavity which the pattern will create in the mould) i've allowed 0.25mm around the radius for clearance.. too little and you're in danger of the core not fitting in or not being able to close the mould .. too much and you're 15mm wall thickness will be out of tolerance ..made a few plywood discs, just by drilling a hole through 6x pieces of 1.5mm ply, then using the drill to spin them on the sander.. Set half of the core box former up on a perfectly flat board.. used the discs^ to mount the dowels, build a frame around and cast up in liquid PU resin.. ..once cured, build the other half onto the joint uising the silversteel location pegs.. cast that half too.. once cured, split the mould, and make some levers to gently extract the former.. creating vibration by tapping on the joint with a small hammer will help.. the sand core will just fall out, because it's heavier.. ..lift out the former to leave a perfect resin mould to create the sand core.. ..these are examples of smaller sand cores.. in the foundry, sand is mixed with amine and then blasted into a core box under pressure on a core blowing machine, you can see the line left by the joint line of the corebox brass vents are inserted to allow the air out as the sand/amine mix comes in.. the metal dowel locates both halves of box together to blow the core ..two halves of corebox with a hole in the top to blow sand through ..clipped together with suitcase clips so the sand doesn't blow out of the joint. ..now i have to start mounting the pattern on a male and female joint, to allow the two halves to perfectly locate together in the foundry.. .. then i have to use my metallurgy skills again to create a runner system to allow the metal to flow into the mould.. and feed the casting.. ie- the thick flanges will stay hot longer than the 15mm wall thickness.. but if the 15mm wall cools too quickly, it will contract while the flanges are still liquid which creates small cracks at the point where the 15mm wall meets the flange and the very expensive casting will fail radiography. This is an exothermic sleeve which keeps the metal hot to feed the casting .. so theory is this.. half of the pattern is mounted on a male picture frame joint.. i build the female frame around this platform to ensure a perfect fit for the other half.. i've drawn on part of the runner system with the exothermic sleeve ..a moulding frame is put around the pattern and filled with sand / amine ..the pattern is removed and the sand core drops in.. located by the prints ..the bottom half of sand mould is then dropped on top to close the mould, encasing the core and leaving a cavity / space between the sand moulds and the internal sand core.. ..the whole thing is turned over and metal is cast into the runner system.. filling the cavity with what will become our casting.. when cooled, the sand is broken away, the runner system is cut off with a radiac cutter, the casting then goes to radiography to makes sure it's sound, the flanges are machined up to allow other parts of the pumping system to be cleanly bolted to it .. and off it goes, on it's merry way..


 9 points
 -
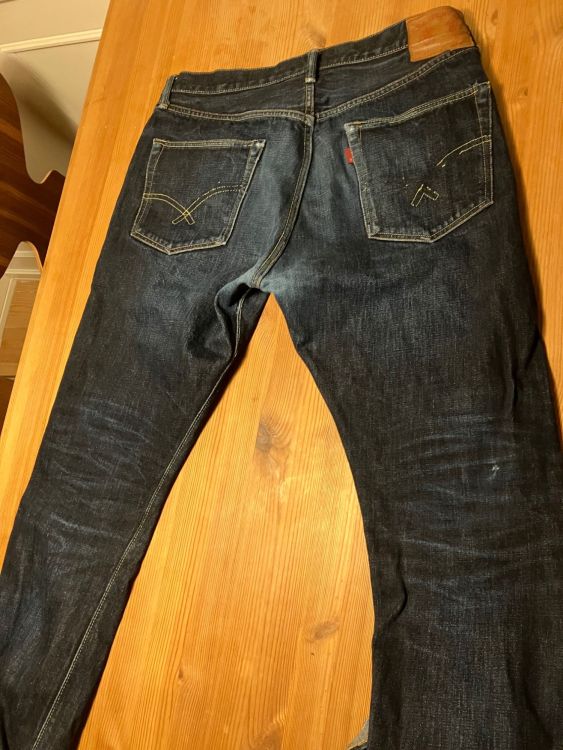
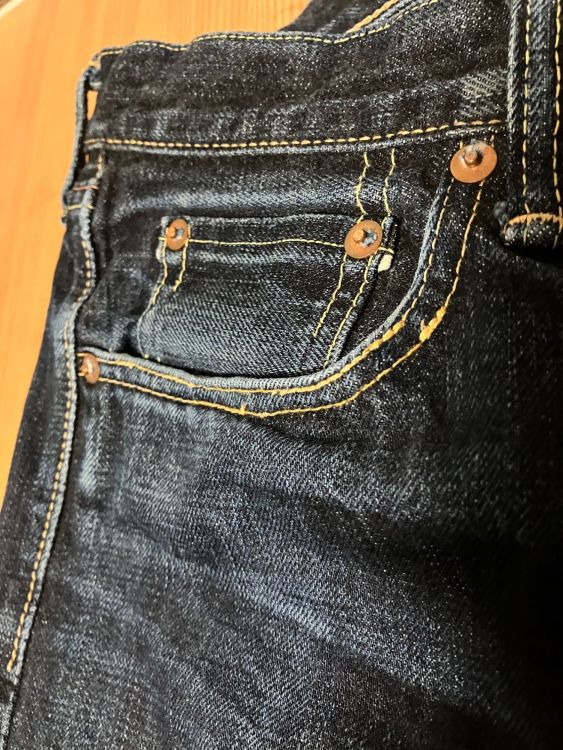
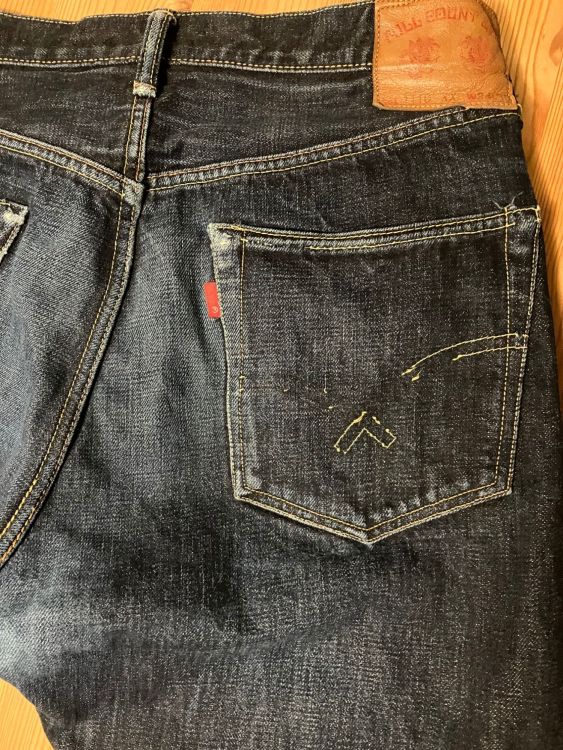
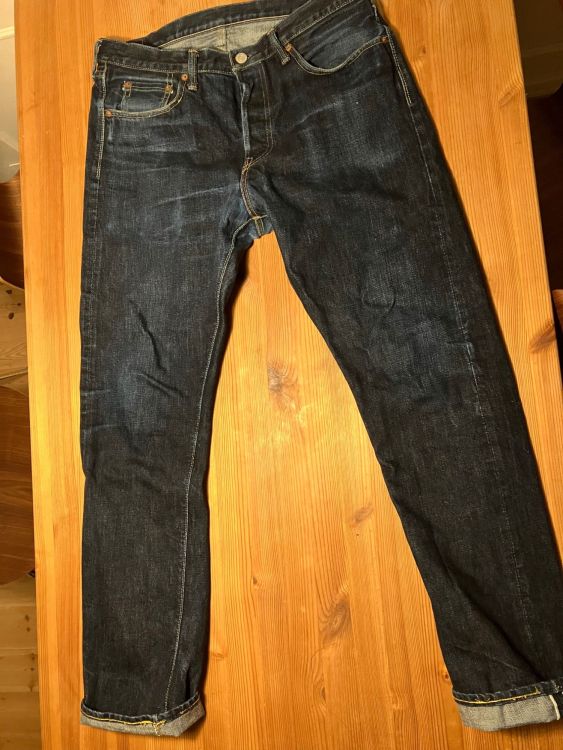
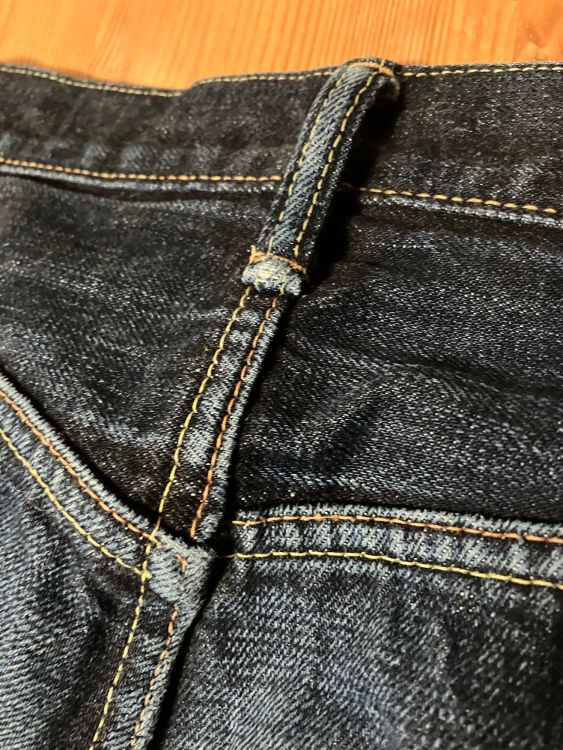
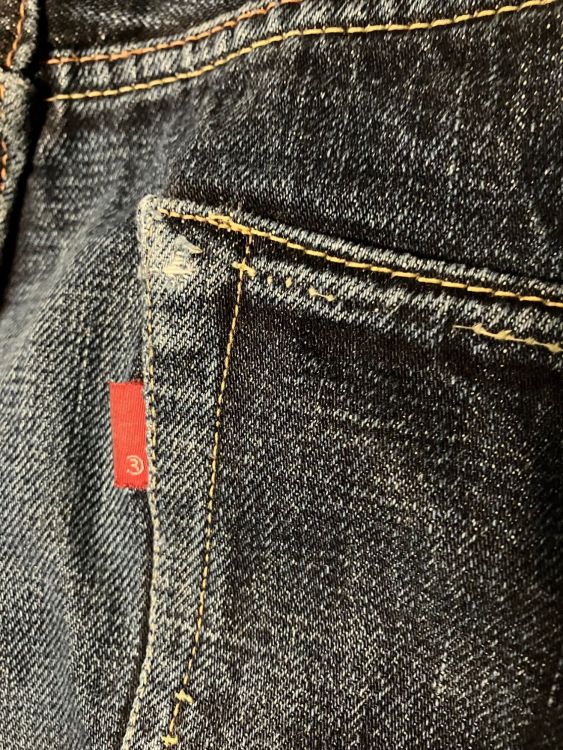
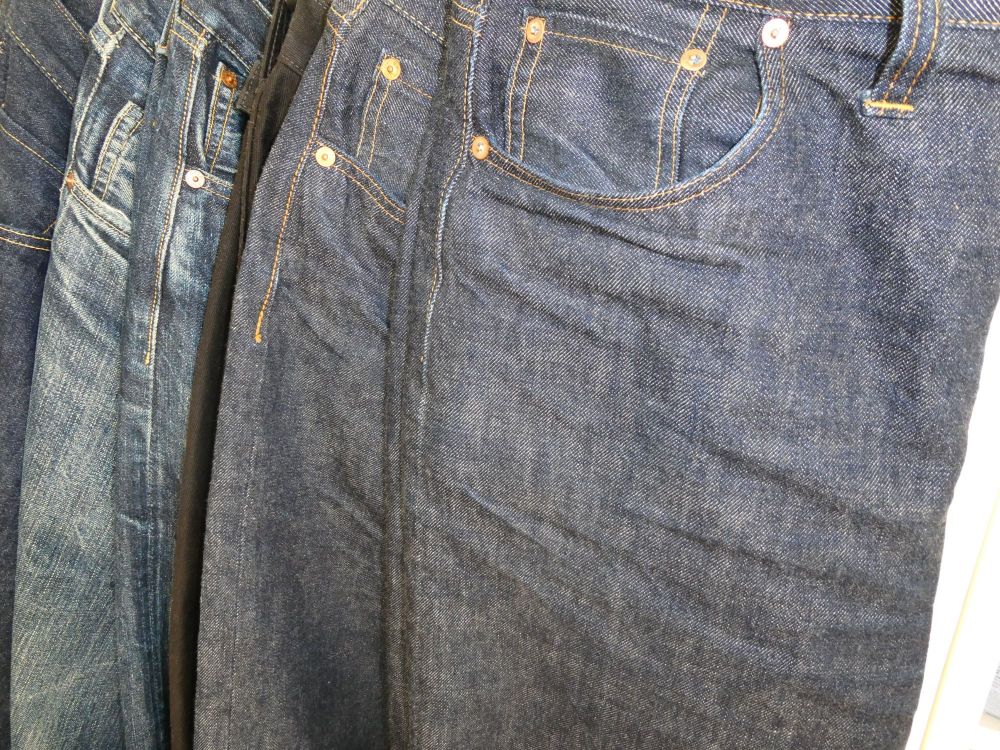
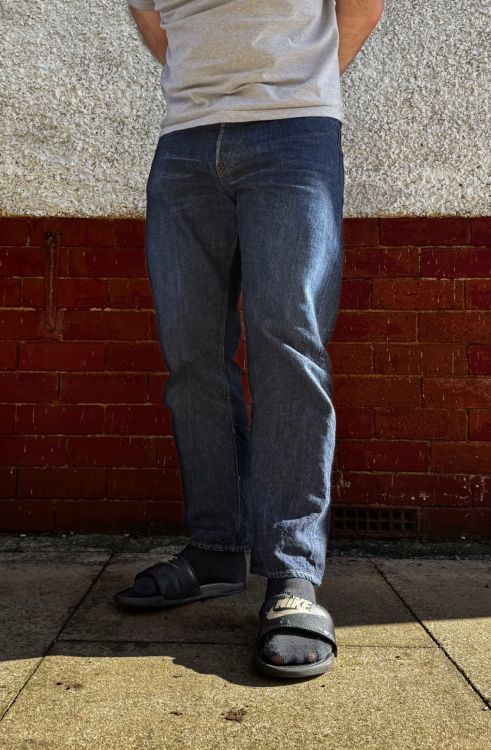
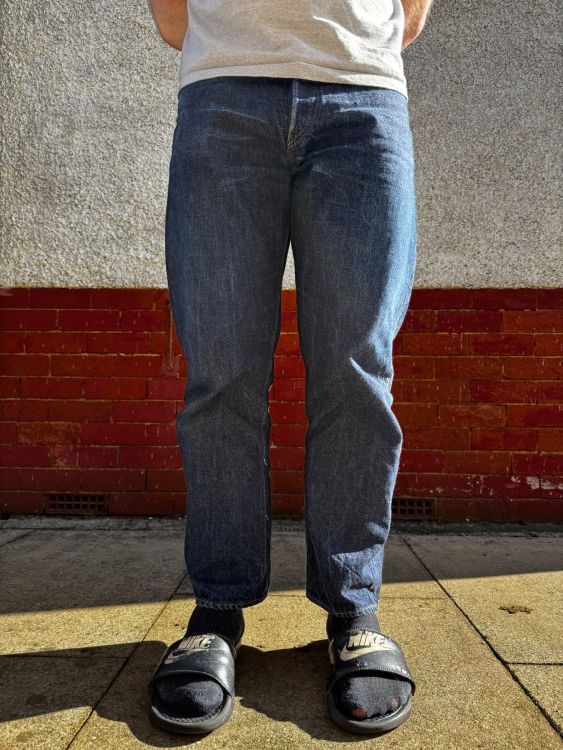
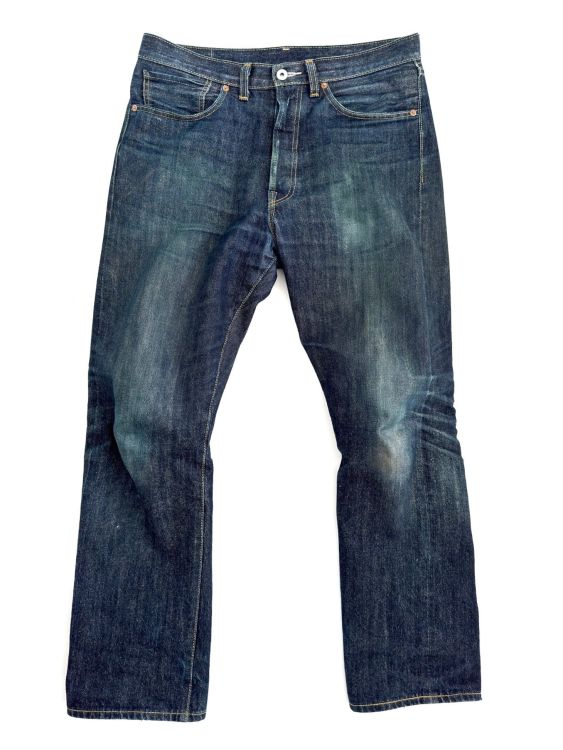
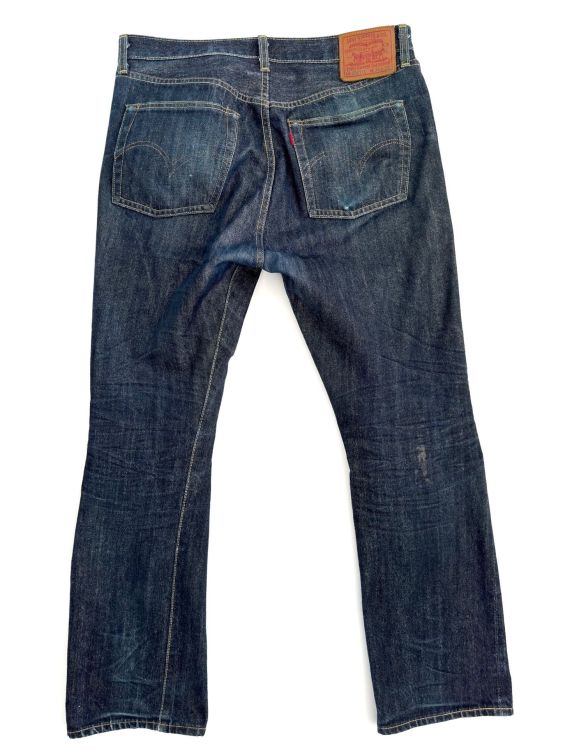
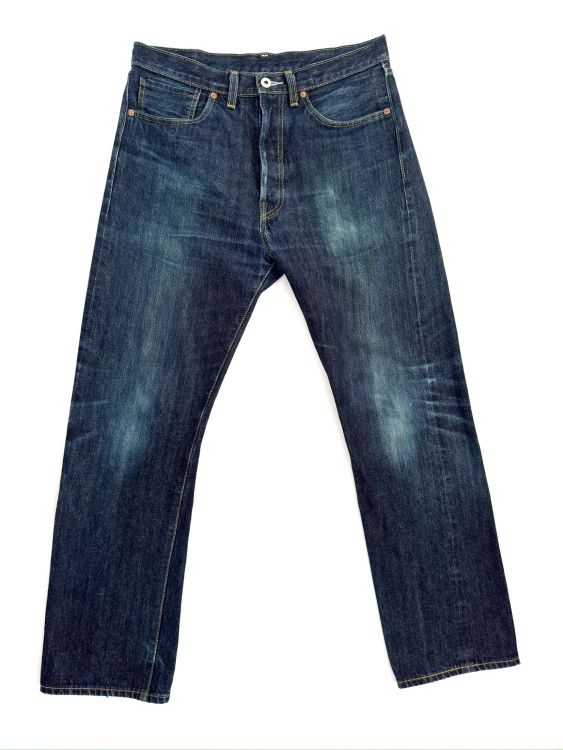
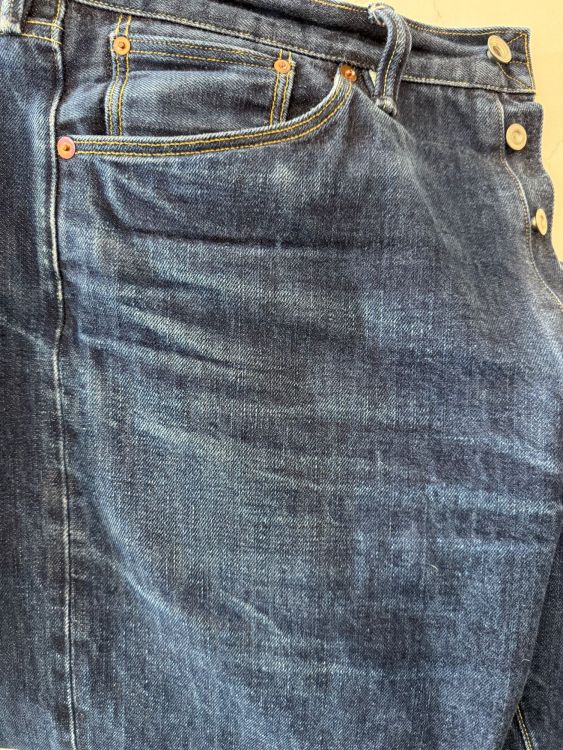
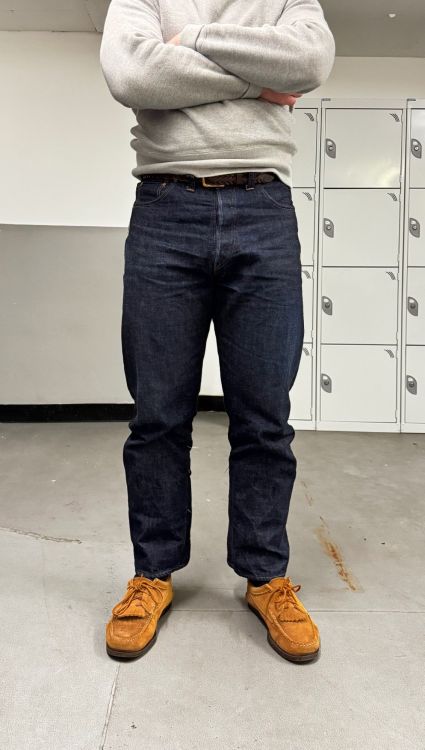
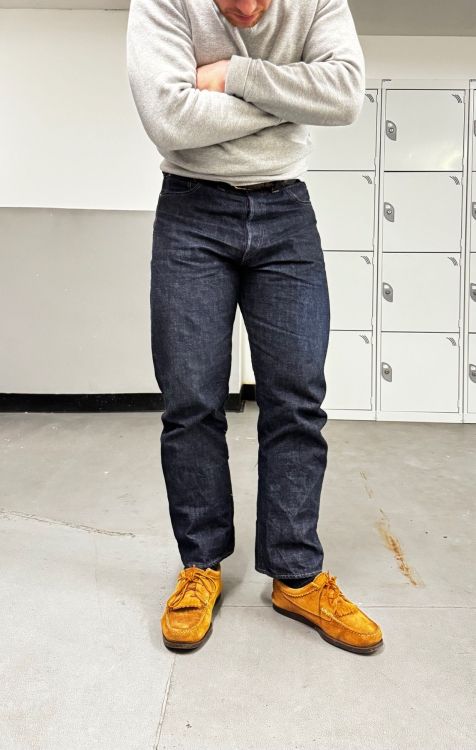
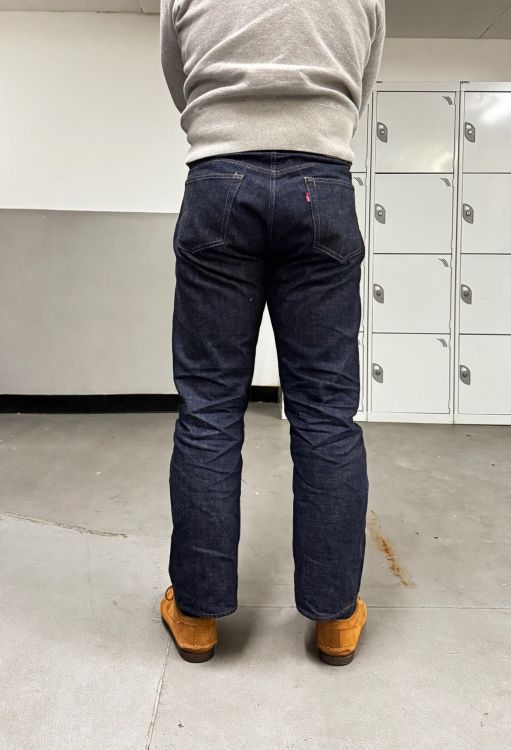
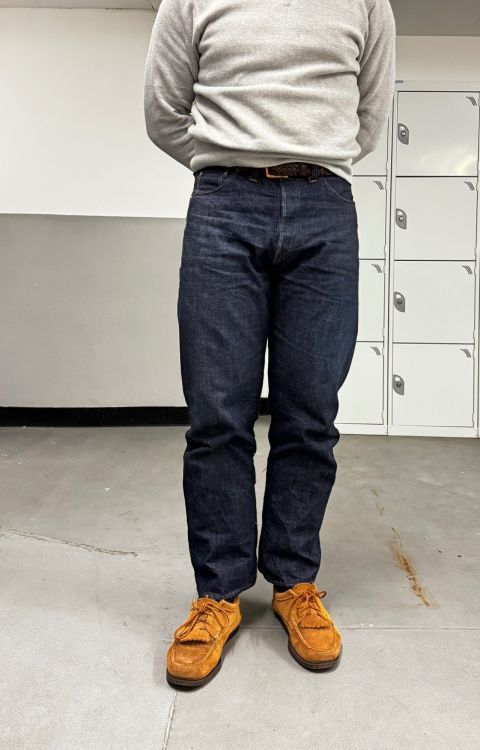
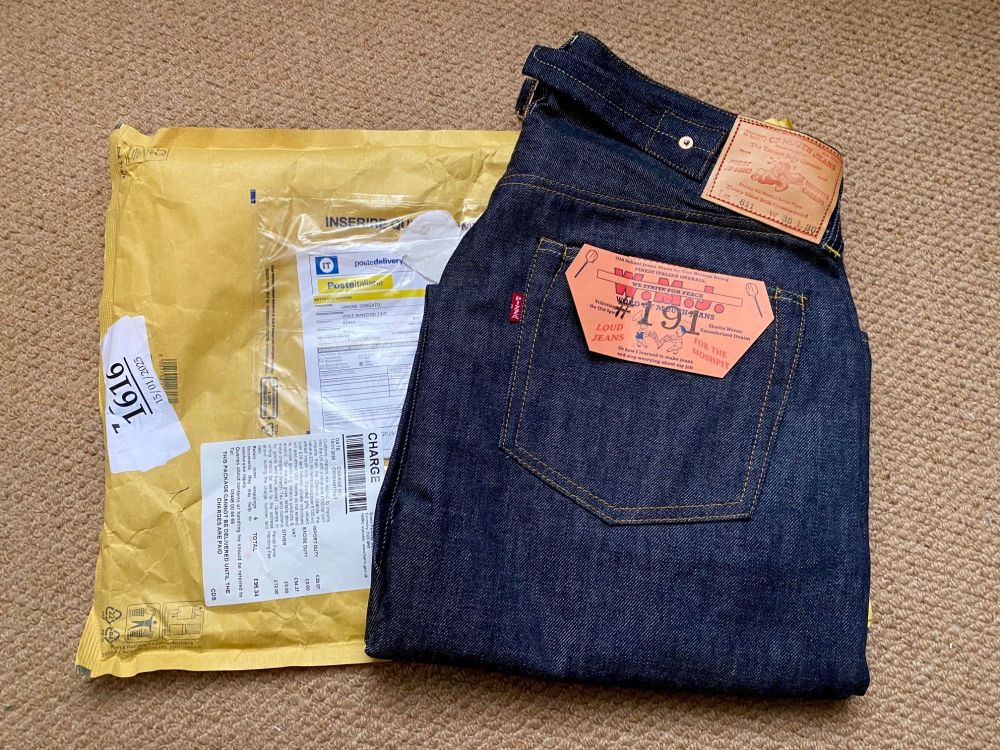
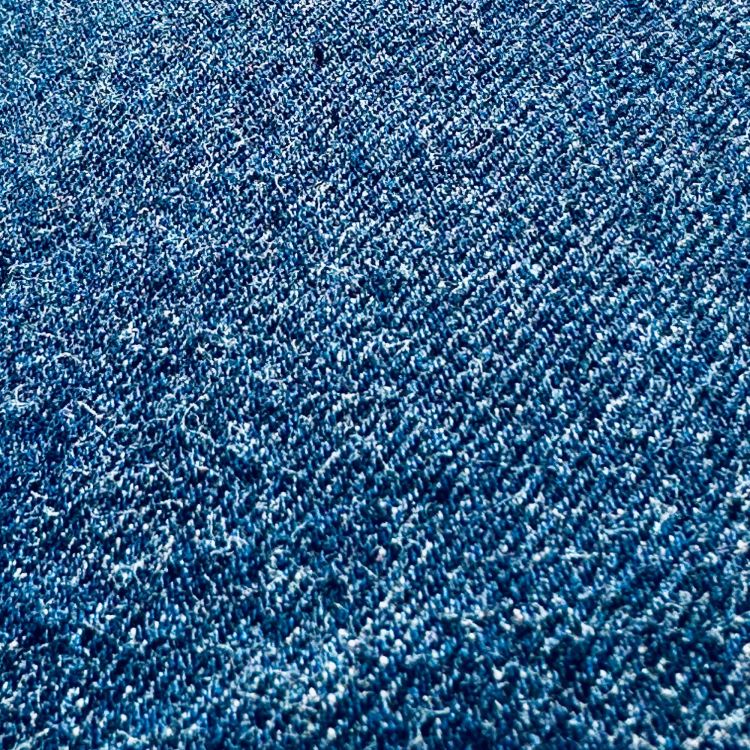
Wanted to post my pair of Full Count 1110XX These are slow faders (!) as mentioned before in the thread (by B_F and others, I think), I’ve worn them regularly for 3,5 years and washing them regularly after the initial 4 months without wash – the sales clerk advised me to The fit is quite slim and it tappers which matches my preference when I purchased these back in 2021. The top block is the best I’ve tried. It was snug to begin with but now it sits nicely and the rise is high but not too high for my liking. The denim is nice, it is quite regular and has a good feel while wearing. The colour is quite dark but the faded blues are really nice, especially when the sun is out (which is rare this winter…..) The 15 oz work well here in Denmark for most of the year. This is my first experience with 100% cotton threads (I think) and it holds up quite well except for the seat part which blew out way to quick, I’m biking in these but it lasted maybe 5 months – the repair was done with polythread so it holds up fine. That and the pocket bags are the only repairs need so far. i like stitching on the back pocket and on the arches coming apart and revealing a little non-fades line where the stitch used to be also some nice fading on the belt loops (the blue colour of the pants is not as prominent in the photos them in reality, i think)
 7 points
 -
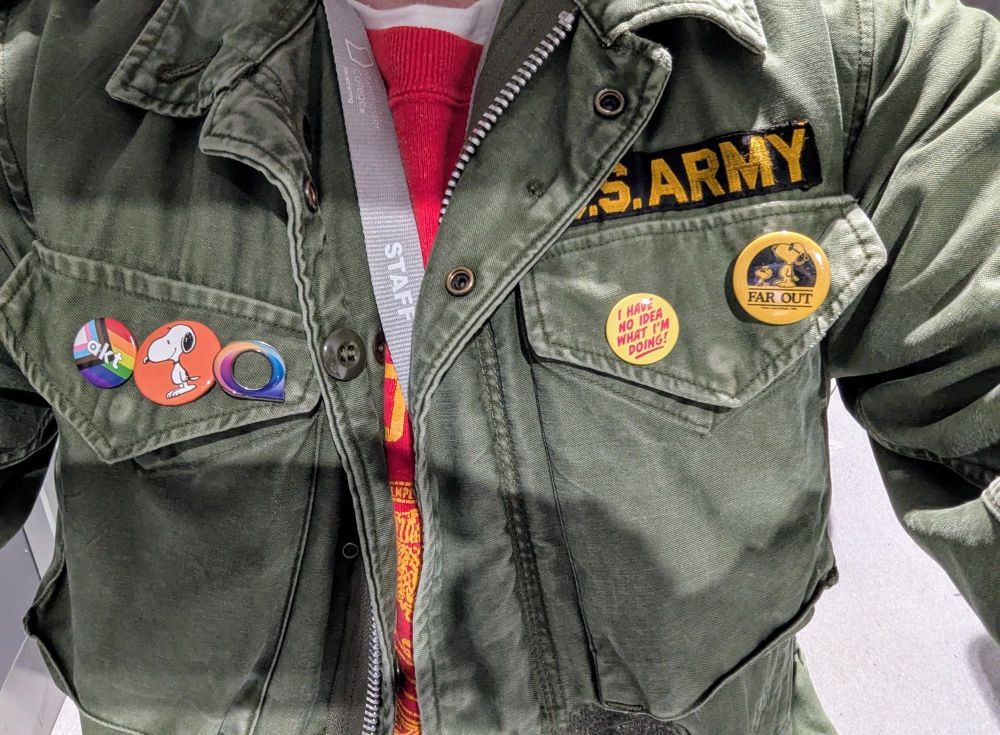
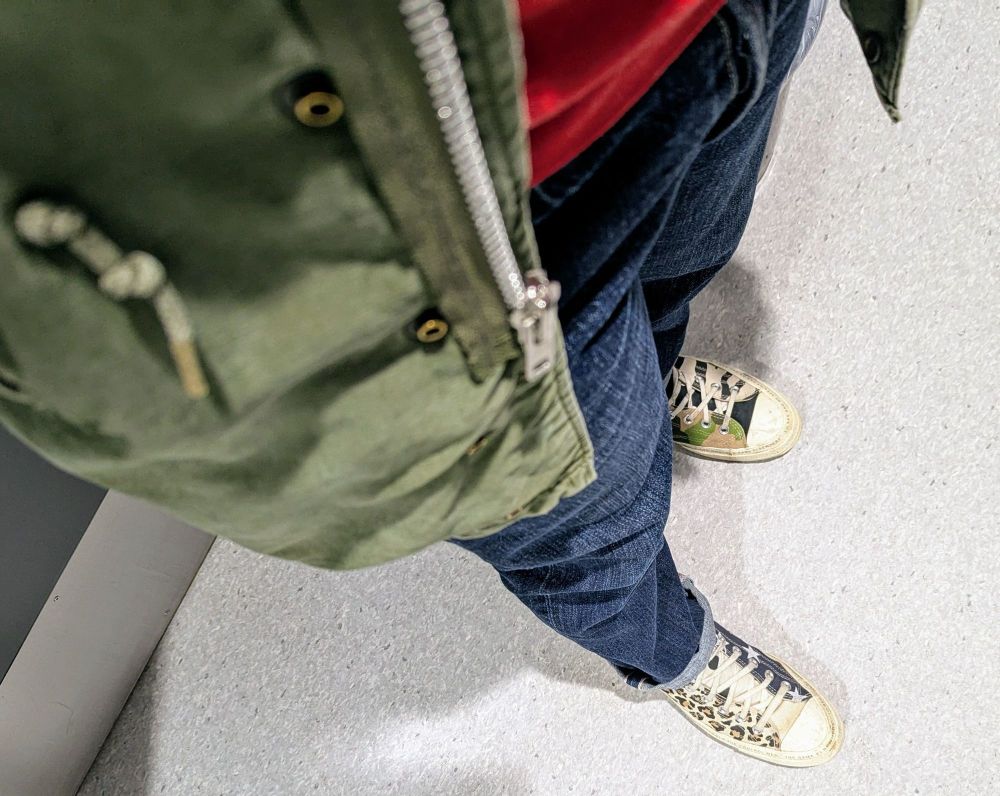
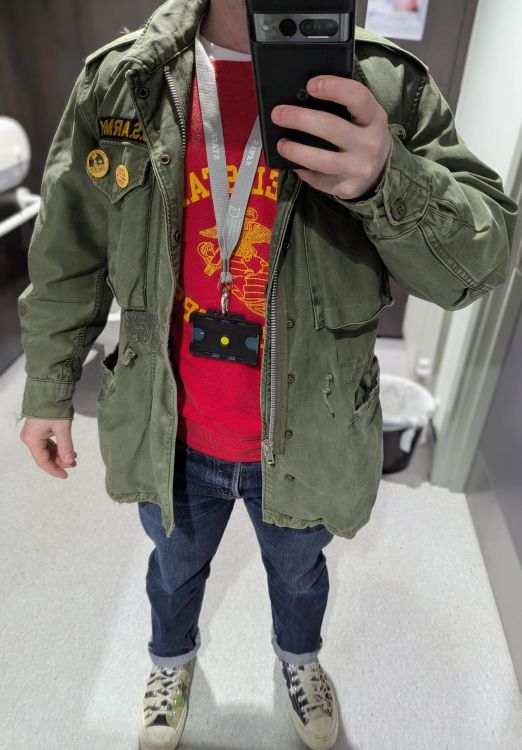
Same old vintage Oshkosh jacket Championship RW Vintage M-1951 Vans
 7 points
 -
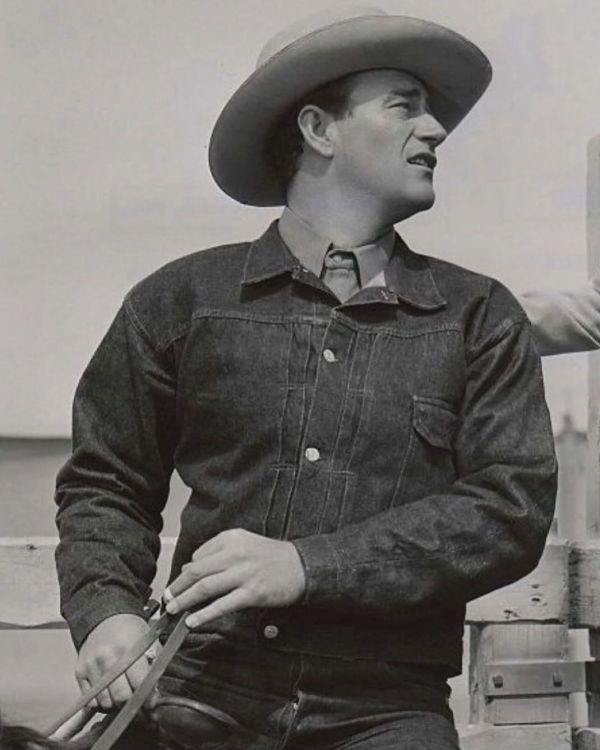
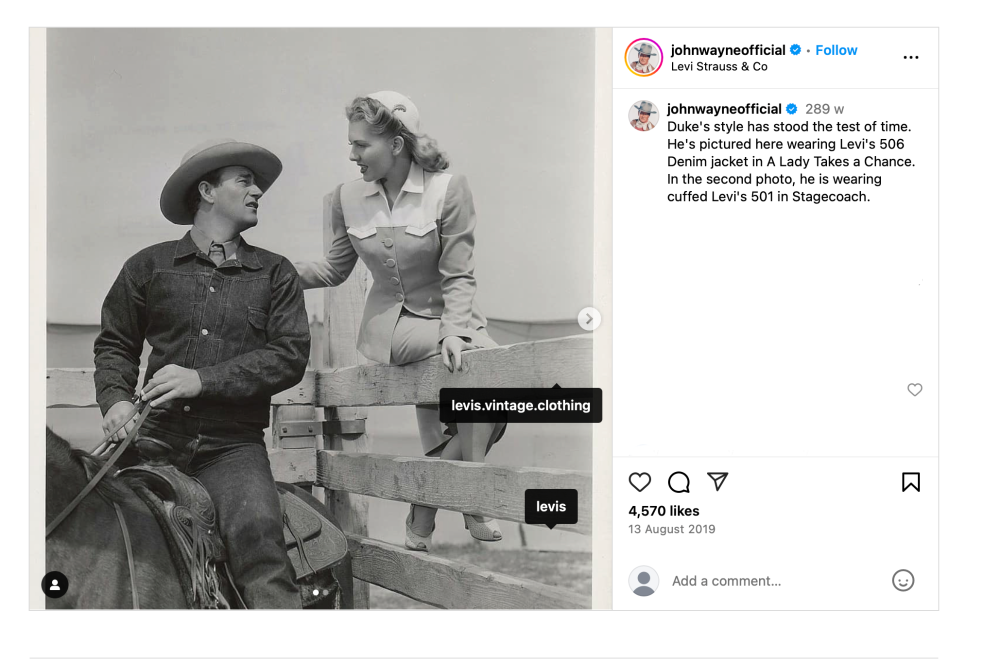
Should've put this in the 'Denim in film' thread but l don't know which film it's from unfortunately. I've seen plenty (if not all) of JW's black and white westerns from the 1930s and 40s but have never seen him in this shot and more importantly for me, never seen him wear a 506xx. The image was borrowed from Vintagebrotherhood on lg, simply titled 'mid 1930s'. The details in the pic plus the date adds weight to this jacket being the small button version (1927-35).
 7 points
 -
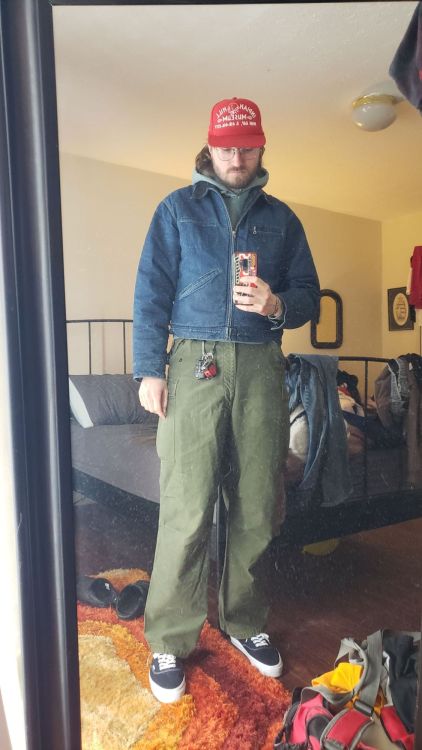
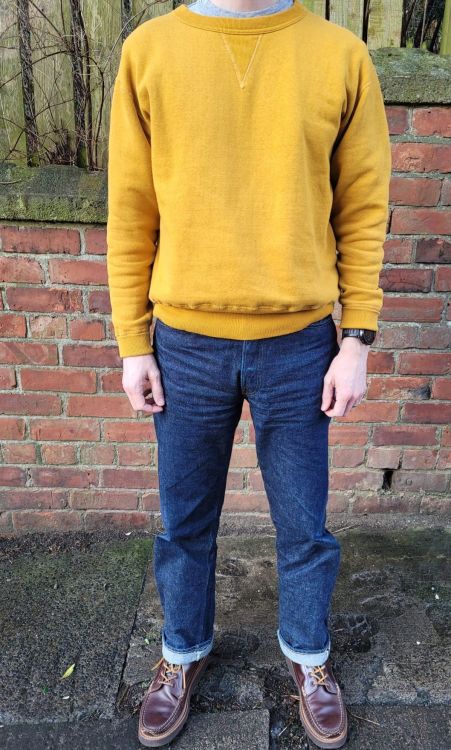
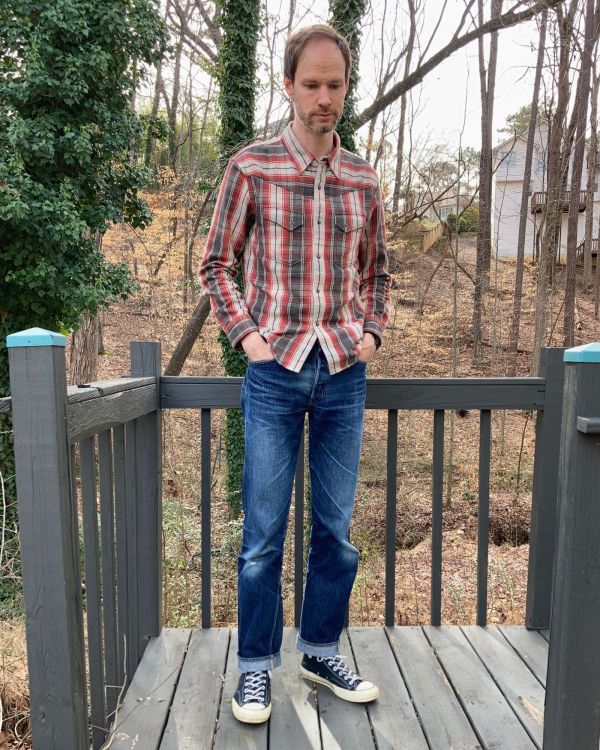
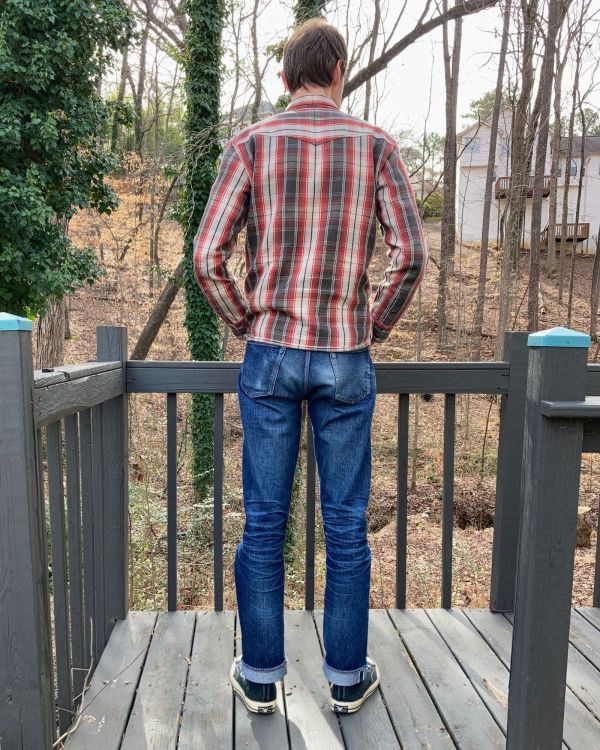
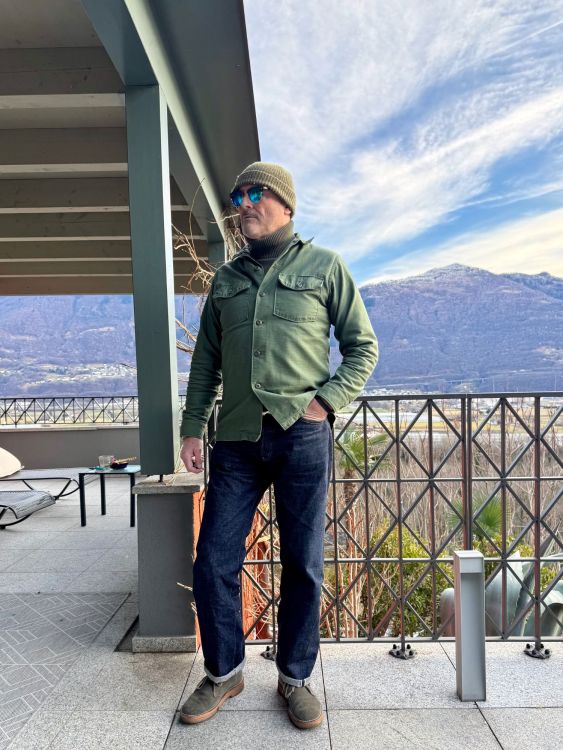
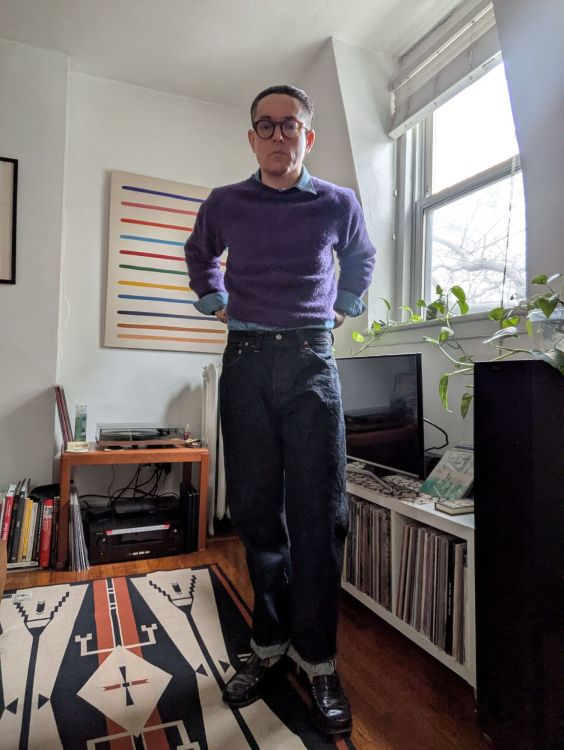
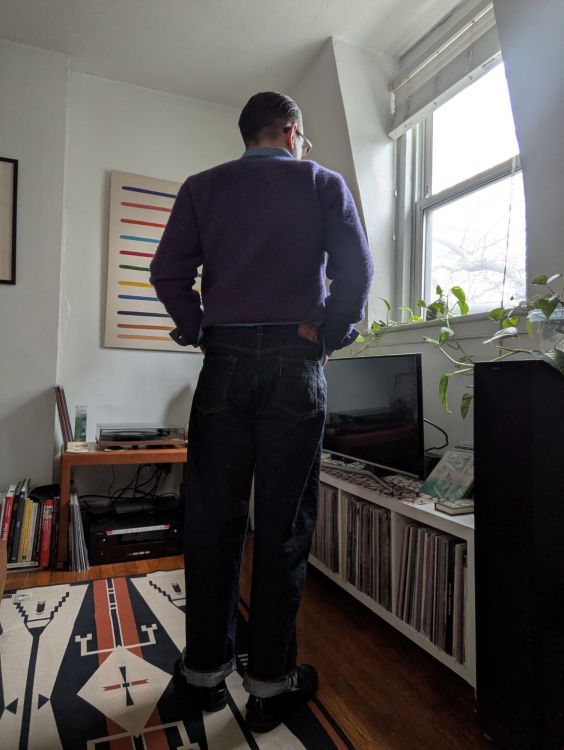
Couple of recent WAYWT (should be able to post & get involved more in a week or so - the big'ol Ofsted are rising from the deep stygian abyss to terrorize work) Vintage M-51 Kings of Indigo white crisp tee Vintage sun-kissed USMC jumper Big E denim (not Levi's, seems to be a forum collab from about 10- 6yrs ago - that's when I picked them up raw) Brain Dead x Converse Engineered Garments Workaday Kapital smiley face-elbow tee Needles Big E not Big E denim MiUSA NB 997
 7 points
 -
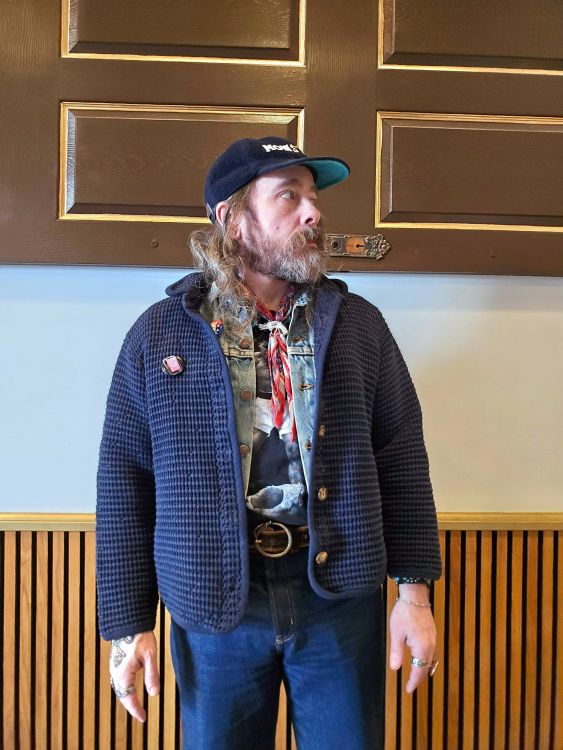
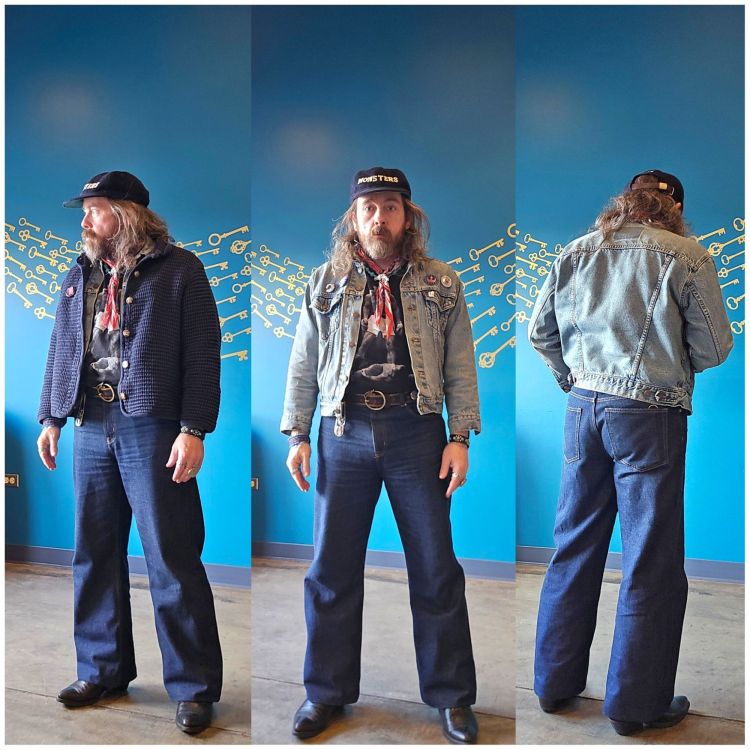
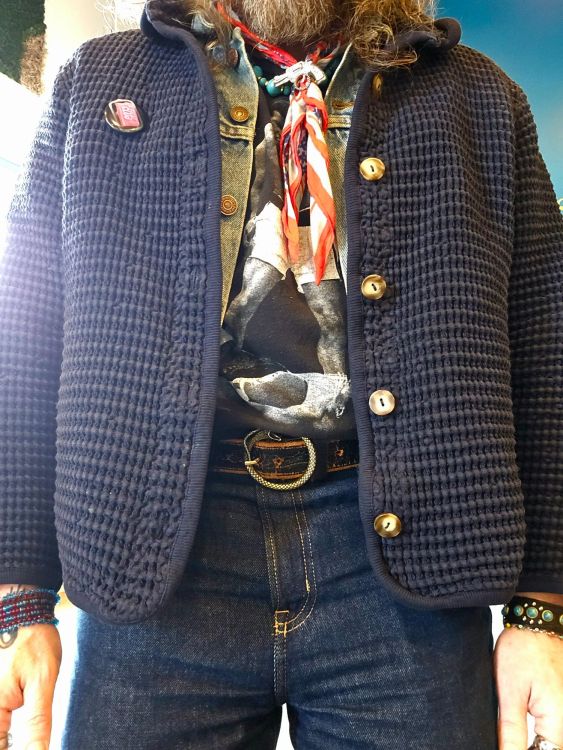
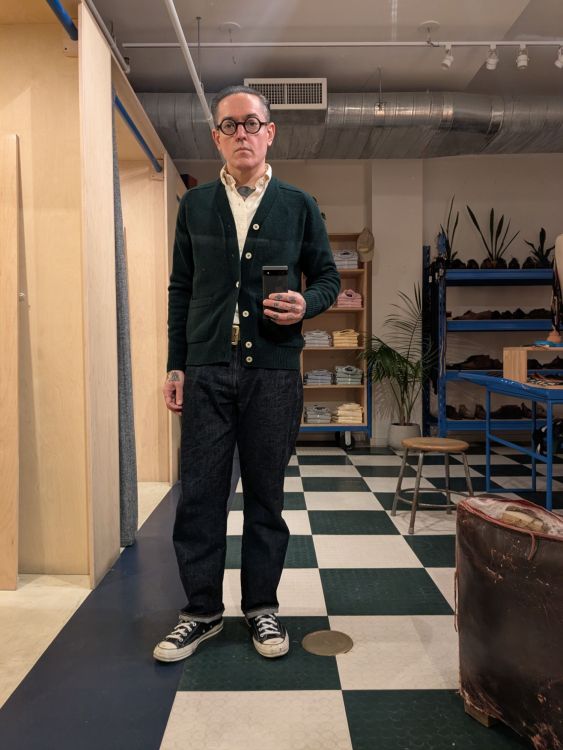
Future Monsters x Ebbets wool Cap Thrifted Quilted Cotton Cardigan Vintage Levis trucker Mohammed Ali T Vtg belt with brass snake Cheapo Wide leg denim by H&M Laredo beaters
 7 points
 -
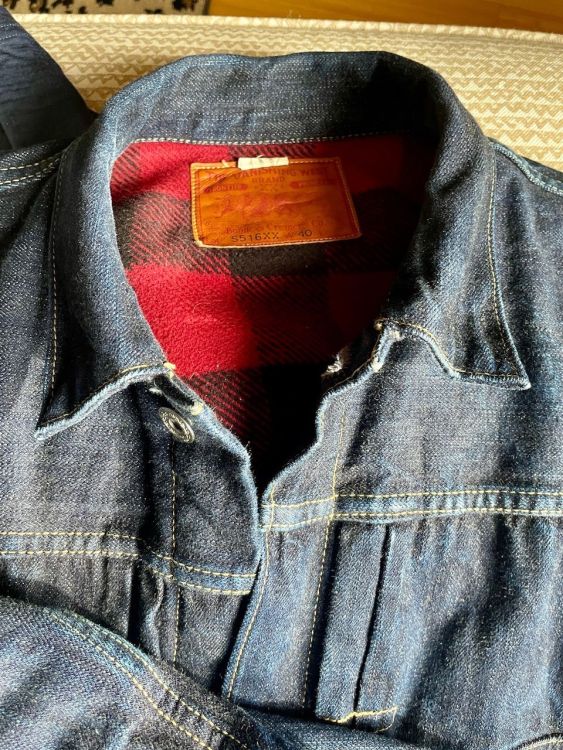
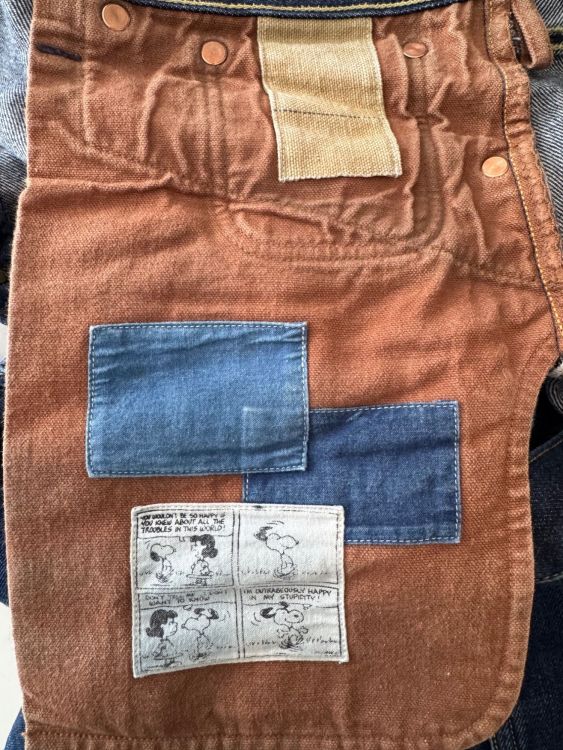
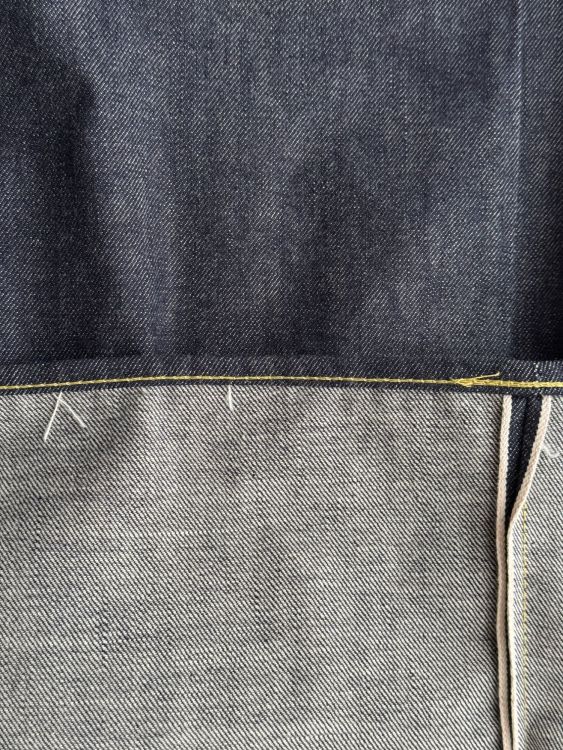
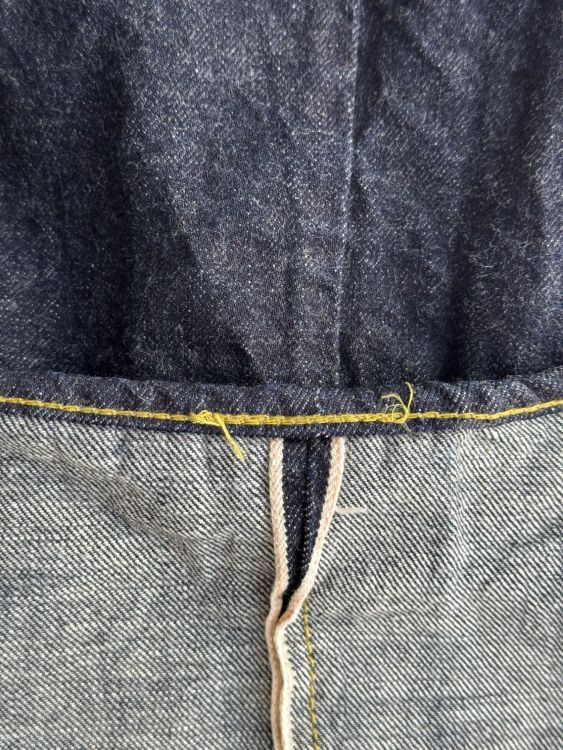
S516xx. Probably gonna get a wash soon. Can’t remember the last time it had one, maybe even 2023. I have a lot of jackets so none of them develop too quickly but this gets a lot of use in the colder months. It’s a really soft denim these days but started out quite stiff. My favorite part so far is probably the puckering on the hem.

 6 points
 -
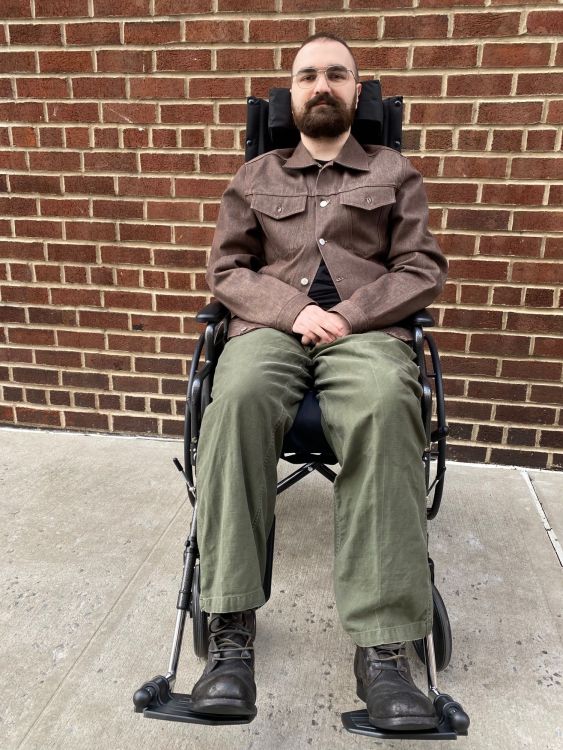
deadstock Helmut Lang brown type 3 from 25 years ago, OG-107, Carpe Diem would have showed this off sooner if my regular chair hadn’t broken down. Only just got a backup manual chair to be able to get out of bed. Waiting on bureaucracy to replace a power cable….
 4 points
 -
Rest day... WoM 5150 on the right hand side... only baby creases forming... wearing them 3-4 x per week atm
 4 points
 -
iPhone doing some creepy stuff with lighting but back in the 5150’s today and oh so comfy!
 4 points
 -
Look on the positive side here. You’d have shredded it to pieces ages ago anyway so it’d just be a distant memory by now!3 points
-
Warehouse, Denime, Warehouse, Yuketen
 3 points
 -
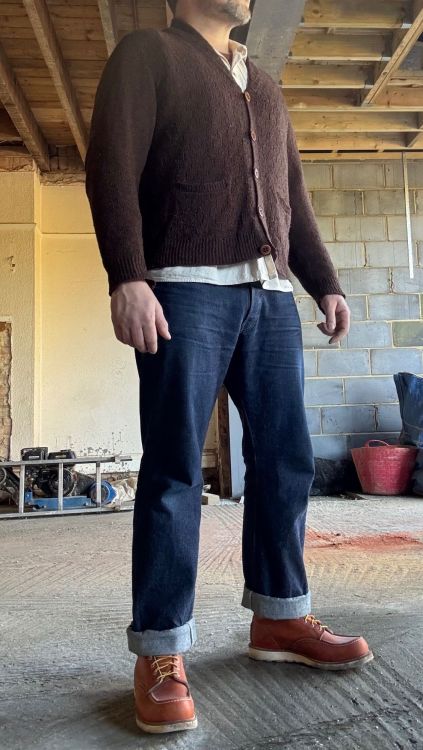
House is progressing nicely. Nice cold crispy day, good for wearing a bit of wool. Jack Russel cardi, Tender shirt, Ooe jeans and RWs
 3 points
 -
The sun is shining so took the opportunity to wash my 44’s as they were feeling rather grubby since their last wash in December Before: After:
 3 points
 -
@Jurassic Thanks for that, never seen it. Seems l was wrong, looking at the date of the movie (1943) and the new(ish) condition of the jacket, l'm assuming it is an early 40s 506xx (which would've had the larger, post 1935 buttons) although the small thin pleat stitch boxes and lack of tab indicate pre 1936. Could've had the tab removed? Could be the 1936 model, big button/no tab? Also found one or two images of the jeans he was wearing in the movie - typical 1937-42 era 501XX. Now l have the name l will have to look out for it 🙂
 2 points
 -
Yep, I did 😅 Also some old models still available at Pants Shop Avenue.2 points
-
Found this not a film I was aware of.
 2 points
 -
J Press/Rockets/Alden

 2 points
 -
Also not sure this all will count as "iconic", but my mom got a film scanner for Christmas last year and scanned a ton of my grandpas old family photos. A few stood out to me where they were wearing some beautiful blue jeans. This was Wyoming in the early 50s. I mentioned to my grandpa how much those old jeans were worth and he laughed, mentioned how much he hated wearing shrink to fits because his mom would always get him and his brother the same size no matter what size they needed. See: picture two, top buttons looking a little tight...2 points
-
@Maynard Friedman quite true. But that buffalo plaid would sure look nice thrashed and shredded to pieces 🤣1 point
-
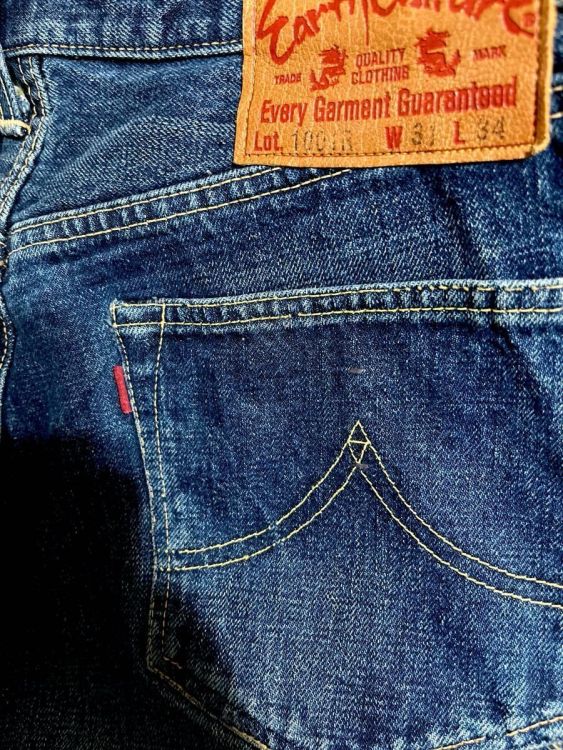
Has anyone posted Bobson yet? I think it's the same brand that used to be called Earth Culture back in the 90s
 1 point
 -
One Ear Brand / Tender / Neat Style / Nicks
 1 point
 -
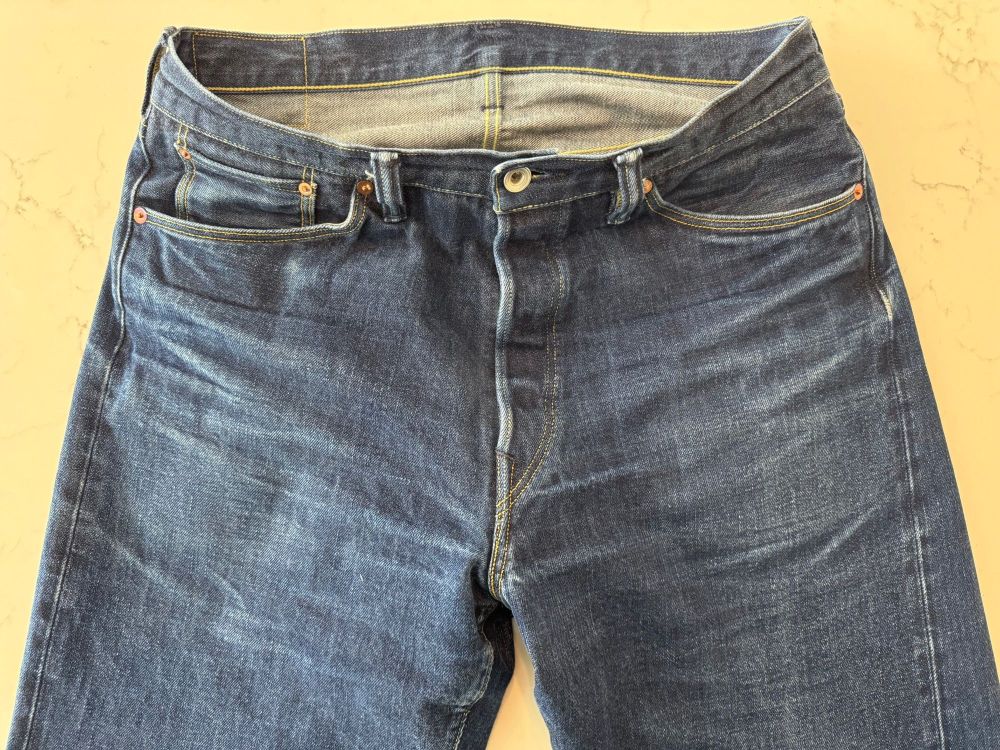
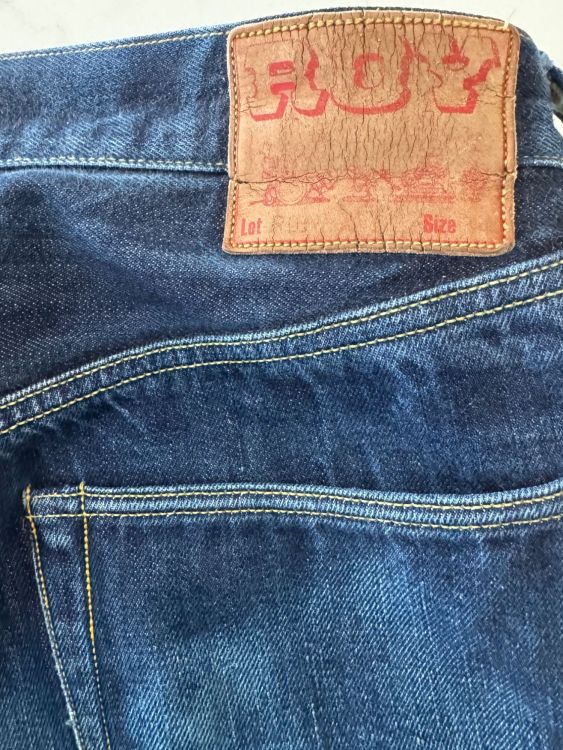
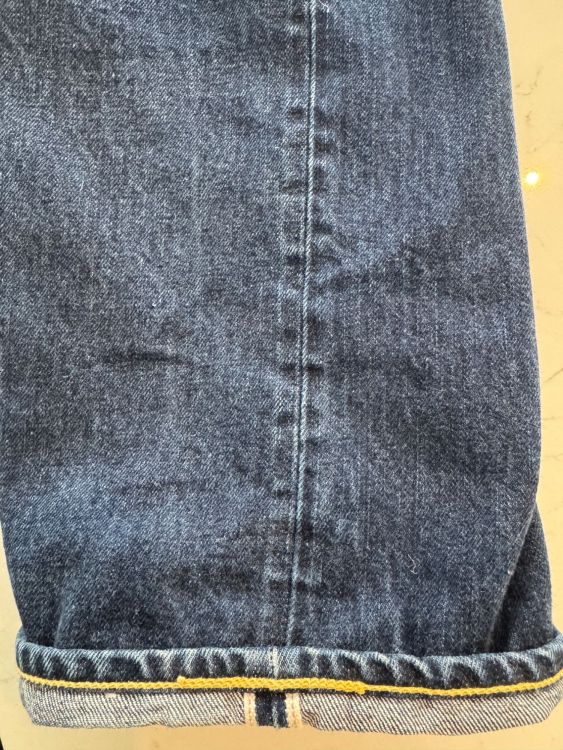
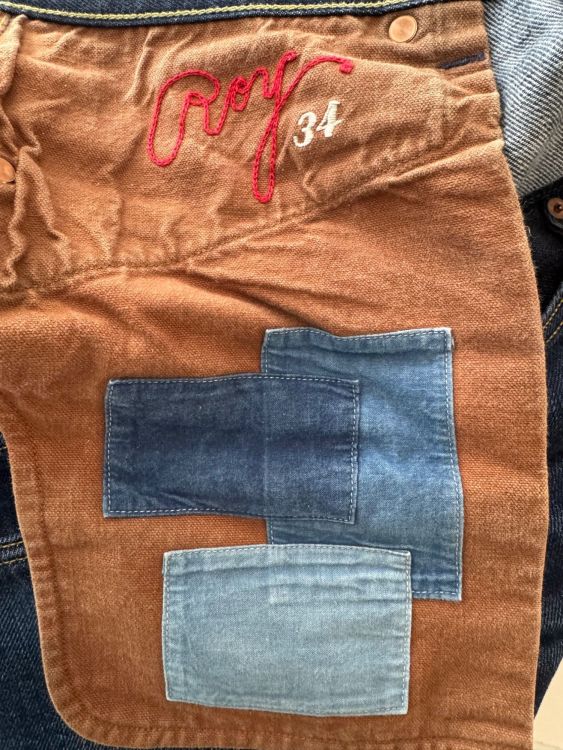
Roy R01 black seed cone

 1 point
 -
FW, WOM, Novesta, (Belt by Julian for Tenue De Nimes)
 1 point
 -
Flat Head Blood Orange western flannel, Warehouse 1001xx, Converse 70s Chucks.
 1 point
 -
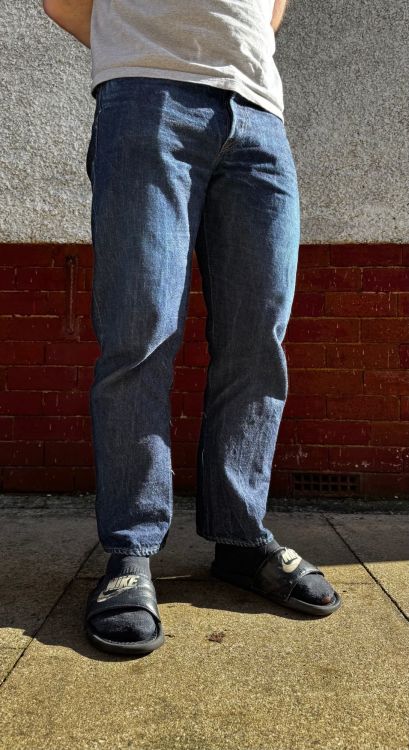
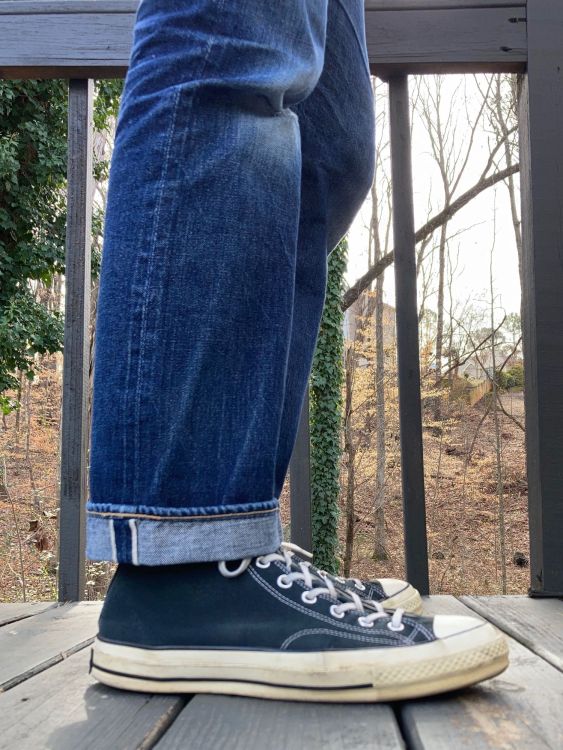
Some progress updates on my 400T. Wore these for pretty much 6 months straight in 2024, and then added into a rotation with a few other pairs after that. I think I've washed these about 4 times so far, but I honestly can't remember at this point. The verticle slub has started to really pop.1 point
-
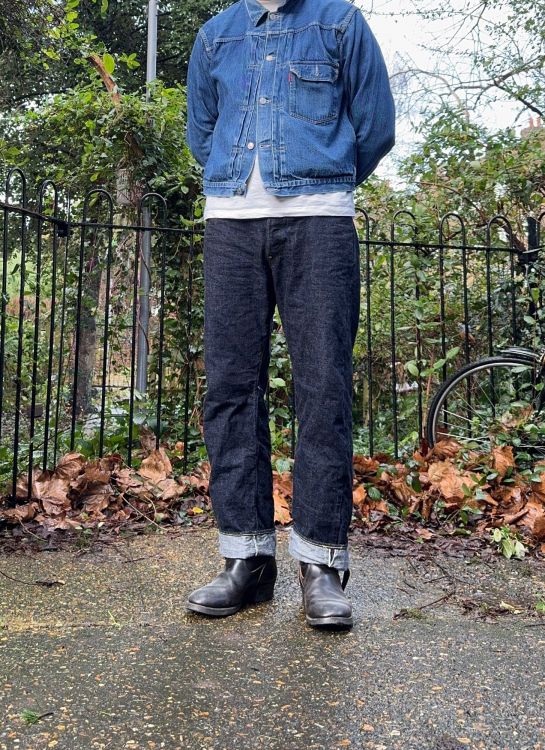
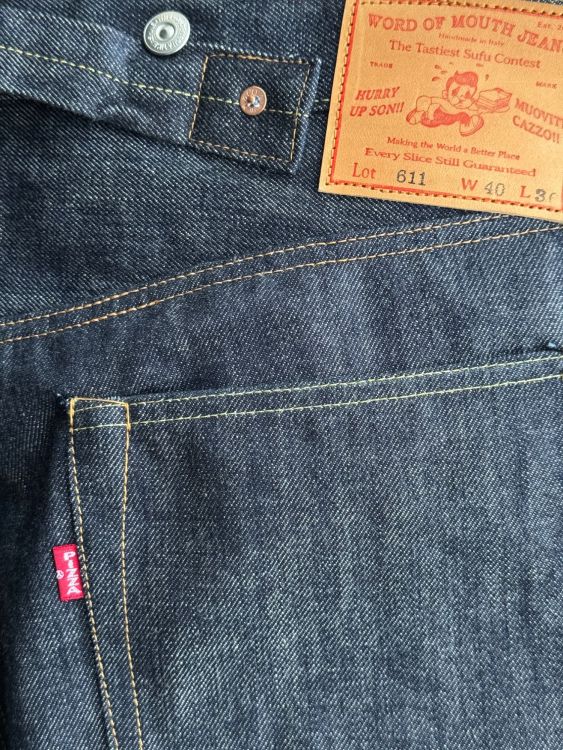
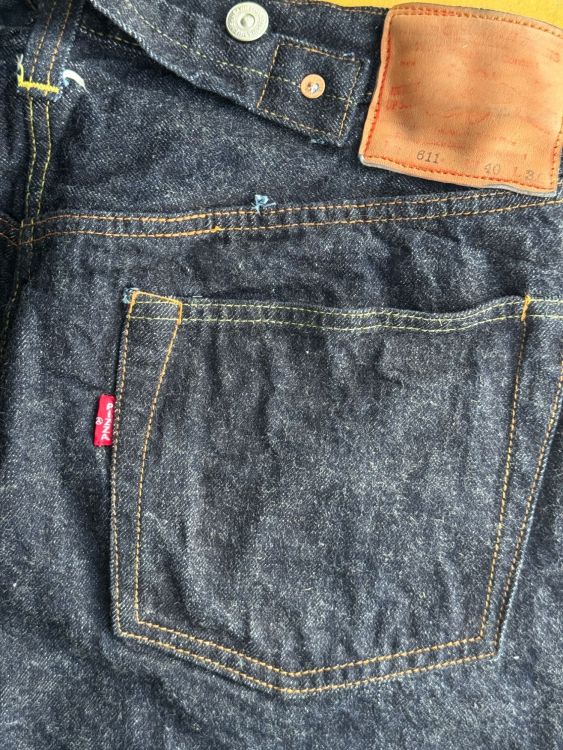
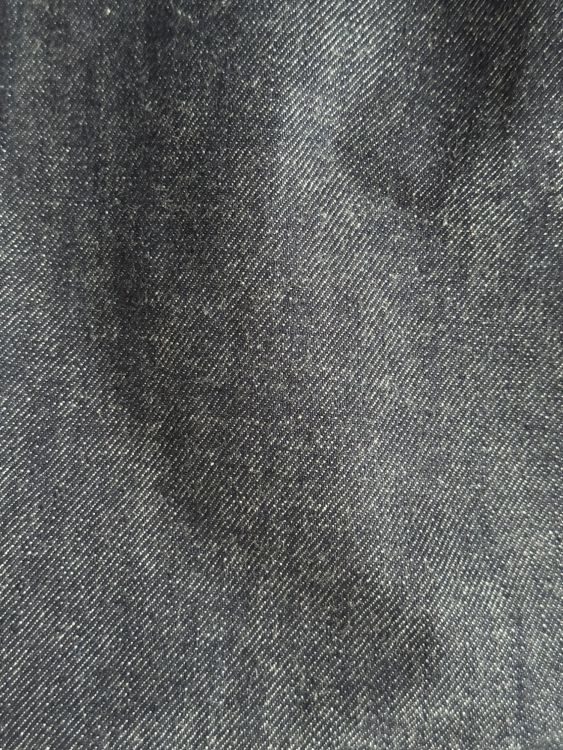
Inis Meain/Kapital/Ooe Yofukuten/WMJ 611’s, Red Wing
 1 point
 -
Merz merino watch cap Iron Heart zip hoodie Stevenson denim jacket Flat Head FN-D111 Visvim Skagway
 1 point
 -
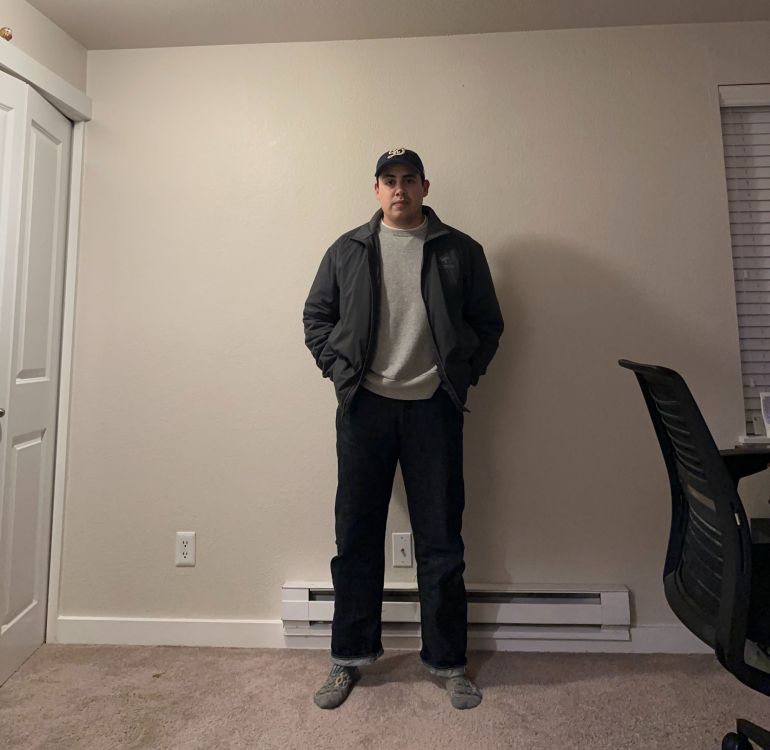
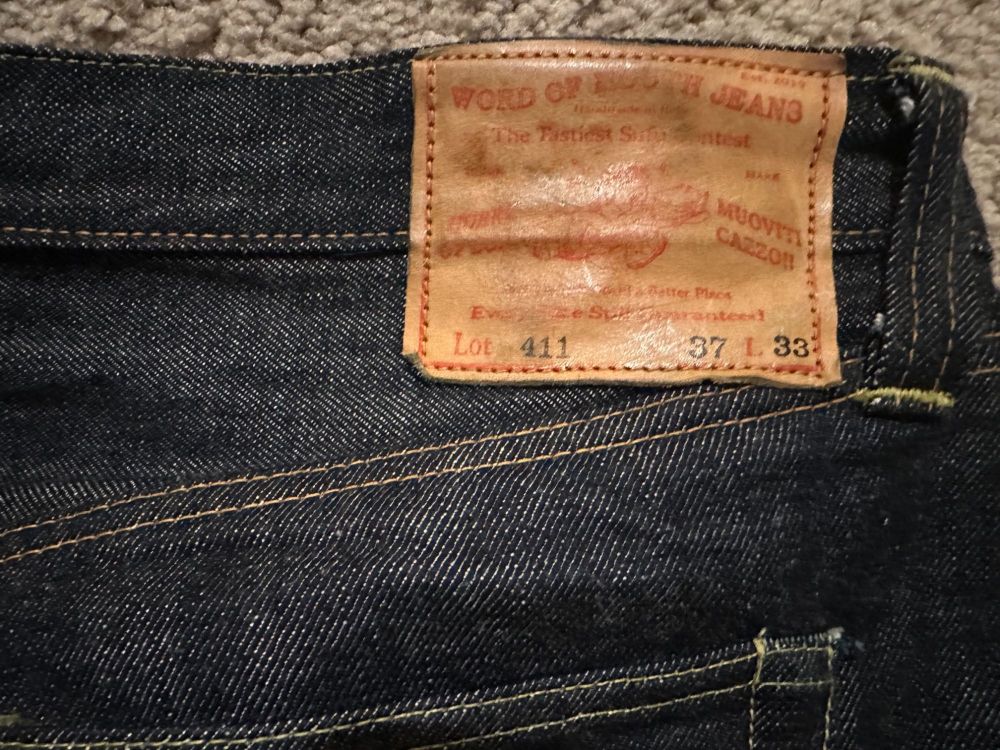
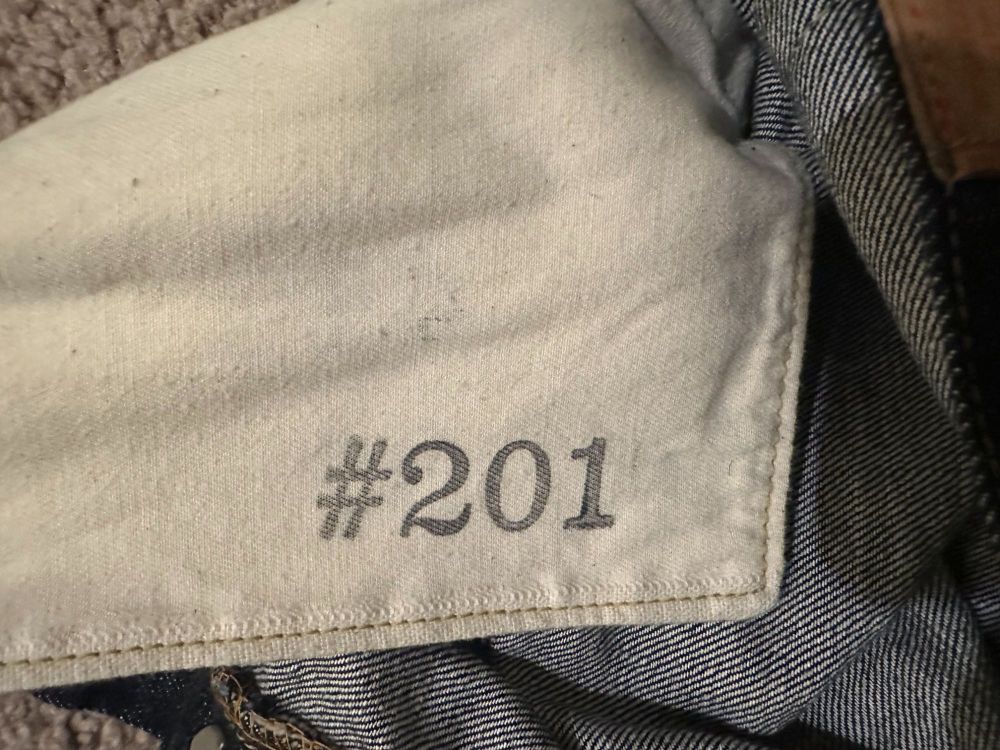
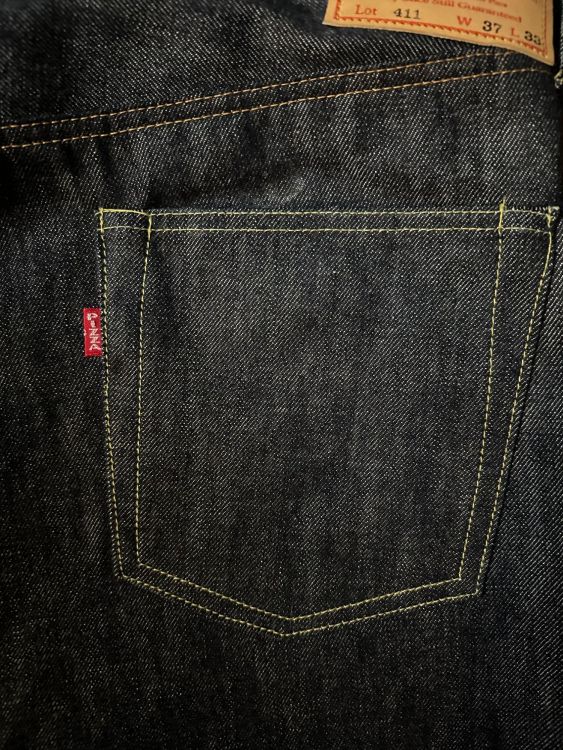
Union Special cap / Tender Co. shades & jacket / Union Supply blouse / Word of Mouth 411S / Wearmasters kicks
 1 point
 -
Thread seems dead.. I missed the Christmas Quiz this year so do you want to join me in '00s Name That Album' ? 1- 2- 3- 4- 5- 6- 7- 8- 9- 10- 11- 12- 13- 14- 15- 16- 17- 18- 19- 20- Some hard un's and some easy un's.. No image drop cheating!

 1 point
 -
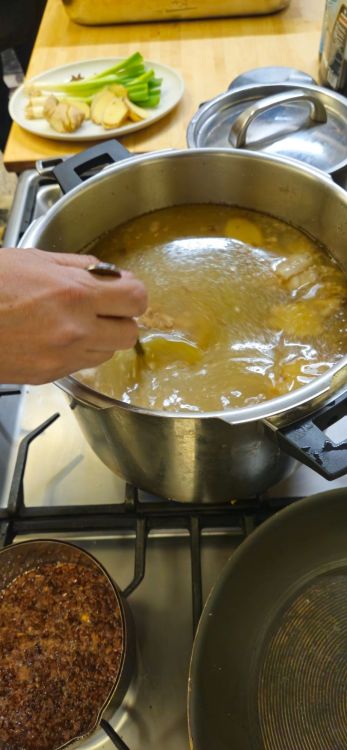
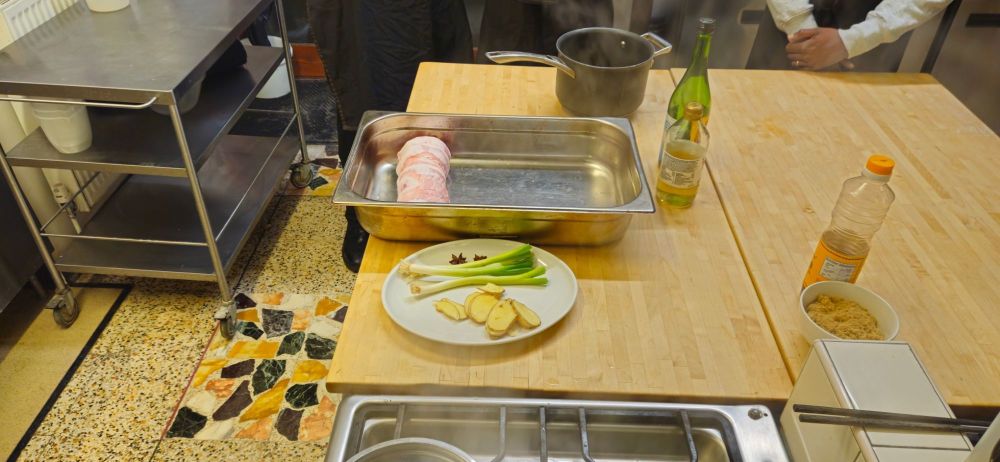
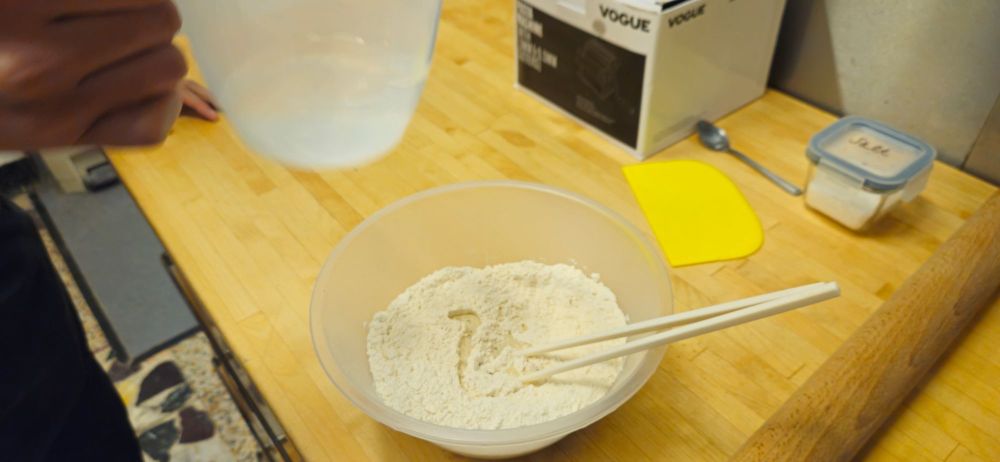
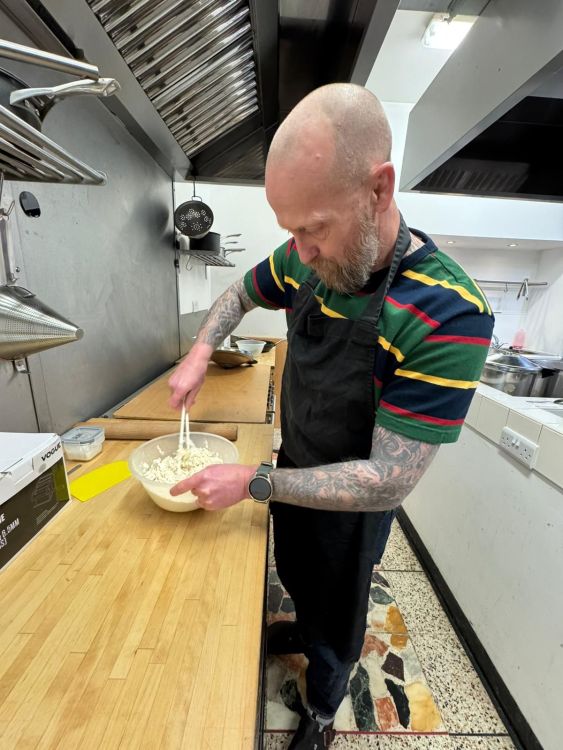
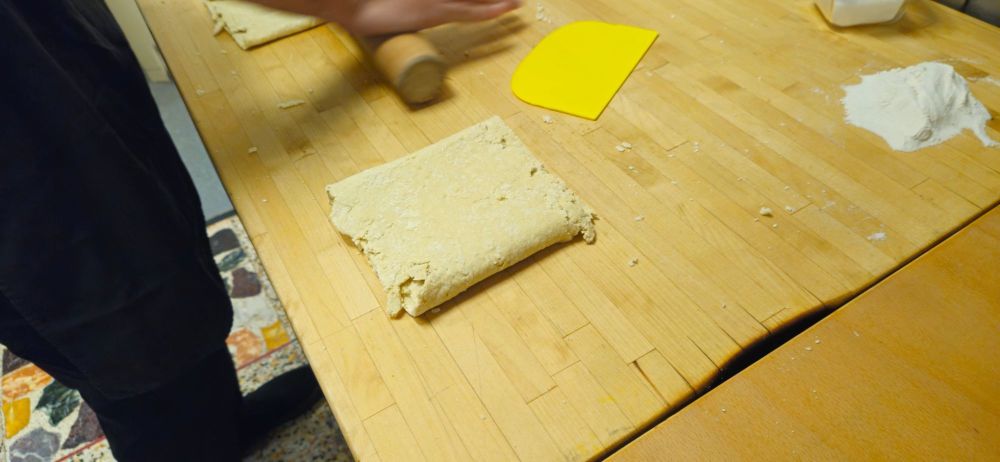
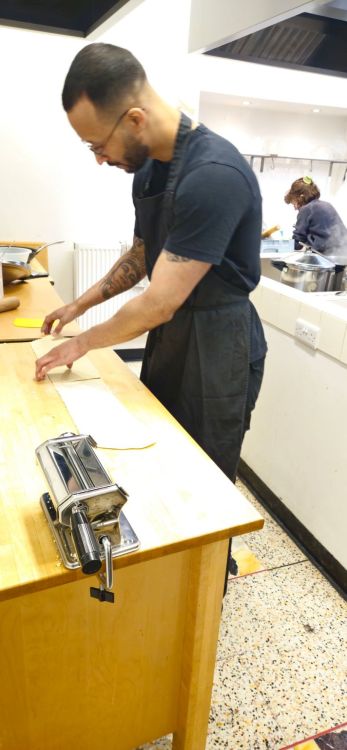
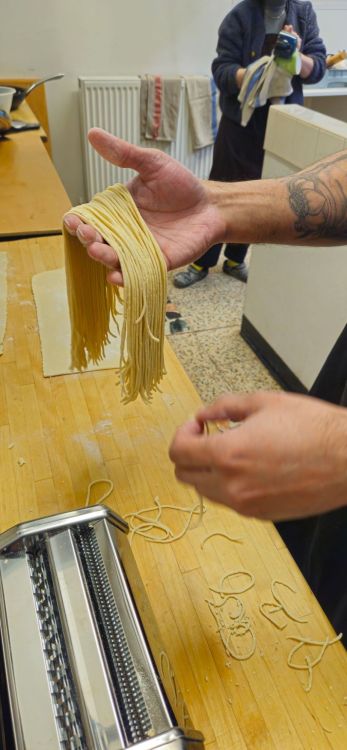
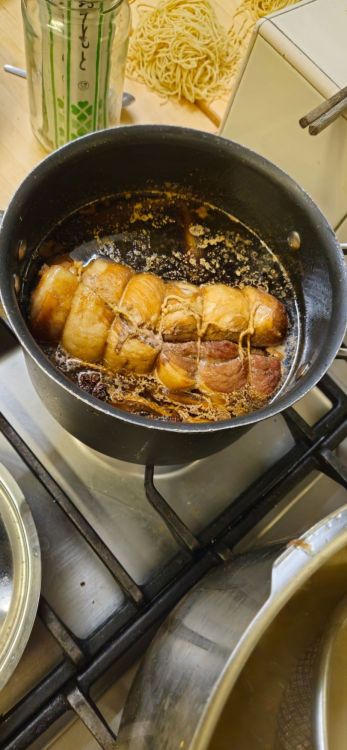
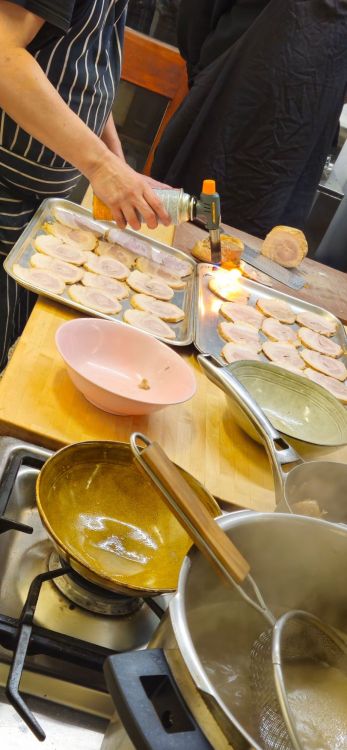
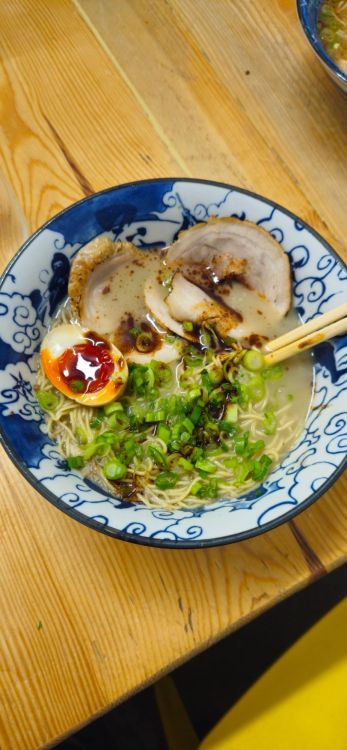
Me and my eldest went to a noodle master class this week, learnt to make Dandanmain and Tonkatsu Ramen. Started off prepping the broth and a black garlic oil. Then onto braising the pork belly. Onto making the noodles from scratch. The chef leading us demo'd a mix at 50% hydration and said 40% were harder to make but resulted in much better noodles.... both of us are OCD/detail fixated so challenge accepted. (Featuring Bronson, Resolute & Birks on me) While the Tonkatsu broth was finishing off (smell was amazing) we made the Dandanmain (spicy beef Chinese noodles) and shared amongst the class. No photos of it finished because we wolfed it down with a couple Asahi. Pork was ready to go. And the finished product with seasoned egg, drizzled with the aforementioned garlic oil


 1 point
 -
pizza landings raw and cooked montage as shortened xposting from starter thread… mobile fabric from large to little and sure they will find largeness again…

 1 point
 -
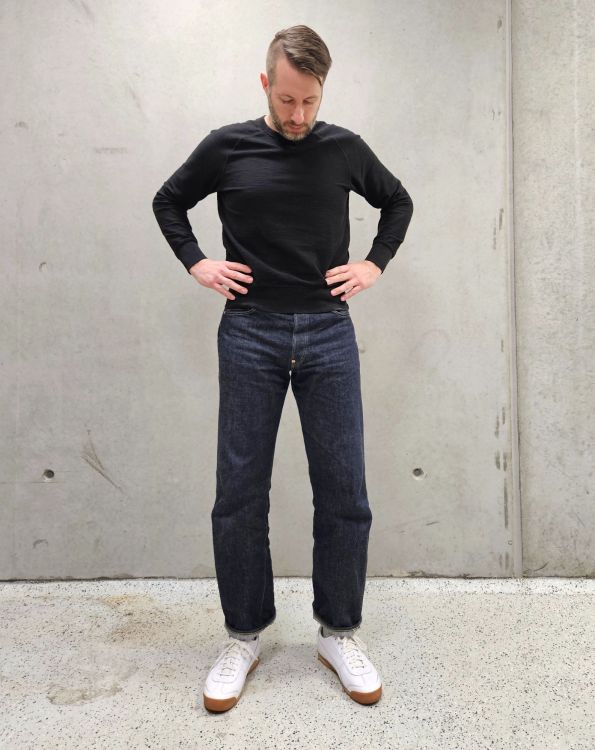
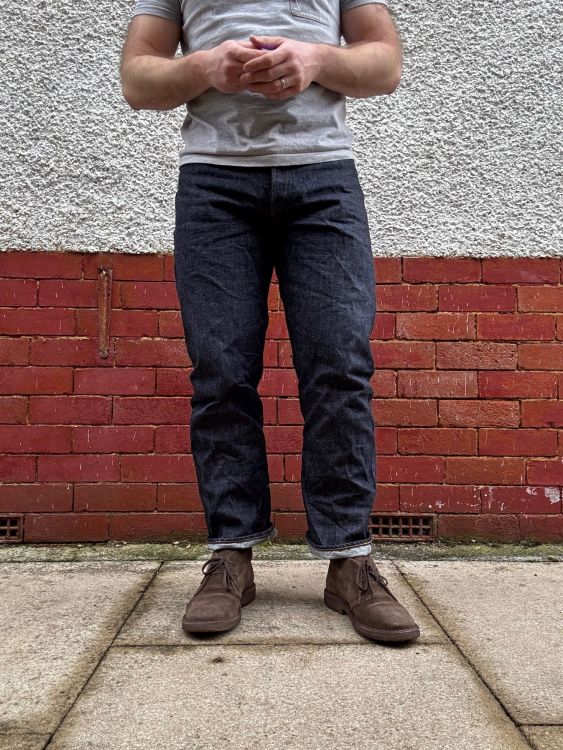
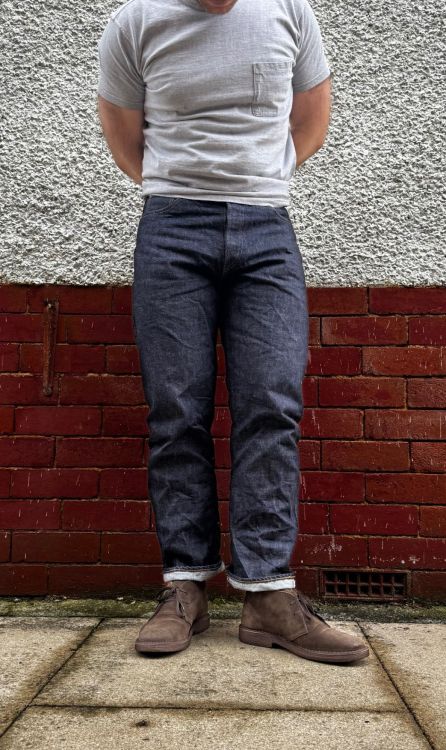
Updated fit on mine with likely final inseam length! Honestly I’ve never had jeans fit this well in the top block before. I know this is going to sound like “denim nerd draws parallels between one generic 501 iteration and another generic 501 iteration” but these are feeling to me like a Warehouse 1001XX with a better top block for me. Lovely stuff.

 1 point
 -
Works with sneakers as well. And finally I had a haircut...
 1 point
 -
Crap photos but I wore my pair yesterday playing golf at the oldest golf course in Texas (1899). Normally wouldn’t wear jeans on the course, but this is a casual 9 hole walking only muni course, no dress code and only $18. A few friends and I play here every month or so. Fun way to spend an afternoon.

 1 point
 -
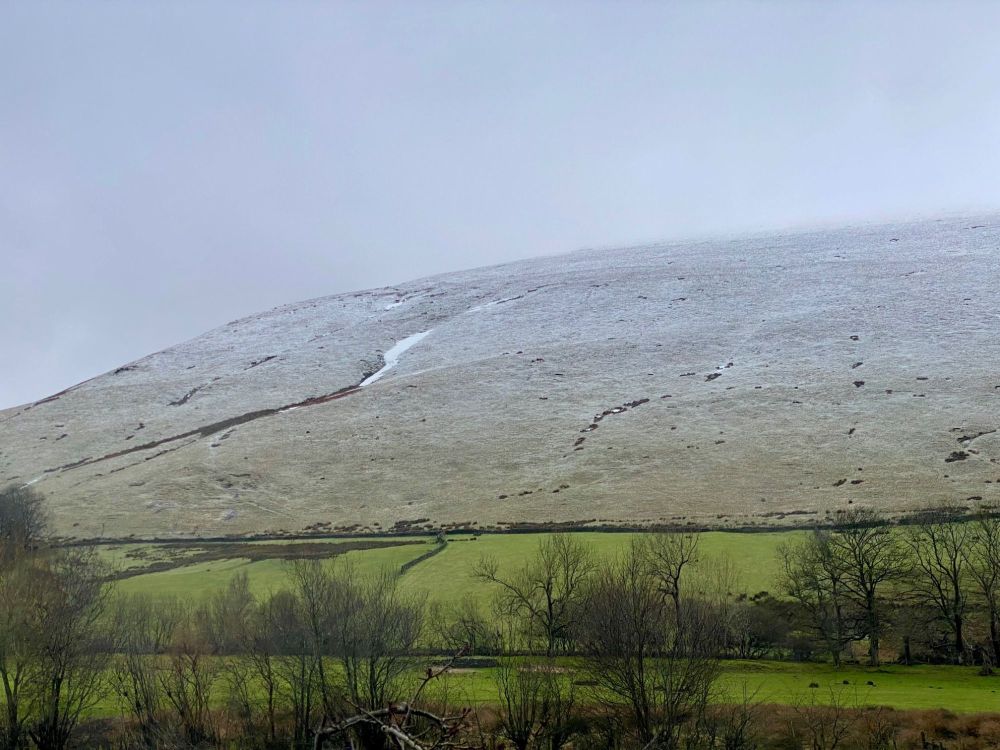
After driving 350 miles from Brighton (that’s a long drive in the UK) up to the Lake District to visit my Dad yesterday, here's the view from his window of Bowscale. Just near the more famous Blencathra. It’s bloody cold too. Looked like this on 11th January though. Much prettier.
 1 point
 -
6 days in...
 1 point
 -
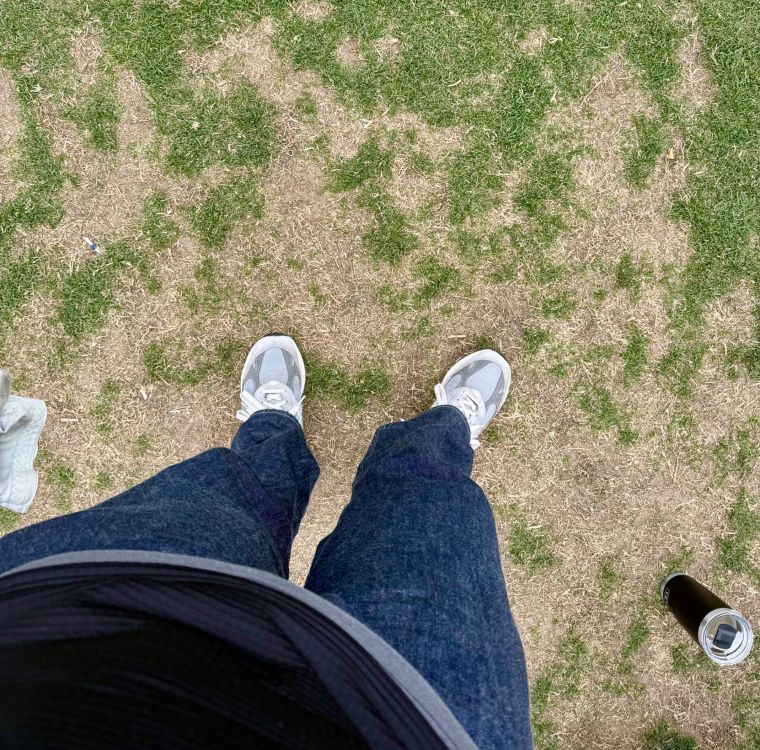
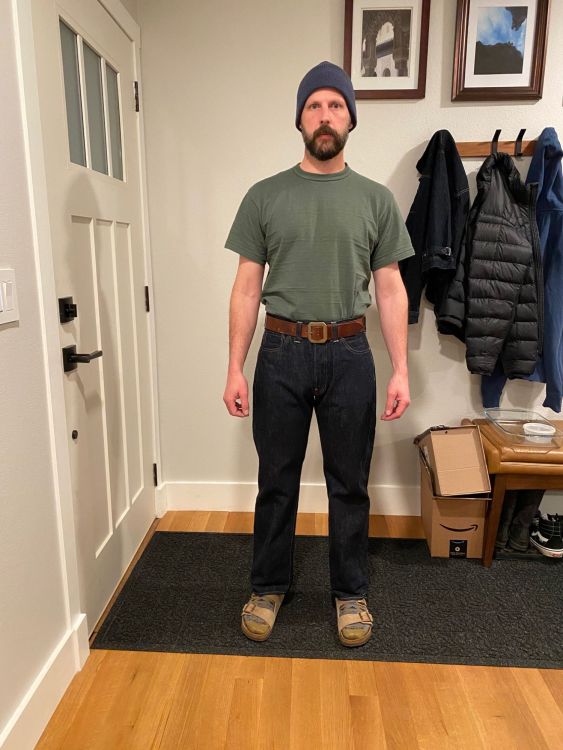
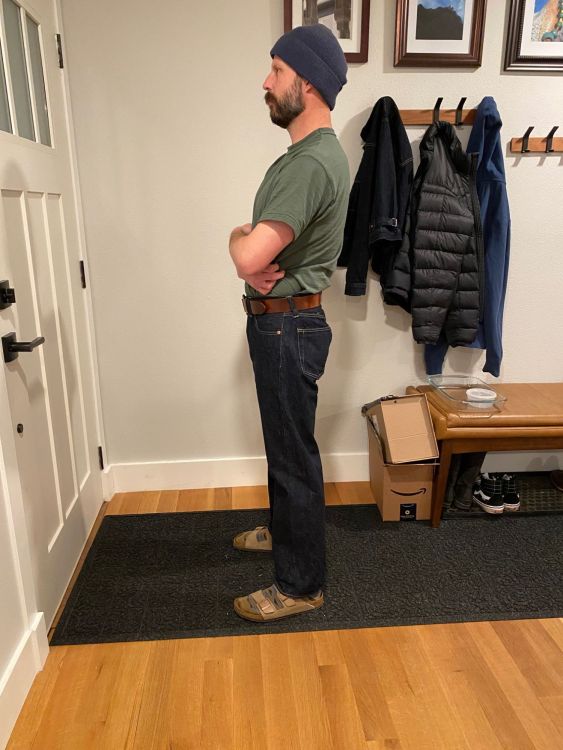
I have to say, loving these jeans so far. Sized it just right. There's plenty of room in the hips without dipping under the belt too badly. Stock room casual this morning doing grunt work.
 1 point
 -
Apologies in advance for the crappy pictures, my lighting isn't so good and the sun isn't as plentiful as it was in LA . I got these last Wednesday and was really impressed with the little details, mainly the patch and the Pizza red tab. I was initially worried that they would be too small post soak, however, they ended up fitting pretty nicely! They were given a soak and were then machine dried (couldn't wait on the air dry) to avoid any further shrinkage. Simo really got all the post soak shrinkage right, especailly with the inseam! I'll try to post more pictures as I get more wear in, I just tend to forget to take pictures 😅 Patch got pretty faded post wash.
 1 point
 -
Checking in with pre/post and initial thoughts. I really like these jeans and cut. The roping is top notch. I’m still tripping out on the denim pockets bags It’s a weird feeling, but will only get better with wear. I didn’t get as much shrink in the waist as I wanted with the first wash, so I ran them through again as well as a trip through the dryer. Think we’re fully shrunk now - waist snug, but has loosened to what I was wanting and inseam hit requested post-shrink exactly. I ended up with some marbling with the initial soak/wash/hang dry that was probably intensified with the second wash/dryer. My typical machine wash/dry usually doesn’t marble like this, but it did this time. No worries - I’m choosing to see the squiggles as ‘freshly grated mozzarella’ for my pizza pants. Pre Post initial wash, hang dry


 1 point
 -
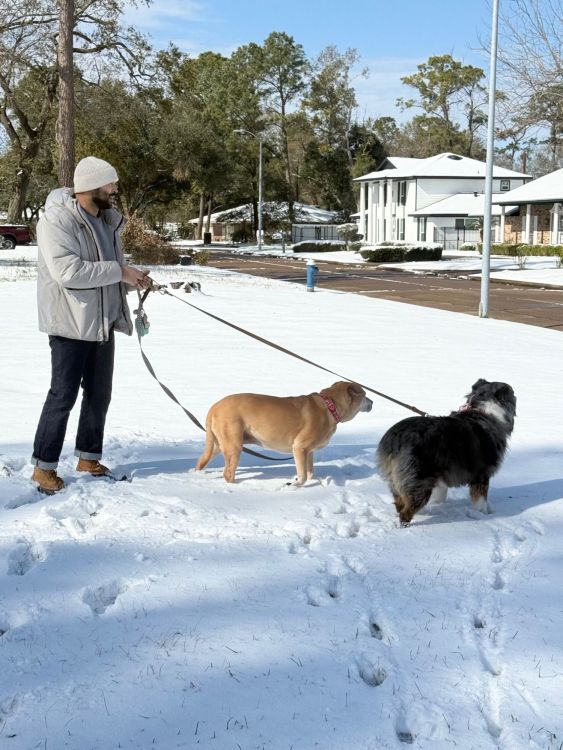
Another Texan snow post. Took the girls out for some exploration!
 1 point
 -
IT’s TIME ! !
 1 point
 -
Here’s the fit, so far is feeling great, and will only get better I’m sure! EDIT: Now I've confirmed they fit me after the wash - all my other pairs are vac packed and stashed away for the duration! Let's see how this goes. I do feel like they will show some real character quite quickly.
 1 point
 -
Finally! I still carry 3-4 kg more with me than I'd like. @Duke Mantee bonus shot
 1 point
 -
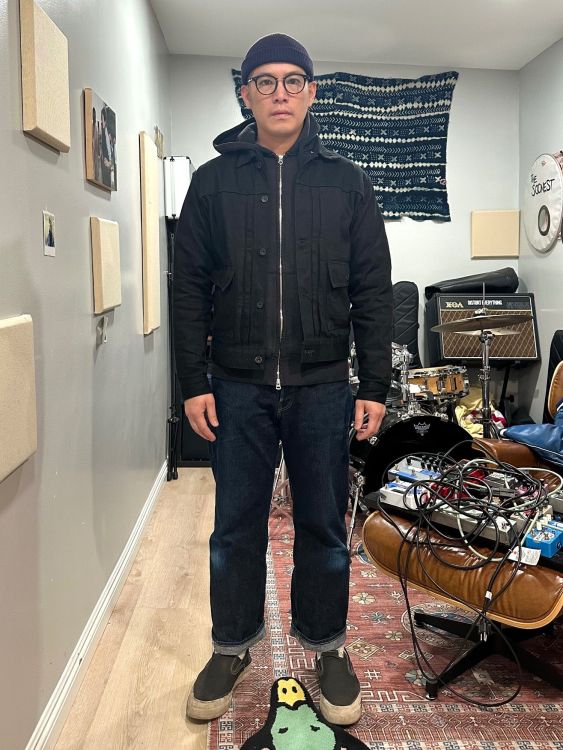
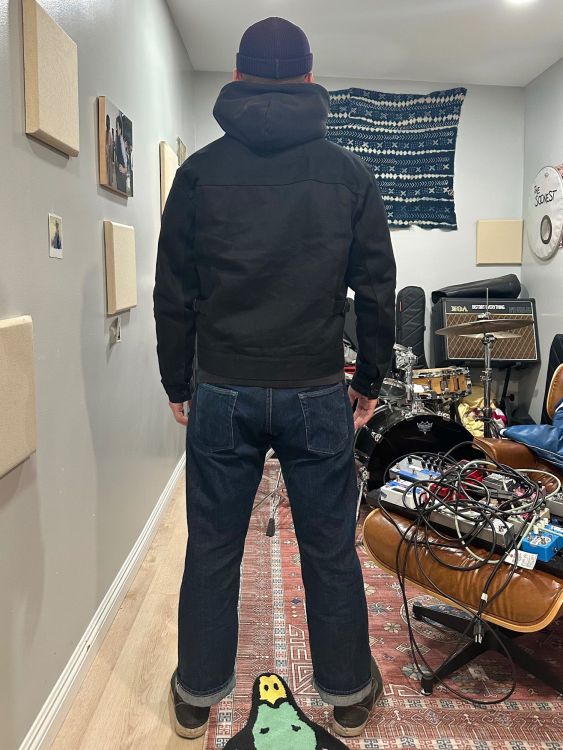
Just groceries and the dentist today, but it's damn cold out. Oh, and the chainstitch settings are wild. The hems are taught and twisted after a single wash unlike anything I've ever experienced. Iron Heart/Mister Freedom/SDA/Tanner/WoM/Chippewa
 1 point
 -
This is good to know, I didn't want to shit on Simo! I love my 311. The only thing that comes to mind for me on initial thought, with a size 38 in mind: The pocket bags feel a tiny too shallow (fits iPhone 14 Pro just); an extra inch in length would probably be perfect Front pocket openings are a little small, at least for my hands. It's probably partly a syndrome of "new denim" stiffness—but they are only ~13oz—and my hand size; however, I don't think I have overly humungous hands. Everything else feels solid. Love the denim!
 1 point
 -
They shrank perfectly. -3" in the waist to a 32" waist. Leg opening came down to 8.5" from 9". There's a bit of a pattern issue in the seat shape and pockets as I've seen in others' photos as well as my fit, but nothing that ruins the fit. Just a little pattern issue that could be addressed going forward with WoM. Edit: pocket bags are also ~1" too shallow for my liking. Again, small issue, but worth noting.
 1 point


.thumb.jpg.5542df7a8476d44f07b166bf013ec06f.jpg)


-
Popular Contributors
-
1

-
2

-
3
-
4

-
5
-
6
-
7

-
8
-
9
-
10
-
11

-
12
-
13

-
14

-
15
-
16
-
17
-
18

-
19

-
20
-
21

-
22

-
23

-
24

-
25
-
-
-
-
DSPTCH Fidlock Key Chain - Add On
DSPTCH
$US 30