Jump to content

Tender Co. Denim


braille_teeth

Recommended Posts

so, as promised, i'll put up some making and detail photos of some of the products on the trestle shop. it's been lovely finding out about some very varied crafts and manufacturing. first, socks!

tender's socks are circular knit in england, on old, mechanical machines, which look like this:

7409056344_8a4e4a0c58_z.jpg

they're knitted on drums, which hold an array of needles:

7409059016_9b4e5de3eb_z.jpg

The needles themselves are like little hooks, with an articulated latch:

7409051092_98b5dc5f68_z.jpg

The hook pushes up to catch a strand of yarn, then pulls back, hooking it down. During this process, the latch is pulled closed:

7409052566_0a7b3ef335_z.jpg

which holds the yarn in place until it comes back up, unlatching and letting the knitted yarn drop out, to be replaced by a new thread.

This is basically the same type of machine that knits tubular Tshirt fabric (such as Tender's). It's like a flat knitting machine, bent into a circle, so instead of a row running from end to end, backwards and forwards, the whole drum rotates, making a single long run, in a coil- producing a tube:

7409060796_701a0caf2c_z.jpg

This tube passes through some rollers underneath the knitting drum, and appears as a long string of socks:

7409062598_46fb0e61aa_z.jpg

The heel, the rib at the calf, and the tighter knit at the toe are all programmed in to the knitting pattern using punch-chains (like mega-simple early computer programs, it's a continuous punch card, with sprocket holes running down the sides to feed it through the machine in time with the knitting drum.

7409064332_5fa343bf14_z.jpg

The calf rib of one sock is connected to the toe of the next by a few lines of thinner knitting, knit from a fine water-soluble material called solvron. When the socks are cut apart, and washed, this washes away, leaving a clean finished edge where the cotton stopped in the knitting. With Tender's hand dyed socks the solvron is washed away in the dyeing, with the 'unborn' ecru socks the solvron is still visible, but it will wash away as the socks shrink to fit with their first wash.

Also visible above is the thick terry sole. This is a different stitch type, where the reverse of the knitting (inside the sock) is left long, in loops, like towelling. It makes the sole softer and thicker.

After the socks are cut apart, the toe needs to be closed, which in this case means linking them onto a second machine by hand. pictures to follow!

Edited by rodeo bill
Link to comment
Share on other sites

once the chain of socks has been cut apart into individual socks, they're taken upstairs to be linked. (These pictures are no longer of tender socks, they're purple socks for another company- tender's purple socks are hand-dyed with logwood, after they have been completed)

7412870234_c904c59c90_z.jpg

The linking machine takes the edge row of knitting from the upper part of the sock tube, and the edge row of the lower part, and knits them together. Unlike overlocking, where the sock is just cut and sewn together, linked socks are knitted together using the original knitted lines, which means that no seam is formed, and there's no bulk in the toe.

The trick with linking is that every stitch has to be individually fitted on to the needles in the slowly-rotating linking machine:

7412869514_bd3355cfab_z.jpg

If you miss a stitch, the join won't sit flat, and the needles are tiny, so it's a really skilled job

7412868718_1b56ebe8f7_z.jpg

After a sock has been slotted onto the correct linking needles, it is pulled round into the linking section, which then cuts off the extra knitted tube. Finally, a rotating brush unravels the last few threads of knitting, and brushes them away

7412865448_8f211c86fd_z.jpg

Here's the whole machine, seen from above:

7412866476_092b0e8443_z.jpg

at the back, the socks drop off, into a hopper.

With most socks, they are then taken to be turned inside-out and pressed, on heated steam irons in the shape of legs :)

7415295064_d00ae938b6_z.jpg

however tender's come home with me at this point:

7412870948_d8a2a5bfd6_z.jpg

to be transfer printed with the tender logo and packaged as 'unborn', or to be hand dyed with woad, purple logwood, or black logwood, ready to go out.

Link to comment
Share on other sites

We've had quite a few questions and nice comments about the sunglasses, so here are some photos of the manufacturing process. These were really fun to develop, and I took a ton of photos, so apologies if this gets over-long/-enthusiastic!

Tender's sunglasses frames are made from cellulose acetate, derived from cotton pulp. This means that as well as being a natural, biodegradable product, they're hypo-allergenic. A lot of cellulose acetate for top-end frames is made from lignin (from wood pulp), but cotton pulp makes a finer material, which can take a very high polish.

The acetate sheets com like this:

7419293106_d37f1e8c21_z.jpg

there are all sorts of versions, including patterned pieces like this:

7419288024_e3aebe8b17_z.jpg

the slices are cut off solid blocks, and when the glasses are milled out of these sheets, and depending on the position of the frames shape, different patterns will show up. This is how they make mock-tortoiseshell patterns in glasses.

Tender's however, are plain black. We picked out a nice sheet, to take with the box of protos and my design specifications.

7419283434_9863873b96_z.jpg

The first job is to make a pilot hole in the centre of where each lens will be:

7419281930_648f3f7925_z.jpg

7419353944_7913c21450_z.jpg

This will be the centre point from which the front of the frames will be oriented

7419352400_9077a33b60_z.jpg

Link to comment
Share on other sites

now the fun starts! matt (photographed above, who made the glasses from start to finish), made an original pattern for the frames by sticking a paper print-out of my drawing onto a sheet of acetate, and cutting around the lines freehand. He mounted this pattern onto a block, and it goes into a machine that allows him to copy a shape with the router. This is still a very skilled job, and is done one at a time, controlled entirely by hand. One slip and the frames would be ruined:

7419350860_2e749518ee_z.jpg

the pink pair, below, is the pattern, held in place by screws through the guide holes. The black block is in the process of being routed out?

7419349524_e3a49b86da_z.jpg

The router bit in the black pair is spinning very fast, cutting into the black acetate. The bit on the pink pair is just a smooth static pin, but in the relative same place as the router bit in the 'live' black pair. By tracing round the contours of the finished pink pattern with the static bit, a perfect copy is routed out of the black acetate by the spinning router.

The bed holding both blocks is on a track, and can be moved around by two handles on the front:

7419347984_ba1d61f5ce_z.jpg

As the router cuts through the black acetate, it shaves off long spirals, which have to be removed, or the whole apparatus would get too hot and the frame would melt.

7419346596_03f5460258_z.jpg

7419345076_4f46fe2833_z.jpg

Eventually (it's quite a slow process), we end up with what looks pretty much like the front of the finished glasses:

7419343424_227ed7d1c3_z.jpg

The centres are popped out:

7419342086_81a23994c0_z.jpg

7419340862_cba0348c0d_z.jpg

Link to comment
Share on other sites

Now the front are clean and neat, and ready to take lenses, they have to be made a bit more face-shaped. The first job is to make the nose bridge bump. This is done by heating up the frames over a line-bender:

7419316770_50bc813bd8_z.jpg

and then pressing the heated part into a mould:

7419315410_5f40a33102_z.jpg

7419314204_1a5ca8ff84_z.jpg

which bumps them out like this:

7419312876_6c0e418b74_z.jpg

this looks rather extreme, but most of it will be polished out (as you will see....!)

the next job is to apply the pre-made nose pieces:

7419469138_4f4352e8f8_z.jpg

and the fronts are pretty much ready for the big job, of hand filing, sanding, and polishing into their final shape. here's a photo of some fronts which are only slightly ahead of this, having been lightly filed and sanded, to give some shape to the backs:

7419467472_f958c18ec6_z.jpg

note the groove inside each rim, where the lenses will go.

Link to comment
Share on other sites

the sides (temples) of the glasses, are made in a similar way, but first they need to be reinforced with a wire core. This is shot into the solid block of acetate with this machine:

7419466240_052c9126be_z.jpg

The block is warmed up, and then the sharpened wire is shot through it:

7419463380_7a4e1b6684_z.jpg

7419461756_9744f8f38d_z.jpg

This block is then routed out in the same way as the fronts:

7419458804_f9b0a939f4_z.jpg

7419454082_095a12ed5d_z.jpg

7419452296_8f82eac4af_z.jpg

With some (cheaper) frames, the hinge is incorporated into the wire, as you can see above. However this is a very small hinge, and rather flimsy. For tender's glasses this isn't appropriate, so the end of the temples with the wired-hinge sticking out is sawn off, to make way for a much bigger, stronger, riveted hinge:

7419447860_aeb3a5310e_z.jpg

After cleaning and filing the temples, again by hand:

7419444788_d1112f877e_z.jpg

they have the hinges riveted on:

7419443198_7512f0a19c_z.jpg

These hinges are much deeper, and more robust, than the standard ones attached to the temple wires. In fact, they are so wide that they were really difficult to attach (there's only a millimetre or so of space between the edge of the hinge and the edge of the temple). The solution that Matt came up with was to leave an 'ear' of acetate either side of the hinge, to give him something to hold onto while positioning the hinge. Then after it's riveted on he removes the ear with a file, leaving the hinge perfectly in place.

Link to comment
Share on other sites

the final job, and probably the most skilled, is polishing. This not only makes the frames shiny, it also shapes them to a large extent. polishing takes a long time, about 10 minutes per frame section, on each grade of polish, and there are 3 frame sections to a pair of glasses, and 4 grades of polishing!

7419439098_b1ffe3263b_z.jpg

7419437574_f69e639f5f_z.jpg

7419436080_59e34f296d_z.jpg

this is one of the abrasive blocks, which are rubbed through the cotton mop on the polishing head:

7419434700_d1a8b9821c_z.jpg

here are the fronts after the first stage of polishing, with a relatively coarse abrasive. This is mainly to smooth and shape the frames:

7419432836_63b4ee39e1_z.jpg

now a finer abrasive goes on to the mop:

7419429858_5934f837f4_z.jpg

and they go on for a finer polish:

7419428366_7fbc9260ec_z.jpg

the final polish is done with a very soft cloth, to bring out a real glassy gloss in the acetate:

7419425720_923255afdb_z.jpg

the fronts are done! the same polishing process is carried out on each temple, and the three pieces are riveted together:

7419424546_a497f0ef0c_z.jpg

finally the UV protective grey-brown lenses are popped in, and a leather thong is tied through the holes at the ends of the temples. Then the glasses are wrapped in an english-made handkerchief of english-woven cotton satin, and they're ready to go! photos of the finished product, and a bit more about the design, over at the trestle shop

Link to comment
Share on other sites

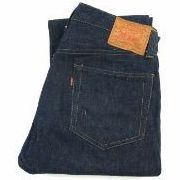
Hi all, I'm a long time SuFu lurker, so this is my very first post, prompted by a purchase of woad dyed 130s from my mate's shop- Peggs and Son in Brighton.

I really didn't need any more jeans but I'm so glad I pulled the trigger on these. Such wonderful detail and the fit is perfect- knocks socks off my Samurai, Eternal, MiJ Evisu and Studio Darts! Will post fit pics and evolution as soon as I get new camera sorted- the missus accidentally broke the last one.

My Tender obsession starts now- I'm already eyeing up the woad dyed twill Guards jacket...

Link to comment
Share on other sites

^^thanks for the nice comments! as i've said before, it's really a pleasure to hear from people who are enjoying my things. Crip Pierre, thank you, woodworking to come....

I've had a few queries about the watch, so i thought I should put up some pictures and a bit about it. unfortunately i don't have any making photos of this one, the watchmaker wasn't keen on me taking pictures. I can, however, show some pictures of my own, with it's worn-in strap:

7468881364_13af16be22_z.jpg

To start with the dial design (which is a really fun project to work on, and much harder, graphically, than I'd expected), it's a combination of various elements from classic watches. First, giving the watch it's name, is the 'hands-on' rotated dial. This was used on a few early wristwatches (as opposed to pocket watches), marketed to drivers. Notably a Vacheron & Constantin (sic, at the time) made in 1921, but designed in 1919:

7473014598_188ece8aa6_n.jpg

The angled dial means that you don't have to lift your arm to a right-angle in order to read the time, rather the watch is straight with your hand at a more natural position. It took me a couple of days to get used to, but I've been wearing mine almost every day for a few months now, and if I switch back to my 'regular' watch it seems really unnatural.

7468905004_3ea445fb65_z.jpg

The numbers at 3,6, and 9 make this an 'explorer dial', named after the rolex explorer, which is a lovely watch in my opinion, with not many changes made through its production. It's often claimed that the explorer was the first watch to the summit of mount everest- there's a lot of disagreement about this, and in fact I believe the rolex worn was a regular oyster, while it's possible that another watch entirely made it up first. Of this (hopefully) more later ;)

The outer train-tracks register is I hope self-explanatory for Tender. The case is a solid stainless steel oyster-style, and wears fairly small (as a 1950s-60s watch does) thanks to the high-domes acrylic crystal, which slightly magnifies the dial, as well as concentrating, visually, on the centre. The hands are blued and lumed pencil shape.

The movement is a swiss 17-jewelled (ruby) manual wind, decorated on the bridges with little pits similar to pearlage. The power reserve is about 48 hours, and mine's keeping excellent time.

7468893808_4a4a812249_z.jpg

The strap is a NATO made in England from Tender's English wattle-tanned leather, with an English cast solid brass buckle:

7468902320_b128ebd3c9_z.jpg

NATO straps are cut in a single piece, and were originally designed to be worn with watches with fixed wire lugs, and to be extendable to be worn over uniform sleeve. This strap, however, is cut to a standard length to be worn next to the skin. The watch itself is mounted on spring bars, so it could be worn with a regular strap or bracelet, as well.

Here are some pictures of the worn-in leather, which speak for themselves, I hope!

7468899698_2352261190_z.jpg

7468884866_f5fb6158ec_z.jpg

7468896760_b060b235ef_z.jpg

7468890726_e37e5d1365_z.jpg

Edited by rodeo bill
Link to comment
Share on other sites

Bill (or anyone), I am trying to figure out the 130 line. Are there 4 finishes: Plain, Logwood OD, Woad OD, and Logwood Purple OD? All size out the same? As a 34W, am I best with a #4?

Thank you.....

Link to comment
Share on other sites

Bill (or anyone), I am trying to figure out the 130 line. Are there 4 finishes: Plain, Logwood OD, Woad OD, and Logwood Purple OD? All size out the same? As a 34W, am I best with a #4?

thanks for asking- anything marked type 130 starts off as exactly the same jeans. There are various different finishes- to date rinsed, black logwood dyed, purple logwood dyed, yellow weld, blue woad, blue natural indigo, and unborn. All of the dyed jeans and the rinsed jeans are fully shrunk. 'Unborn' or raw will shrink down to size, as the fabric is unsanforized. If you normally wear 34"W you should go for a size 4 in any of the finishes.

I hope this helps!

Link to comment
Share on other sites

hi, are you ever likely to do the watch straps separately?

could well be- i currently only have enough straps for the watches going to stores, and the single watch left on the trestle shop(!), so there are none spare to sell separately. There might well be some if and when there's a future production, but probably not for a little while. sorry not to be able to help for now

Link to comment
Share on other sites

I've been wearing my pair of Tender boots for coming on for a year now, and they've treated me very nicely! They recently had a resole, and to celebrate they got taken on a weekend in the woods, and weren't treated especially well.

before:

7487251054_2fac084b3f_z.jpg

7487494710_14382a3ec5_z.jpg

the leather's a bit dry and scuffed, especially around the toe, so it's a good time for a bit of Tender Co. Boot Grease!

7487483070_d7f375abf1_z.jpg

this is pure mutton tallow, and is the exact stuff used in the final greasing of tender's leather at the tannery. here it is in use at the tannery:

7487537994_0ab81d6ab8_z.jpg

7487542382_96a5006196_z.jpg

but here it is nicely potted up...:

7487480640_688896a0b4_z.jpg

I applied a generous amount all over:

7487477560_ccfe39db30_z.jpg

7487470210_fedd351573_z.jpg

half way:

7487462950_a226bb541e_z.jpg

and here they are now!:

7487452370_4113f68fff_z.jpg

Link to comment
Share on other sites

^^melting it down to pour into tins, was, a bit ;) but using it's fine. You could also apply it with a cloth, but i find that because the tallow is absorbed quite readily into the leather you don't end up with much on your hands. It certainly compares favourably to the other leather conditioners I've used, not least because it doesn't get at all sticky

Link to comment
Share on other sites

In some ways these come a bit late, but some people may have seen the printed Ts from tender SS12 (there are still a few around and available). They were done with illustrations by this man:

7515009084_a167b86be2_z.jpg

Chris Brown was one of my tutors when I was a student at Central St Martins doing menswear. His day job, though is as an illustrator, mainly with linocuts. I had a few bandanas printed up with the graphics which we did for Tshirts, and I went over to Chris' house a few weeks ago for tea and for him to sign the artists' proof bandanas, one of each for sale at the trestle shop. Here are a few pics of Chris, his studio, and signing the bandanas :) :

7515008970_cec42f5abe_z.jpg

7515009232_81309234bd_z.jpg

7515008390_848f79e00c_z.jpg

7515098866_282e586d4f_z.jpg

7515009908_68764d0e1c_z.jpg

7515009796_c591150df4_z.jpg

Chris has a lovely book out, an alphabet of London, which is well worth a look. There's also a very nice interview with him from a couple of months back over at llustre, which is a great site worth a click around anyway.

Edited by rodeo bill
Link to comment
Share on other sites

Another new project for the Trestle Shop, and also for the main collection (things will start appearing in stores over the next few weeks), has been ceramics. I've been interested in pots for a while, and this seemed like a good opportunity to bring a new hand-making technique into the mix. Tender's mugs, beakers, jugs, and bowls are hand thrown in england from natural uncoloured clays: Red from the North and white from the south!

Here's the pottery:

7522292686_b0b36698d5_z.jpg

7522294004_a08ccc0fcf_z.jpg

and here's the Master Potter, Nick, at his wheel:

7522317512_39608d0ee3_z.jpg

These pictures are from the first time I visited Nick, and he showed me how he would throw my mugs. The photos are pretty self explanatory, and show what a personal and hands-on (literally!) process it is:

7522297072_0f9d2e7f25_z.jpg

7522304838_fe3427275d_z.jpg

7522303224_2cbb2f682c_z.jpg

7522300520_577efa1dbc_z.jpg

7522298922_4a7f482261_z.jpg

One of the things which i wanted with these pots was to have a flat, unglazed, base, with a tender 'plautus' mark stamped into it. this means that the base has to be quite thick, strong enough to take a stamp into the semi-dry clay, but not so thick that it might have air bubbles in it, which would explode in the kiln. Here;s the test pot cut in half, showing the section:

7522299390_e3f513b999_z.jpg

7522299112_b543e49047_z.jpg

Link to comment
Share on other sites

The handles are 'hung' by hand, which is the traditional way to construct a mug. Nick showed me how he squeezes a lump of clay between his fingers, and lets it flop over naturally, into the shape of a handle. The ridges from where it was squeezed between his fingers will remain in the finished mug, as will the thumb print at the bottom of the handle, where he pushes it into the clay of the mug.

7522316032_64166b658a_z.jpg

7522311642_4b3596c7ec_z.jpg

7522314654_b242a8d41c_z.jpg

7522313114_ba259b4d50_z.jpg

The next time I visited the pottery was to pick up some finished articles. Here are some coffee pots, mugs, and a beaker in situ:

7522337758_d7cec989fd_z.jpg

The thing I like most about them is the human unevenness- where there are slight ridges in the red clay, the white slip clay is thinner, revealing darker streaks. The textures too, are lovely- there are smooth glossy areas where the glaze has gone on thicker, but there are also slightly rougher, grittier areas where the texture of the clay comes through. The undersides of the pieces are unglazed, revealing the natural, terracotta, texture:

7522340378_3e0b802fff_z.jpg

I realize that this sort of thing is getting quite far away from superdenim, so I hope people are still interested- I feel like all of these types of skill and craft can be enjoyed on their own merits, by people who like the details and stories that go into their jeans :)

there are more pictures, and more information on coffee pots, mugs, and jugs, at the trestle shop.

Link to comment
Share on other sites

Join the conversation

You can post now and register later. If you have an account, sign in now to post with your account.

Guest
Reply to this topic...

×   Pasted as rich text.   Paste as plain text instead

  Only 75 emoji are allowed.

×   Your link has been automatically embedded.   Display as a link instead

×   Your previous content has been restored.   Clear editor

×   You cannot paste images directly. Upload or insert images from URL.

×
×
  • Create New...