Leaderboard


Popular Content
Showing content with the highest reputation since 08/23/24 in Posts
-
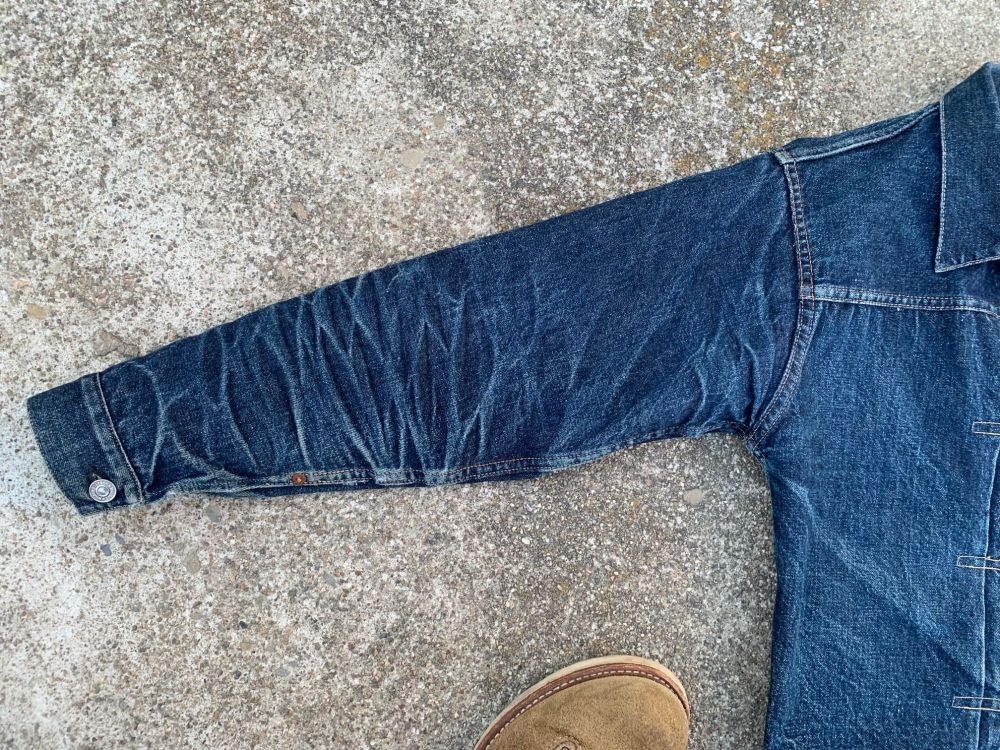
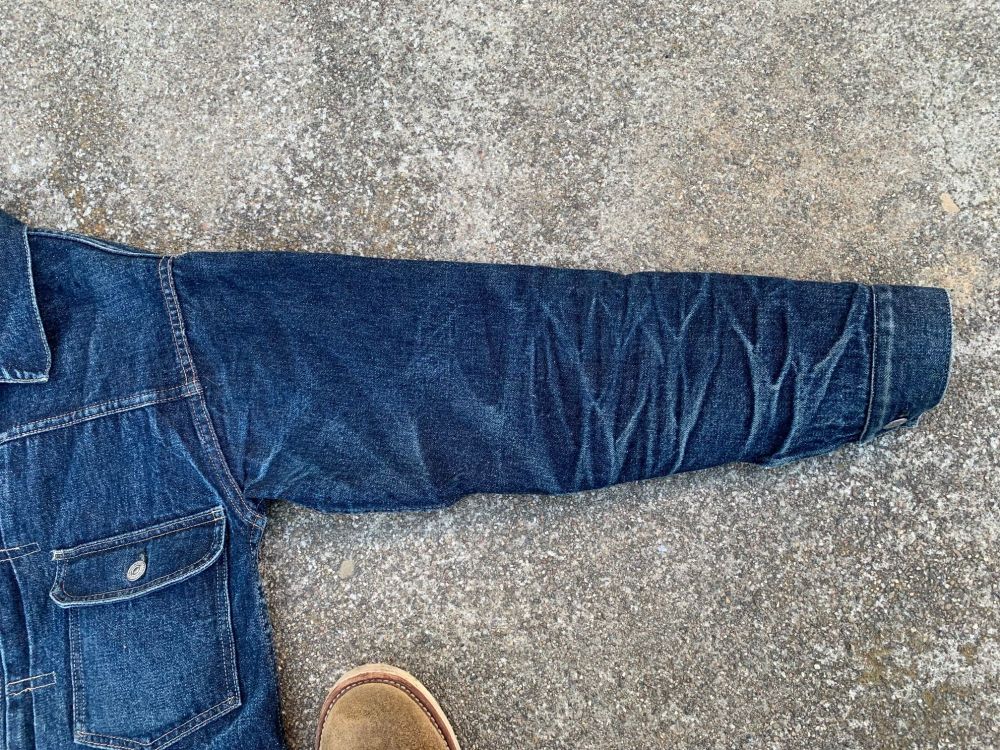
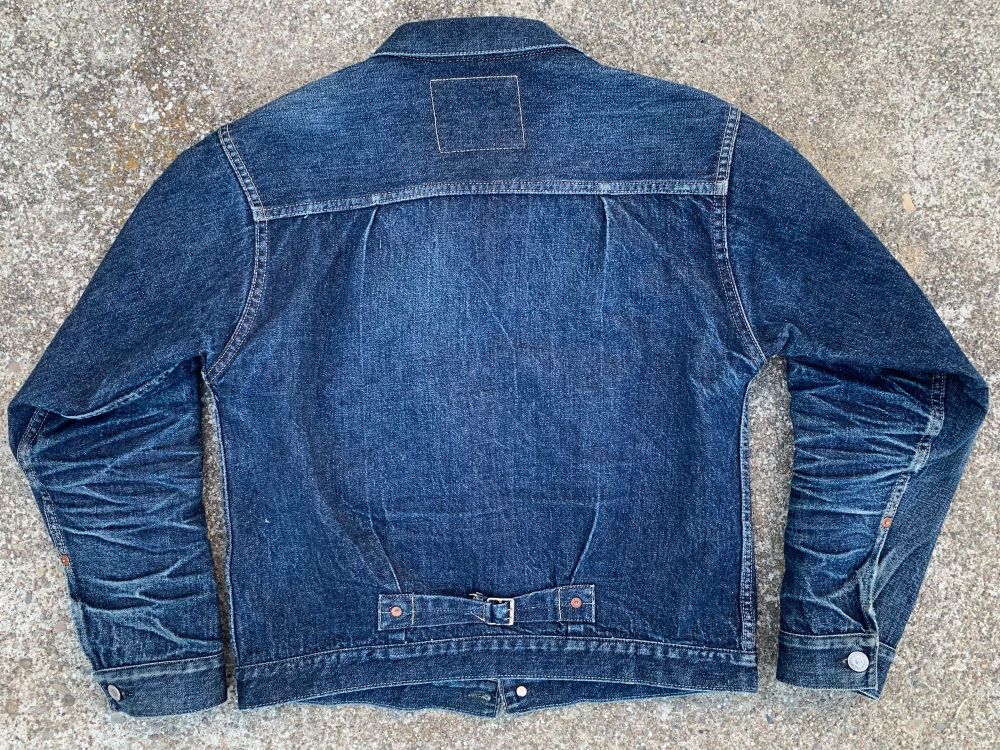
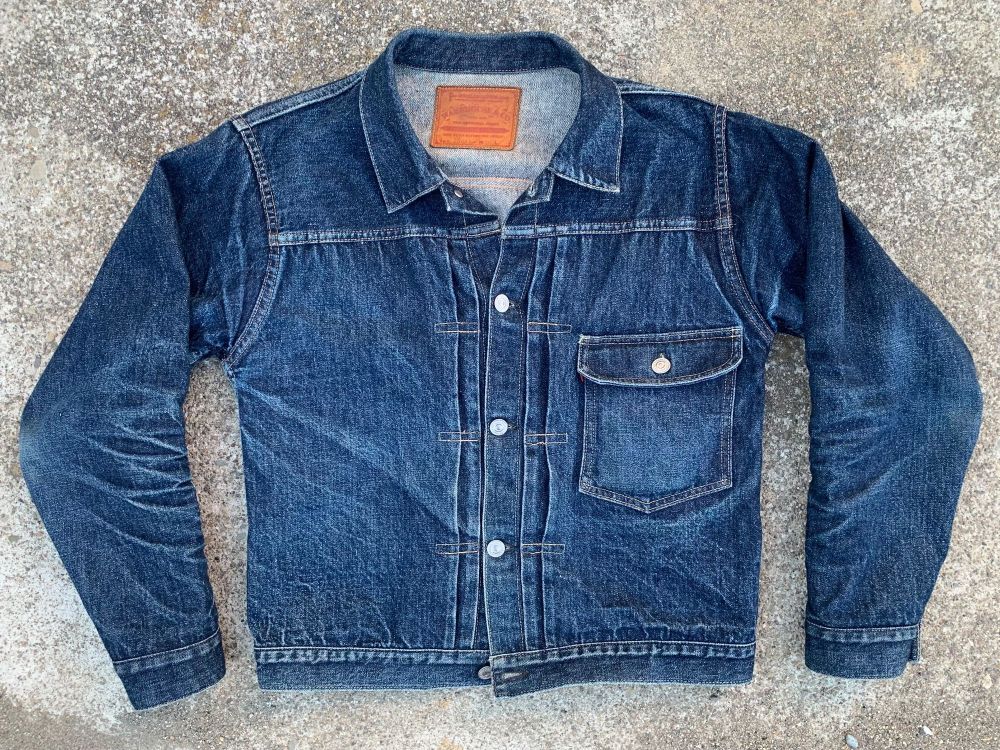
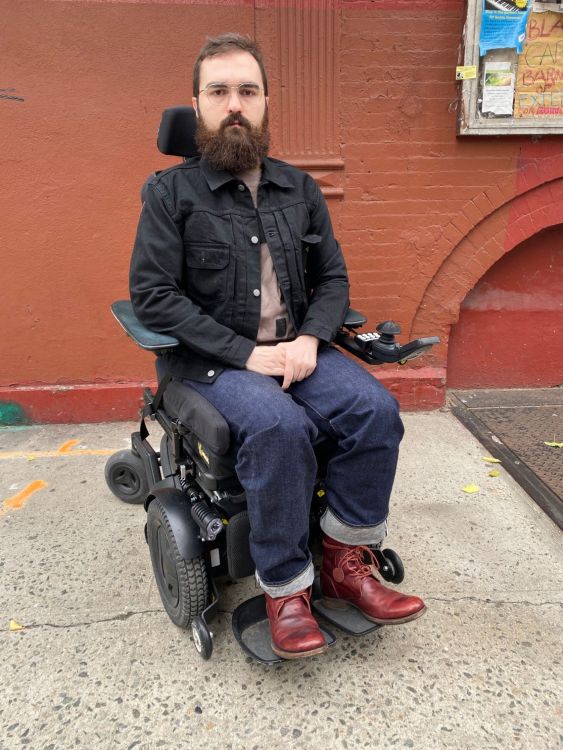
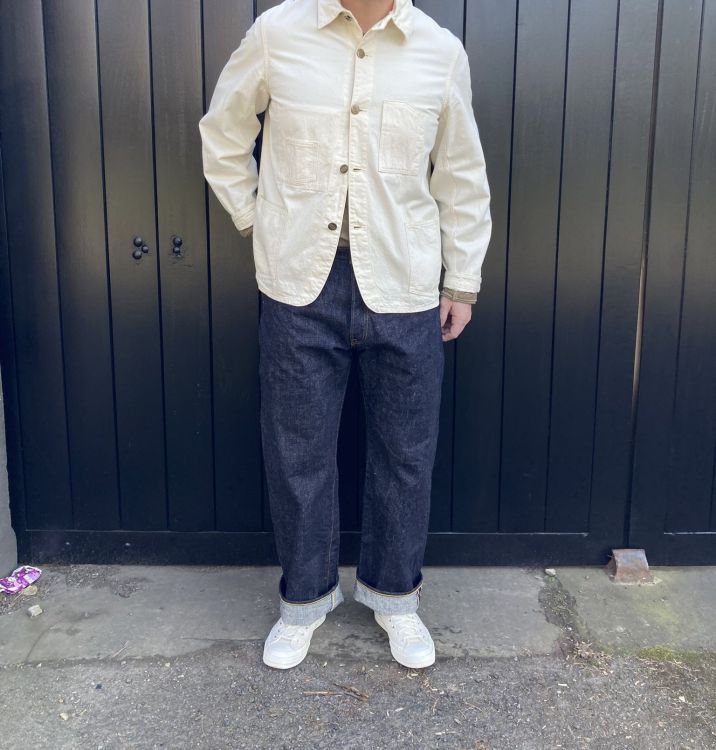
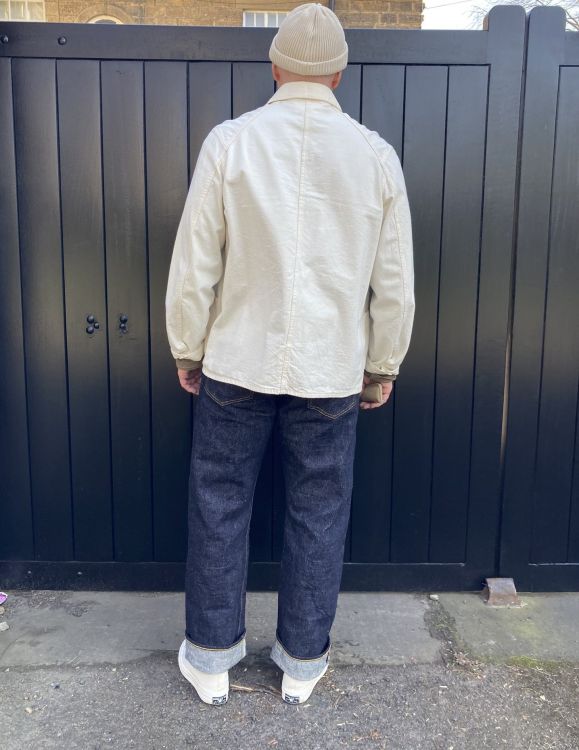
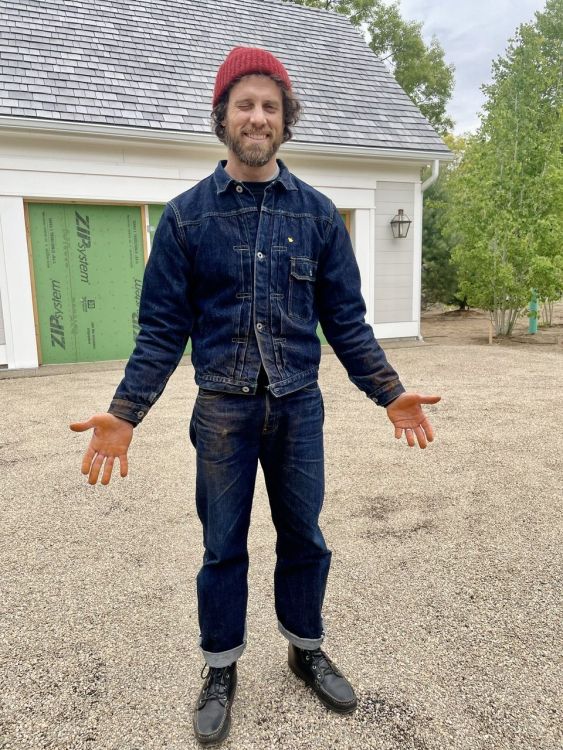
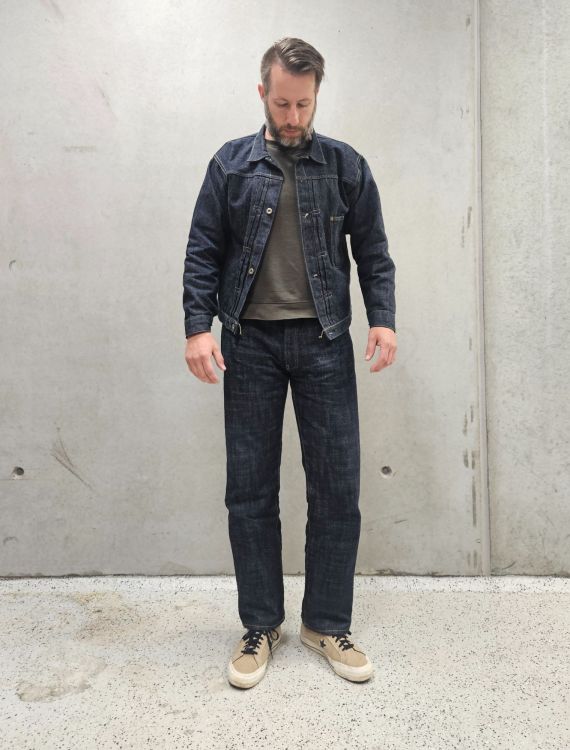
helleaux! I thought I should introduce myself now that I've finally joined. I think I've been lurking since 2021 (!) but in late 2022 suffered a stroke which paralyzed me. however, I've been working to recover ever since, and this year started wearing my old clothes again. can't really work on fading jeans right now (I like pre-lawsuit "fake" levi's repros with the arcs) but I also love jackets so I'm committed to this t-back FW 46-47 for now. the rest is very old polo.
 65 points
 -
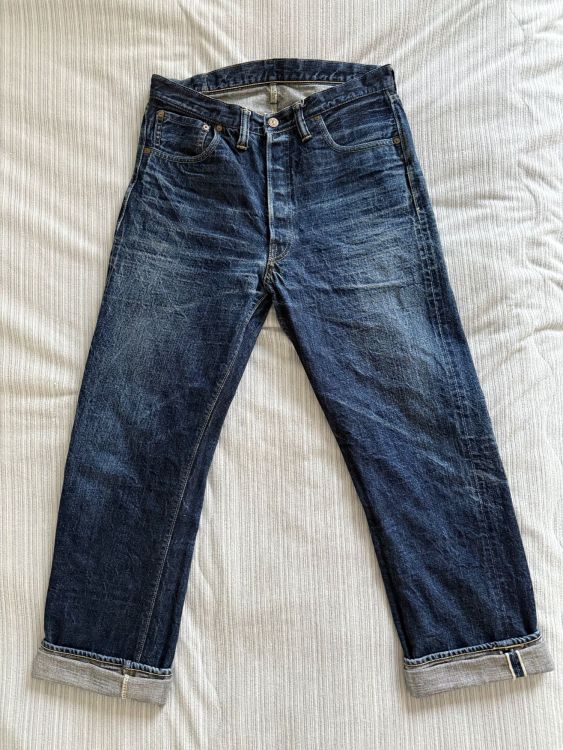
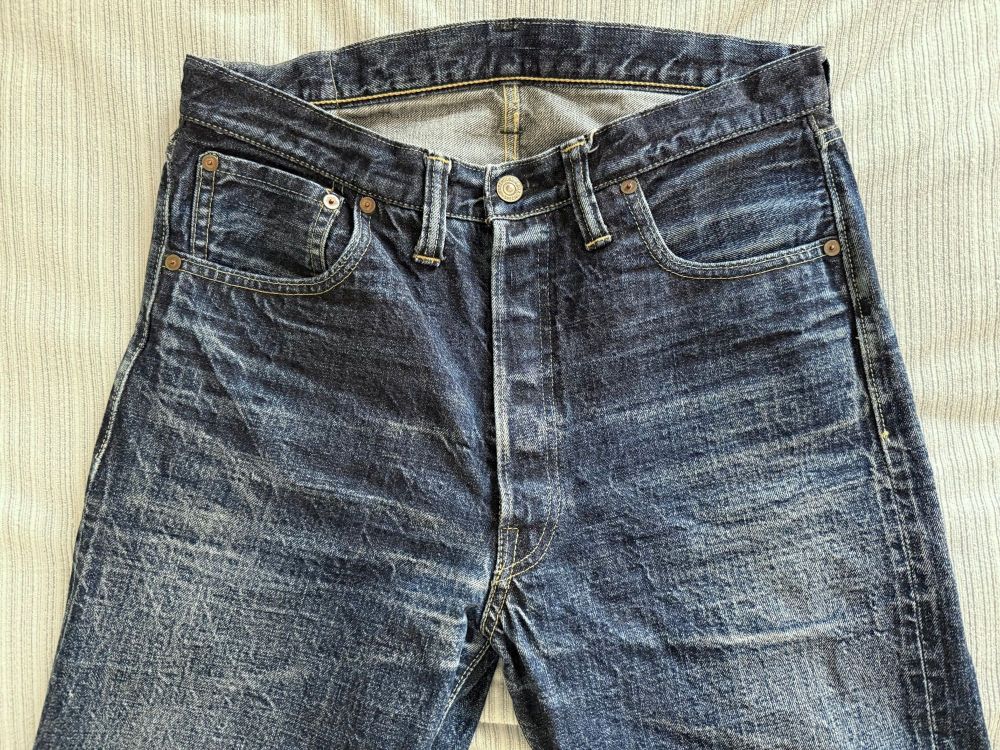
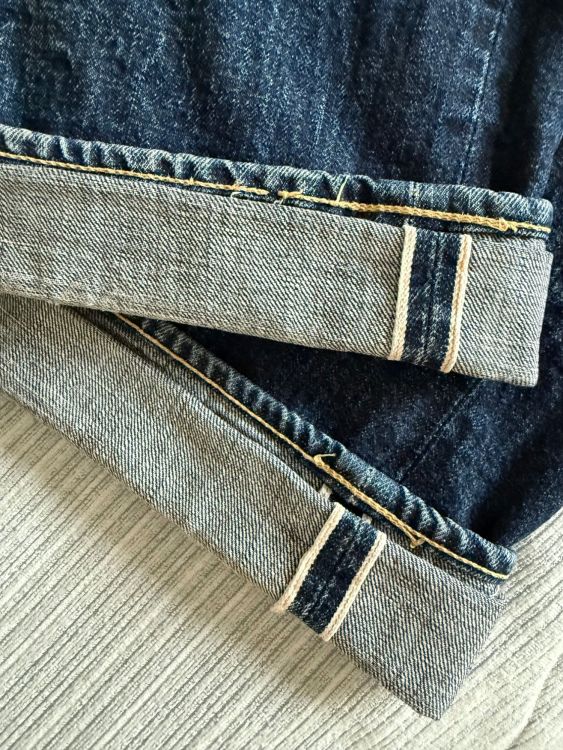
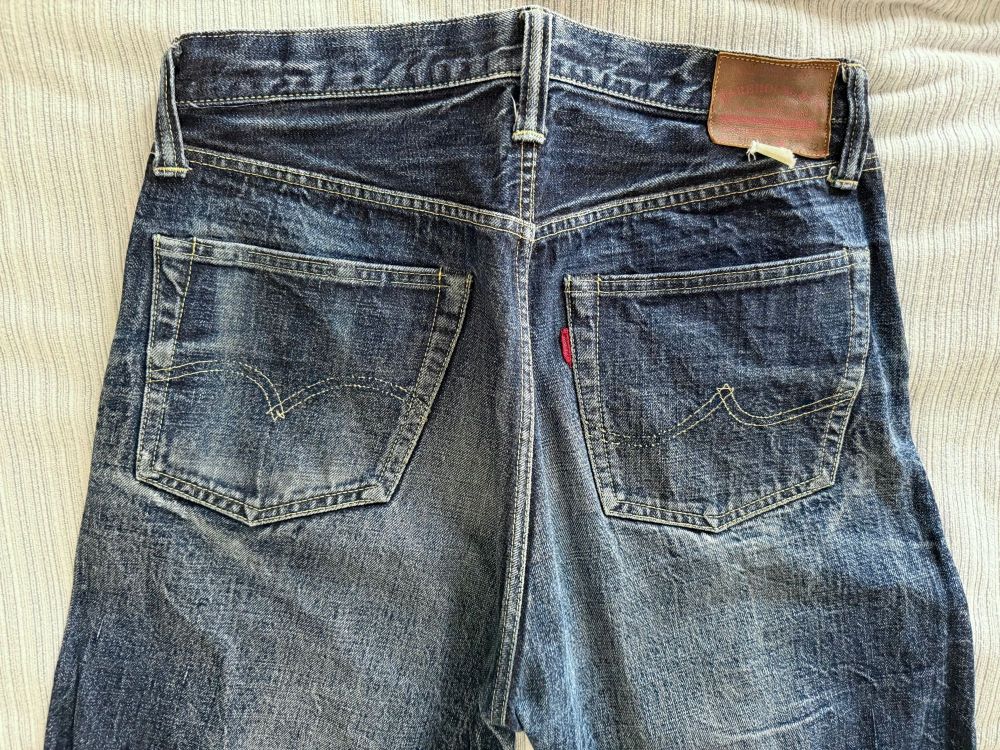
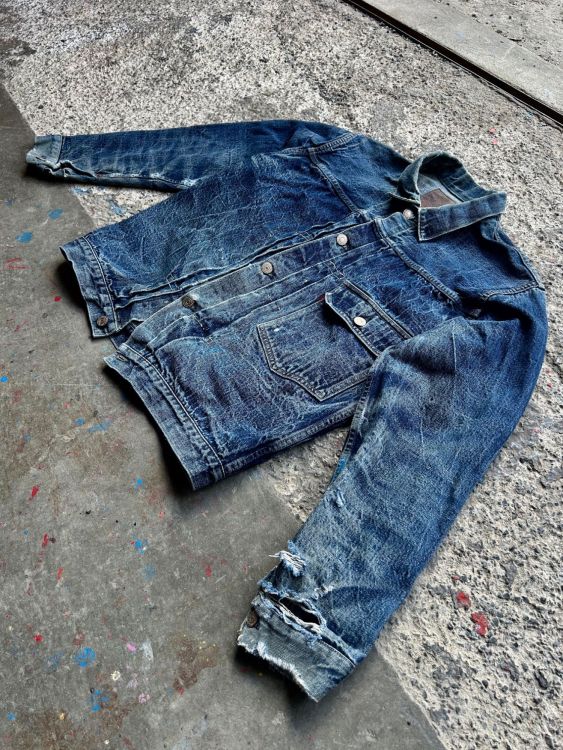
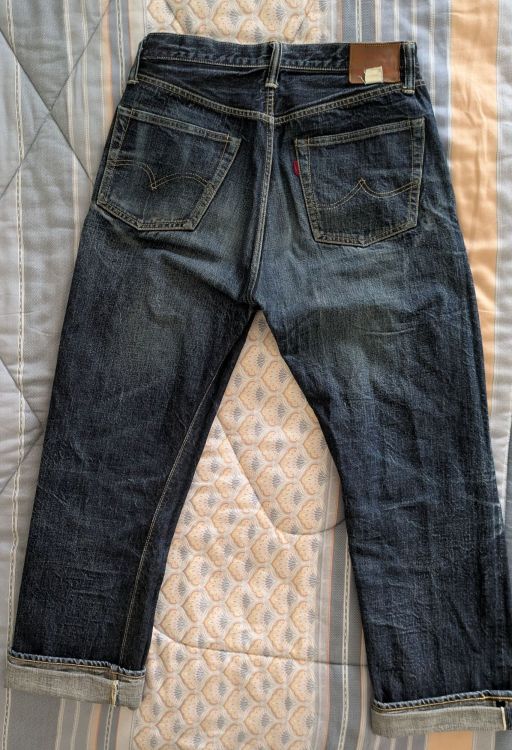
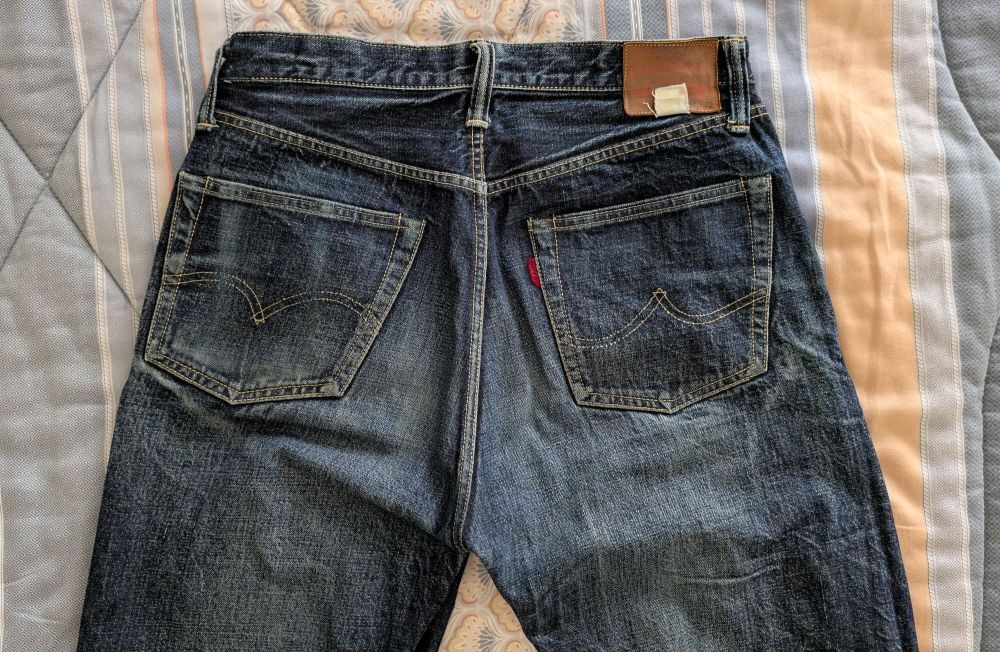
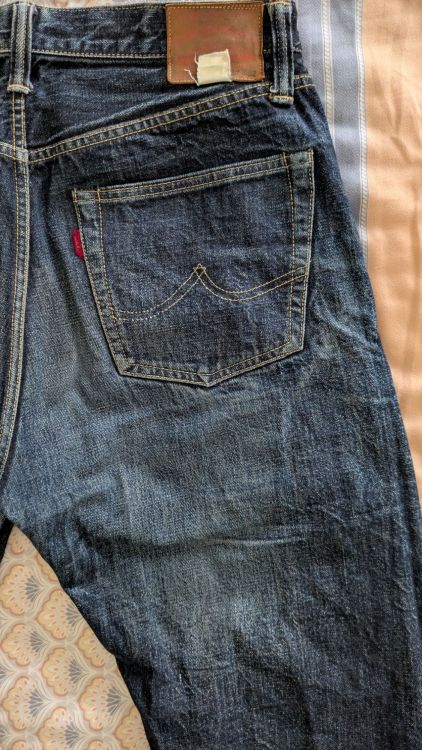
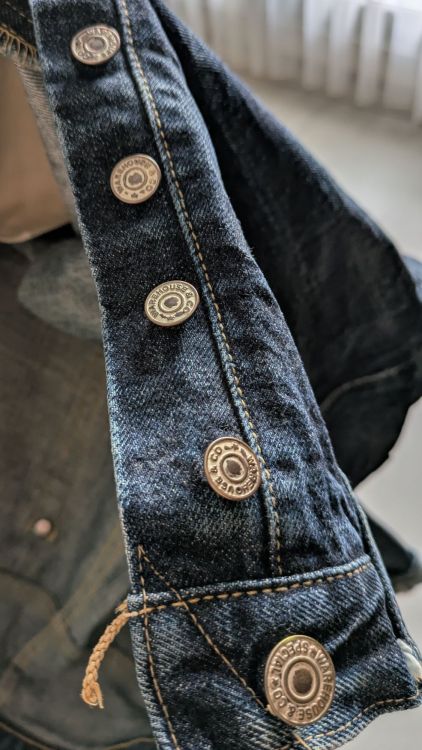
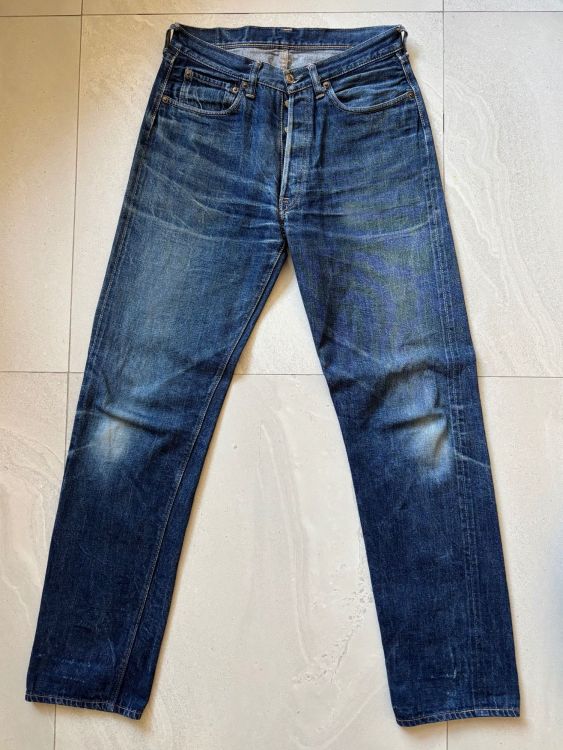
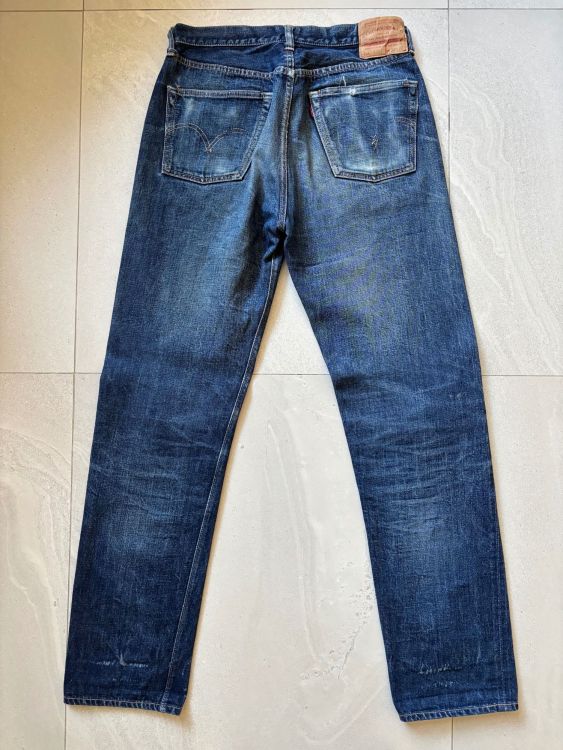
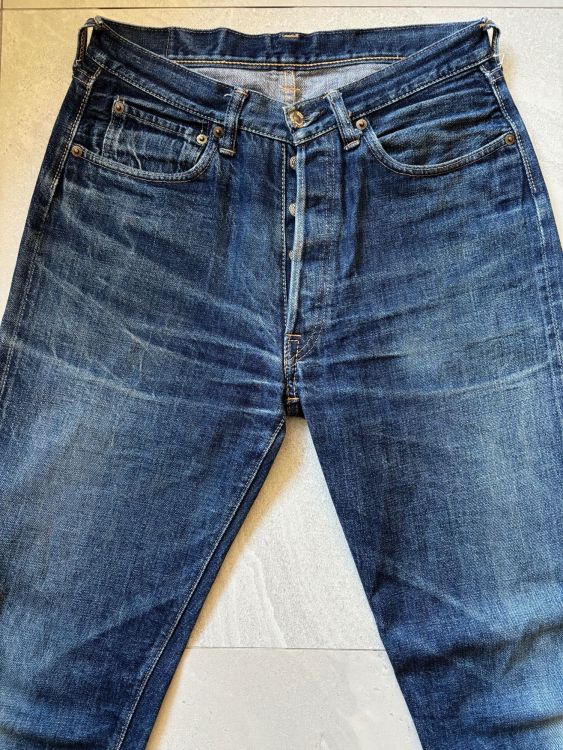
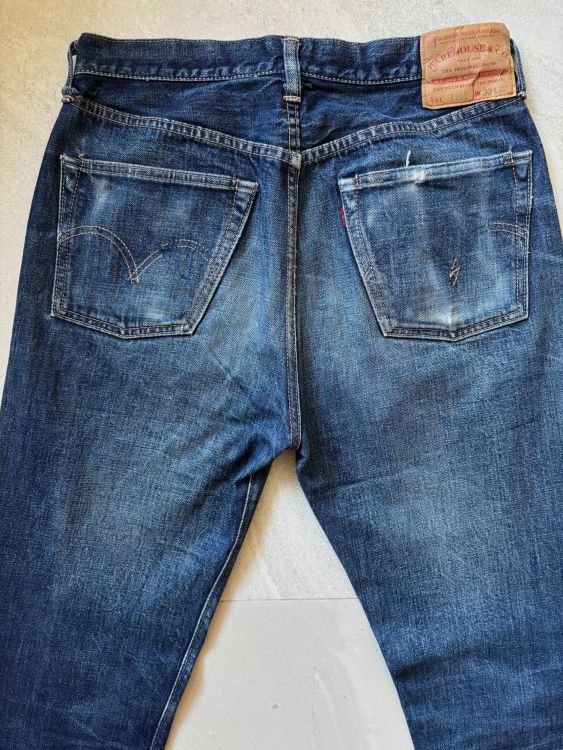
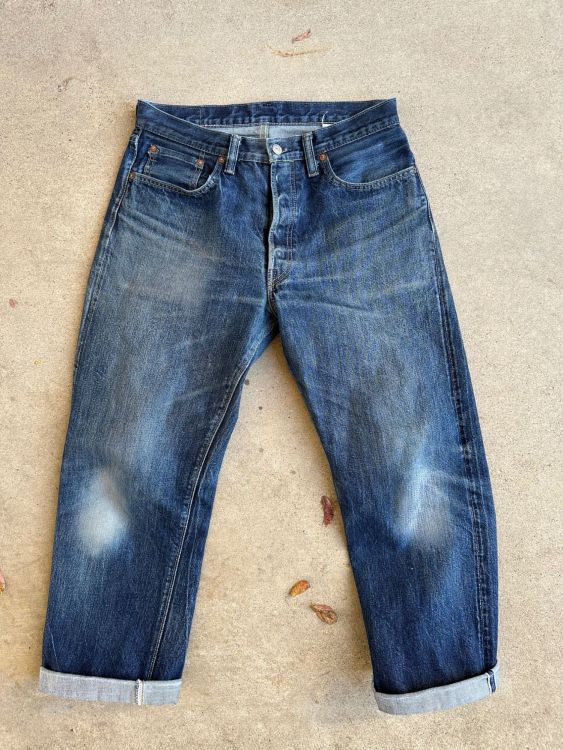
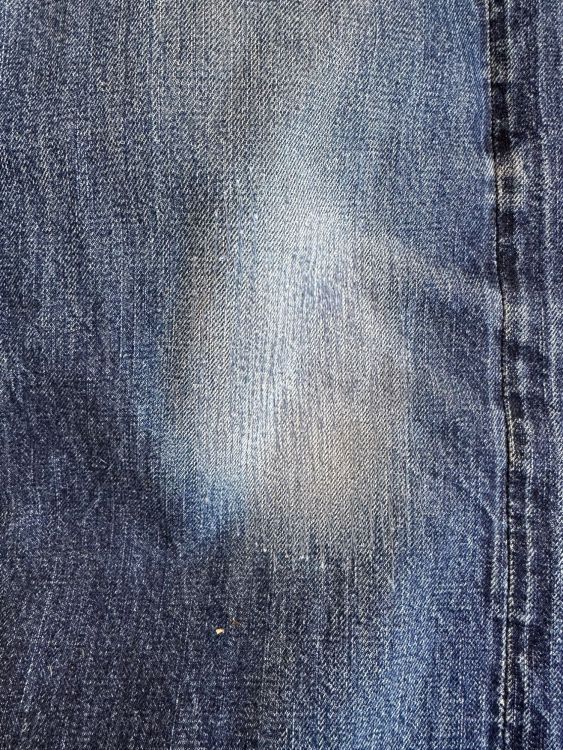
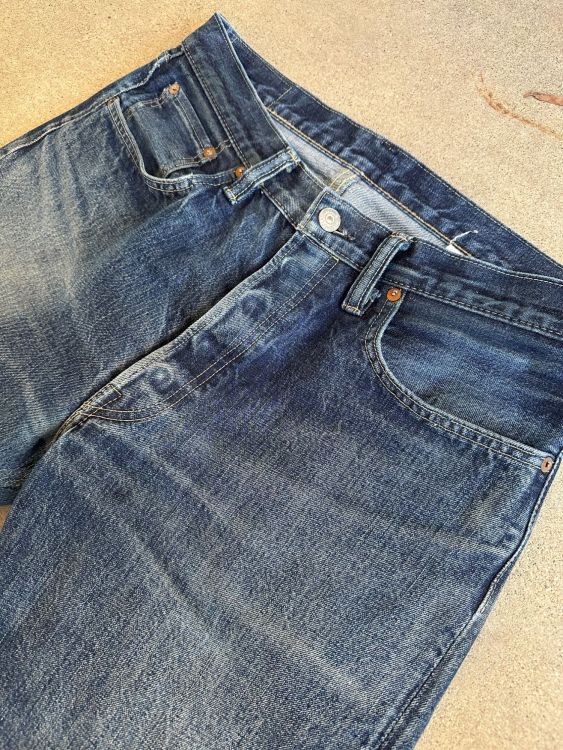
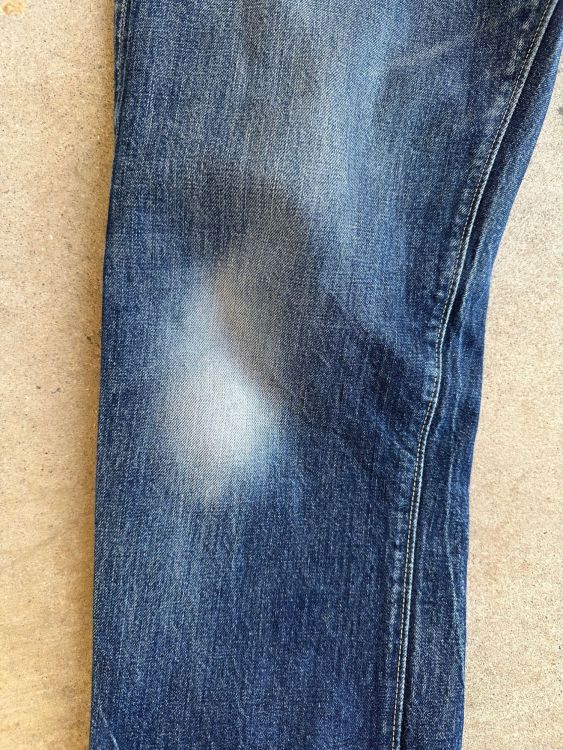
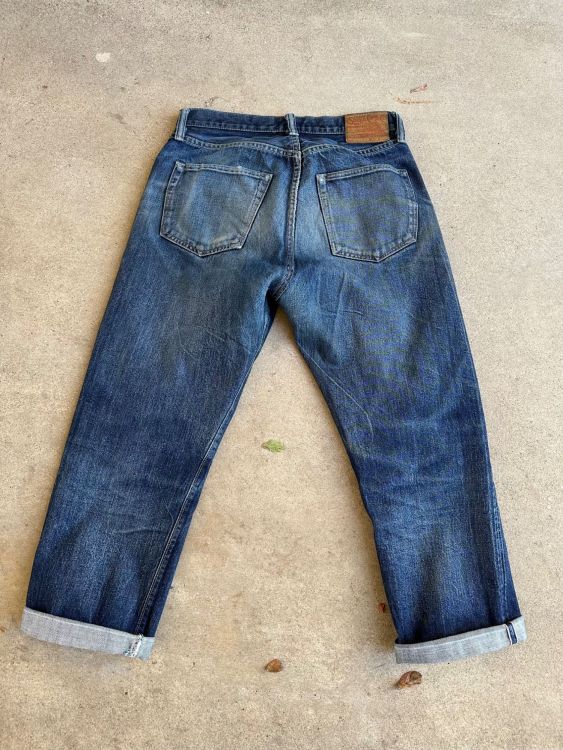
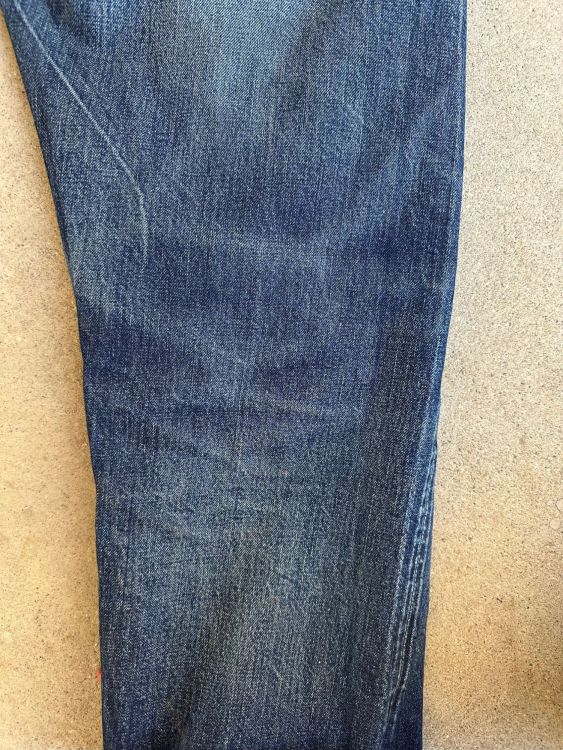
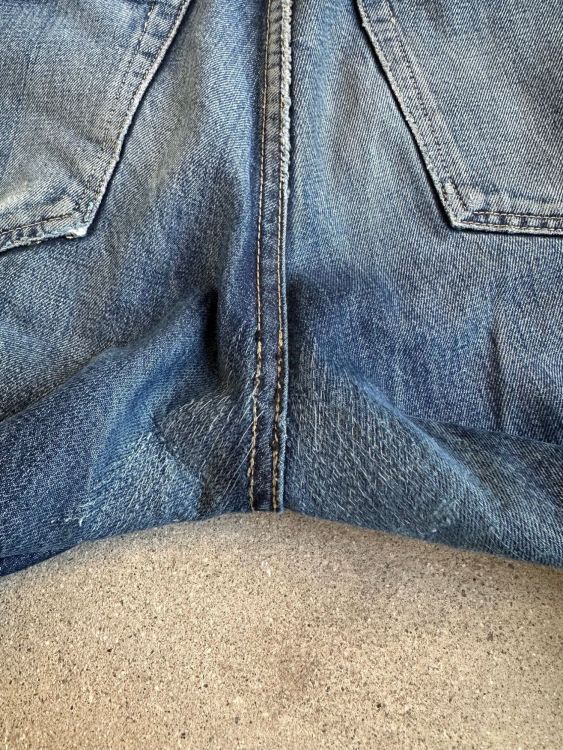
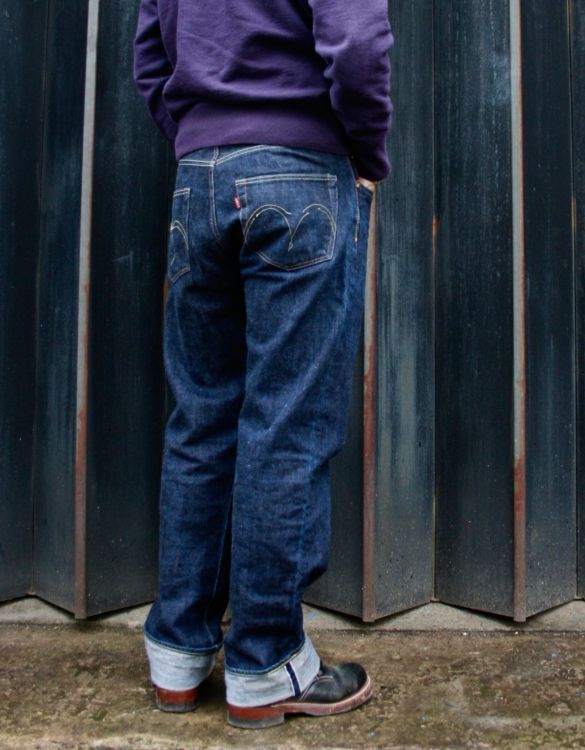
temporarily retiring this for now to focus on other pair, needless to say… incredible fabric!

 53 points
 -
CSF-46s
 53 points
 -
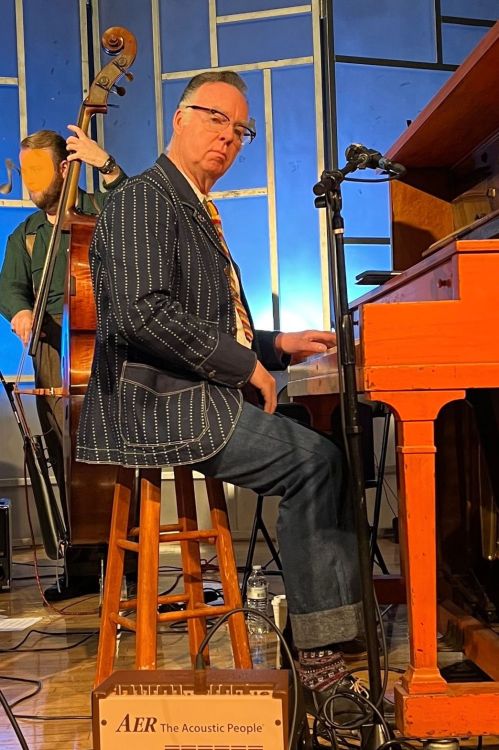
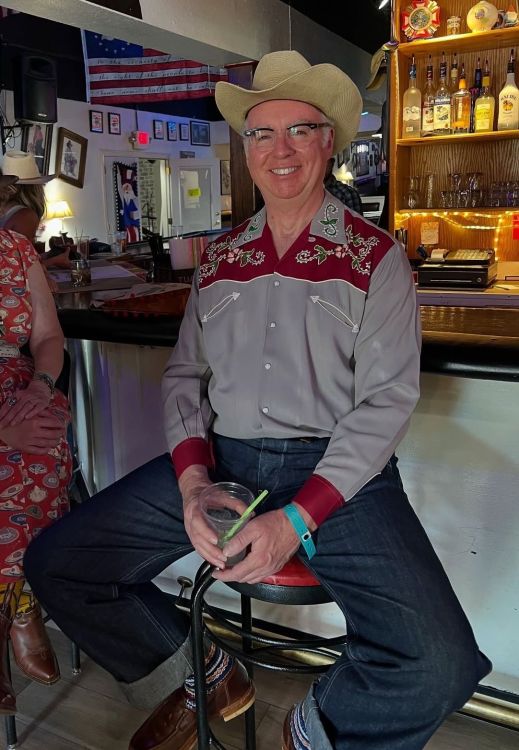
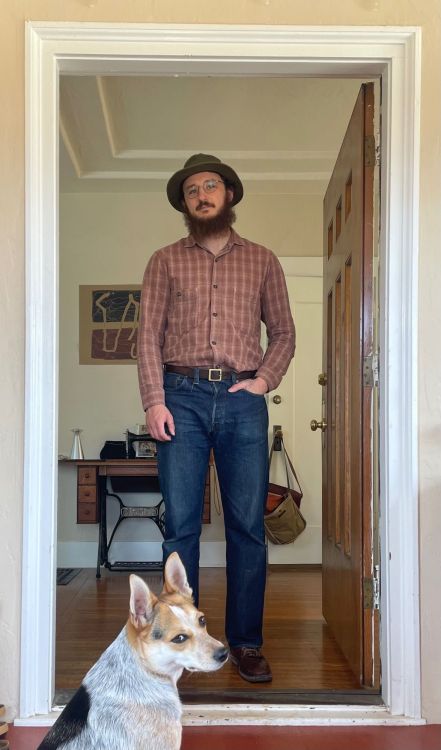
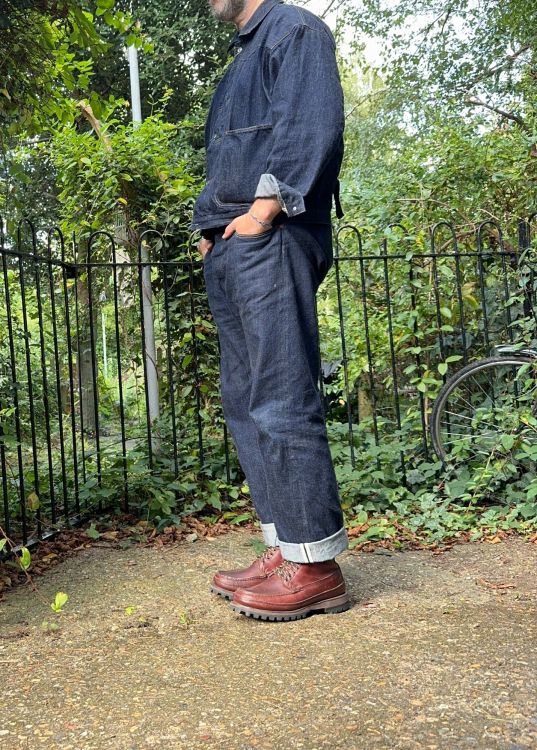
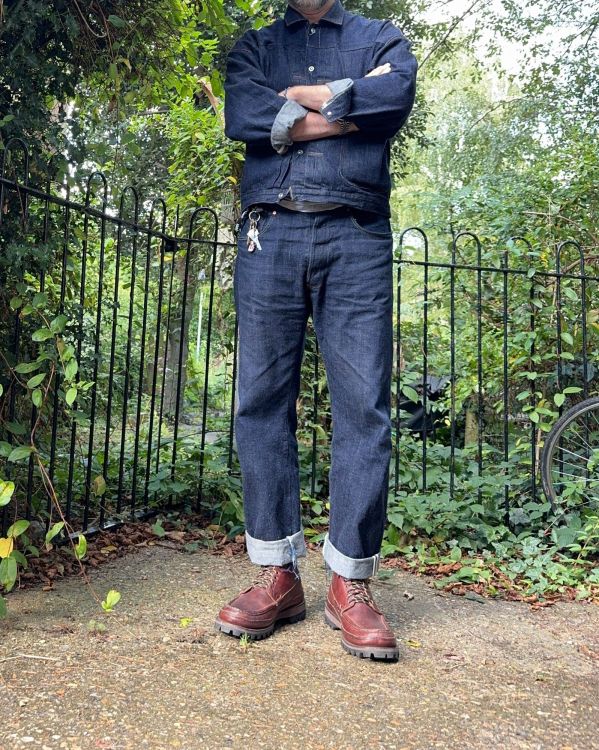
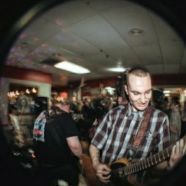
Usually I need to be in pressed suits, & such on stage but occasionally I can get away with workwear. FW, Ooe (double knee chambray), CHUP, Paraboot.
 51 points
 -
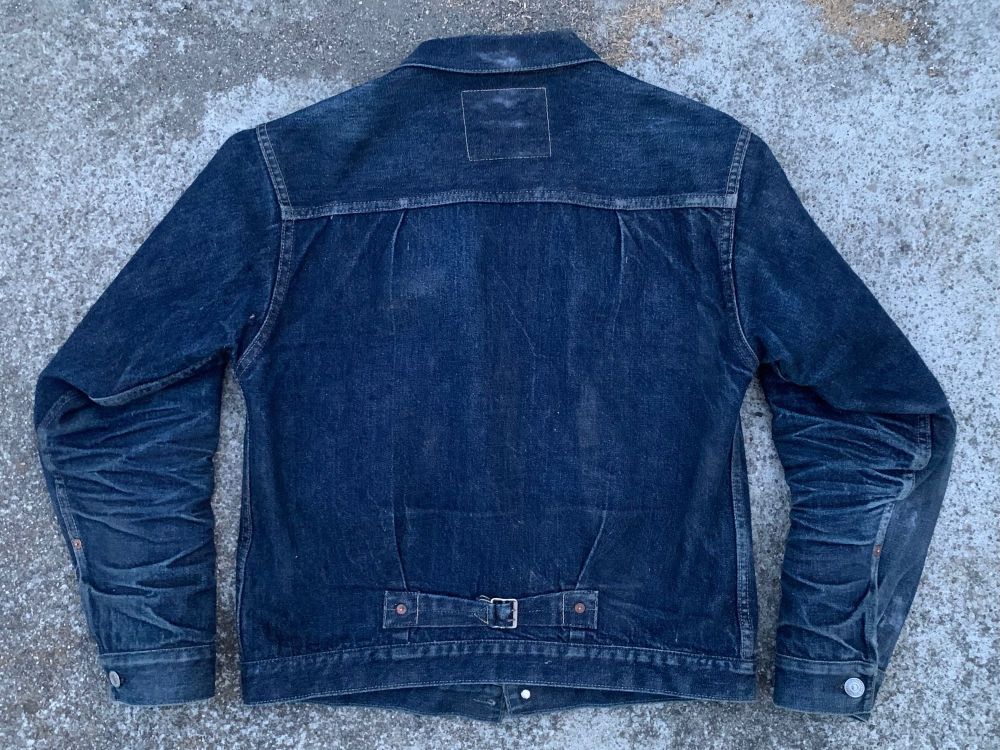
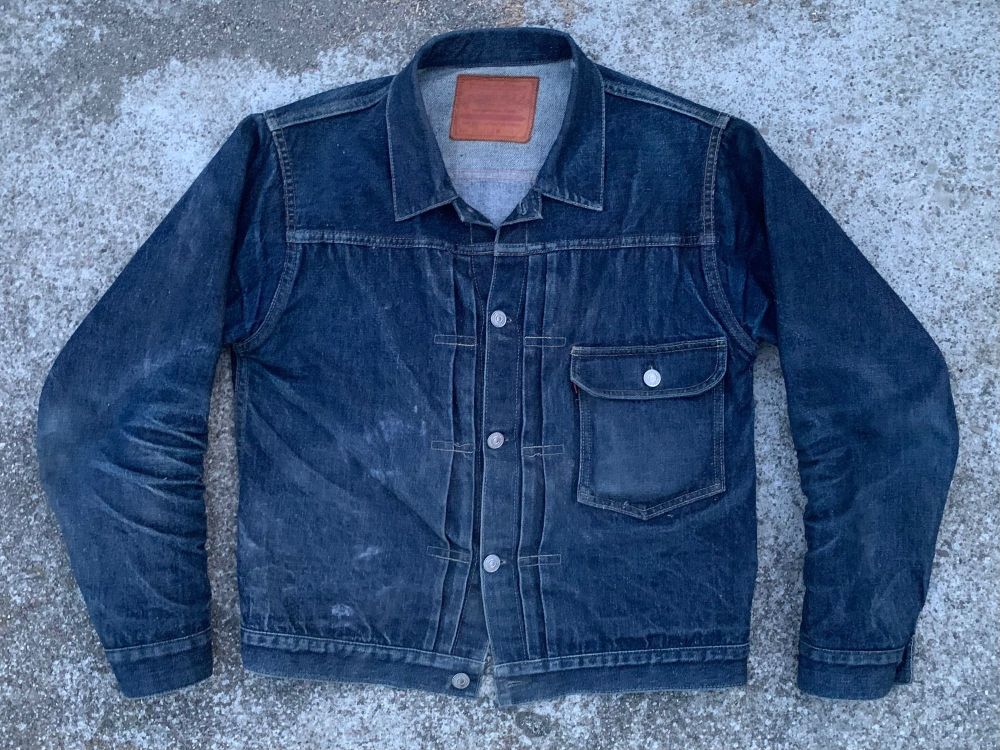
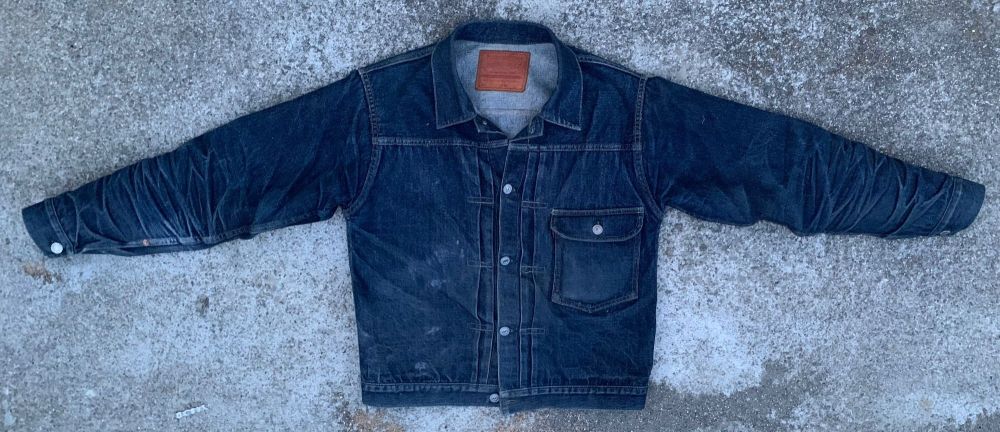
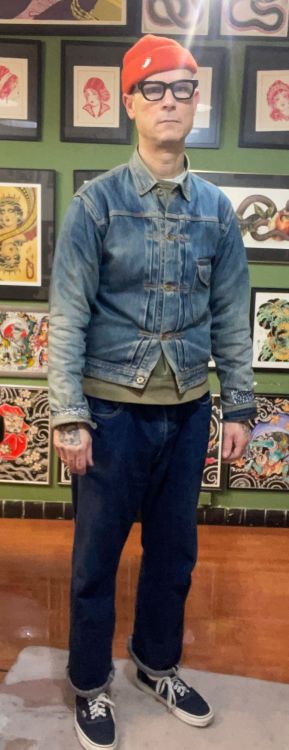
@Sugar Mountain those look great DSB 47 jacket got a machine wash last night after getting a little dirty Pre wash photos Post wash photos
 50 points
 -
49 points
-
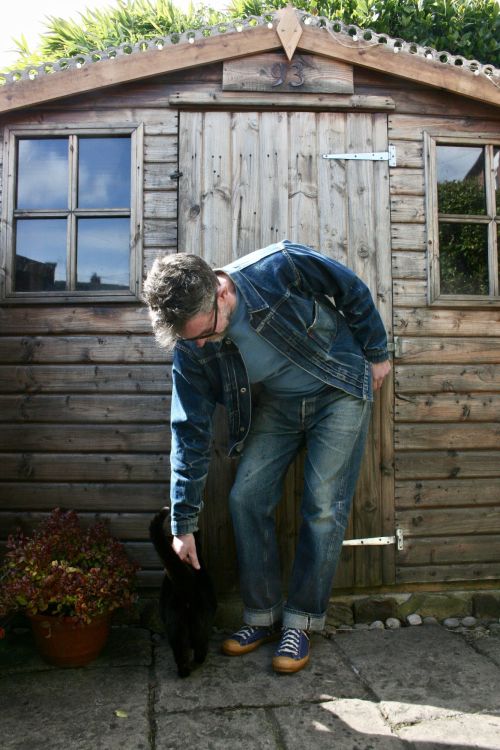
Vintage c1963 Made in USA, RayBan Caribbean LVC Valencia 506xx Vintage 1960s Champion (Running Man) Columbia University 'Department of Classics' Sweatshirt £5 Gildan Tee Freewheelers 47s J.Lofgren Sneakers ...First Attempt Ruined By The Cat
 47 points
 -
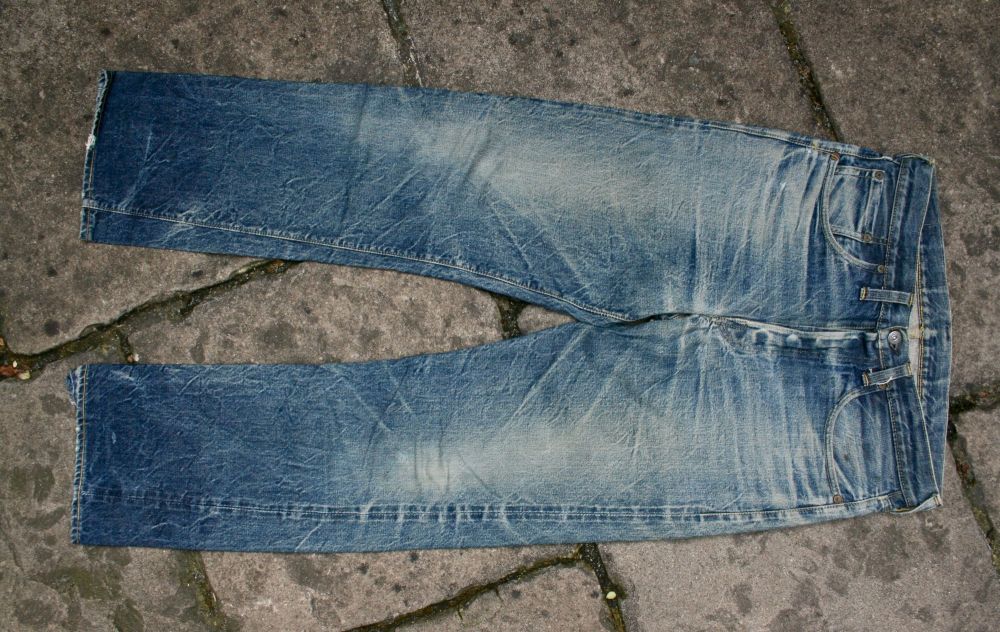
I've just updated my WH 506 flipbook with before and after wash photos ..here are some more post-wash photos besides


 46 points
 -
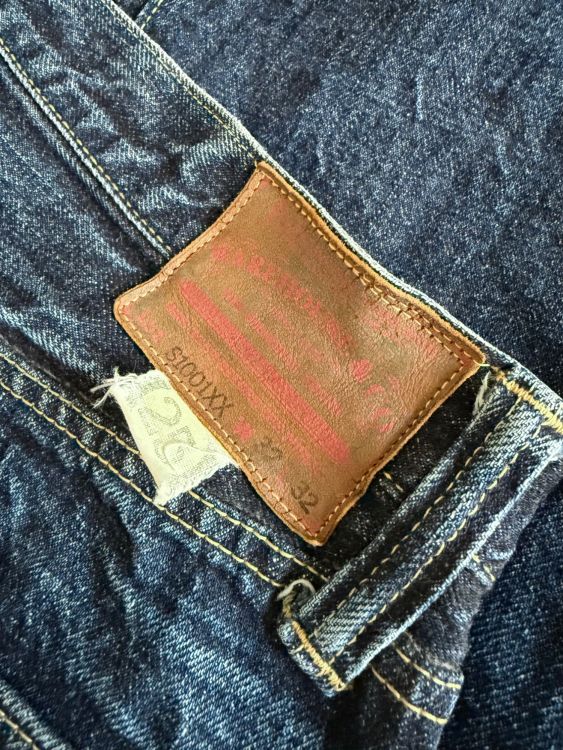
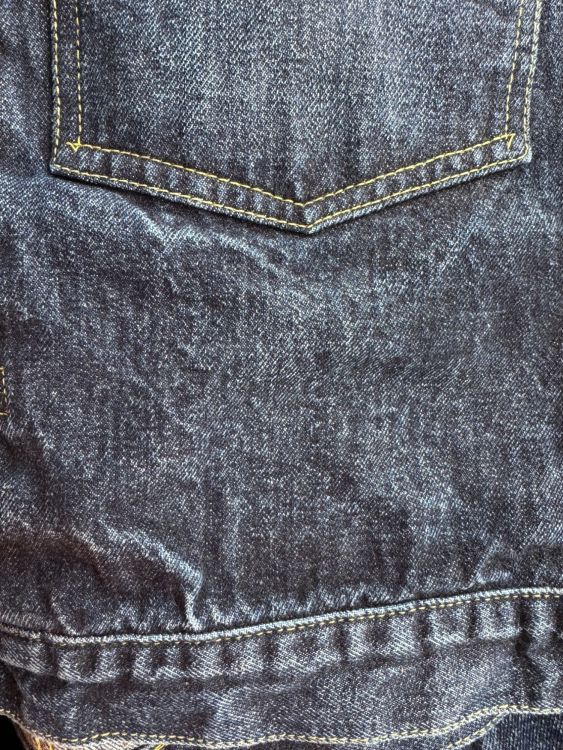
1001XX 25th anniversary

 46 points
 -
flat head + two moon + jelado + Carpe Diem bonus: Warhol’s Pink Electric Chair Disaster pinned on the back of this yacket
 46 points
 -
julius tart optical levis 507xx johng mung denim aj1 Chicago
 46 points
 -
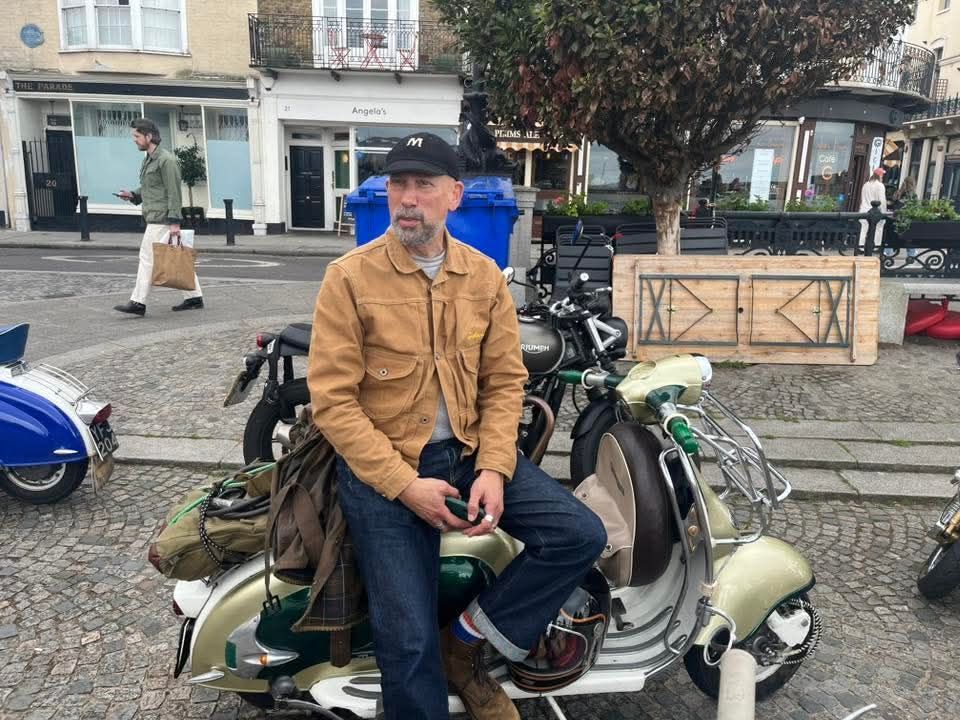
Had a ride over to Margate at the weekend. Cap, self-made Rising sun jacket Warehouse sweat Full count Red wing Lambretta.
 45 points
 -
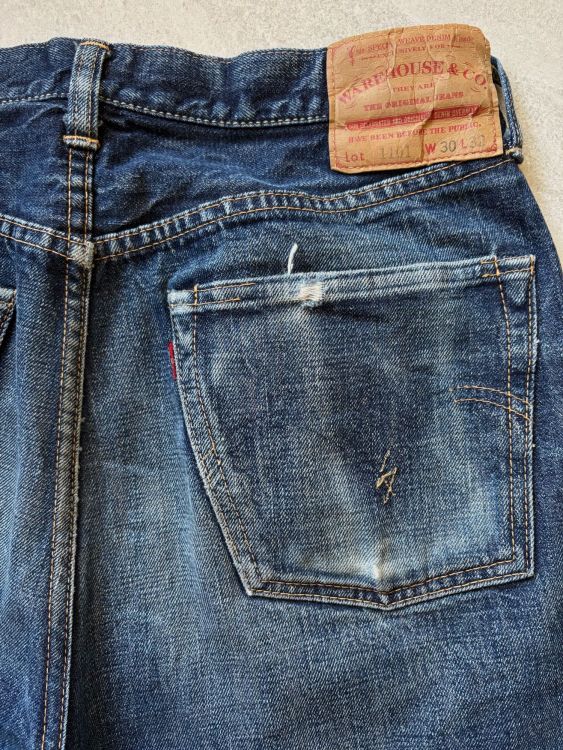
Hey all. Here are my Warehouse 1101, worn regularly for about 18 months I think. Gotta love how the Banner denim evolves. I began wearing them a little before my eldest son was born in 2017 and discovered a whole new world of knee fades upon his arrival 😌… Jumping forward a few years, I’ve started wearing them again recently so will aim to get better shots of them on here later down the line.
 45 points
 -
Pulled out some old classics today. Warehouse Tender (10 years old?) Birkenstocks
 45 points
 -
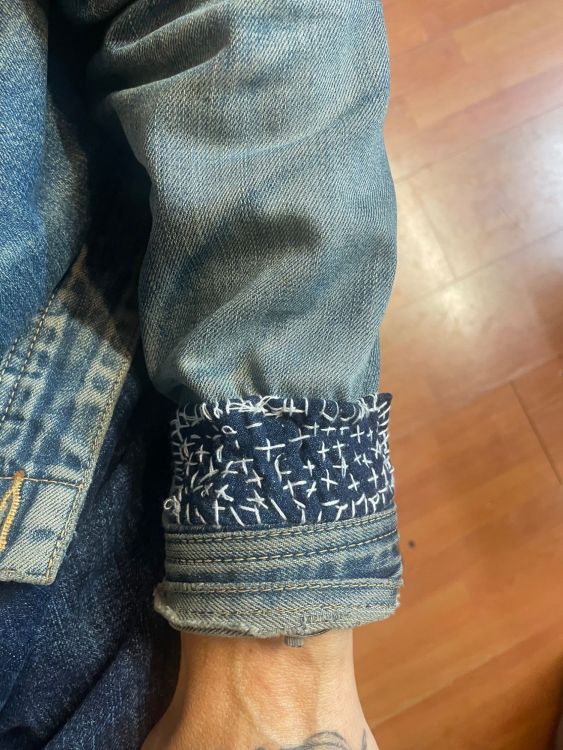
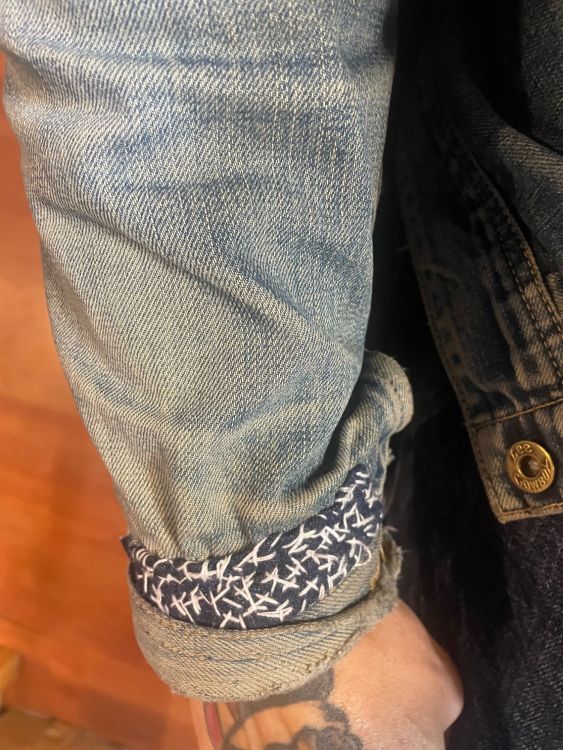
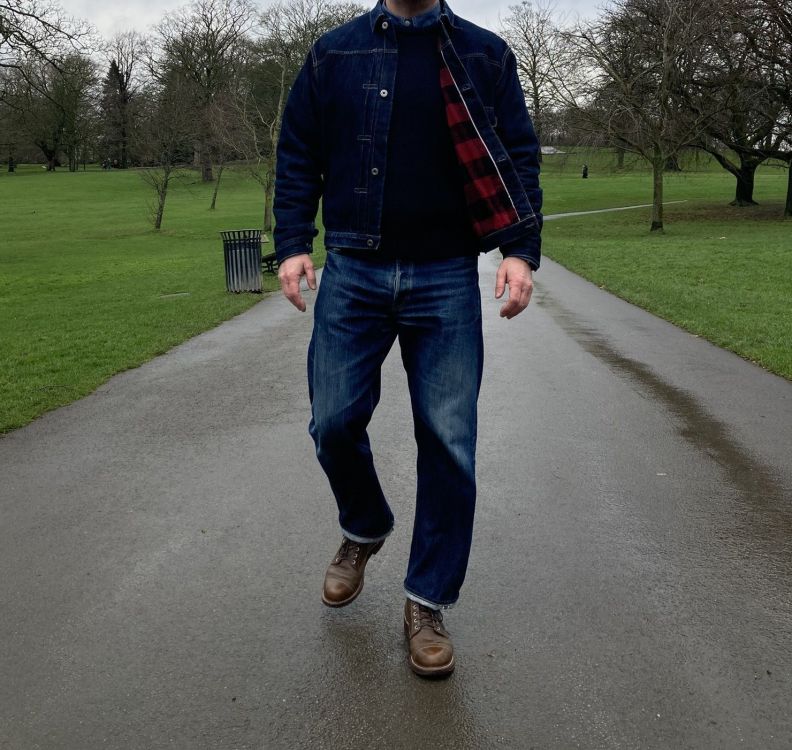
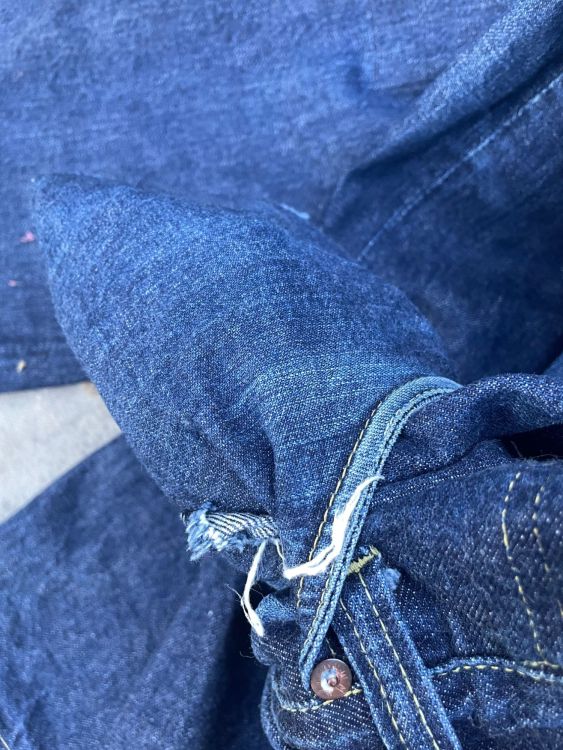
Mended the cuffs on my Lee cowboy jacket. Dirty job, needed to get donen papa nui, Lee, fullcount, vans
 45 points
 -
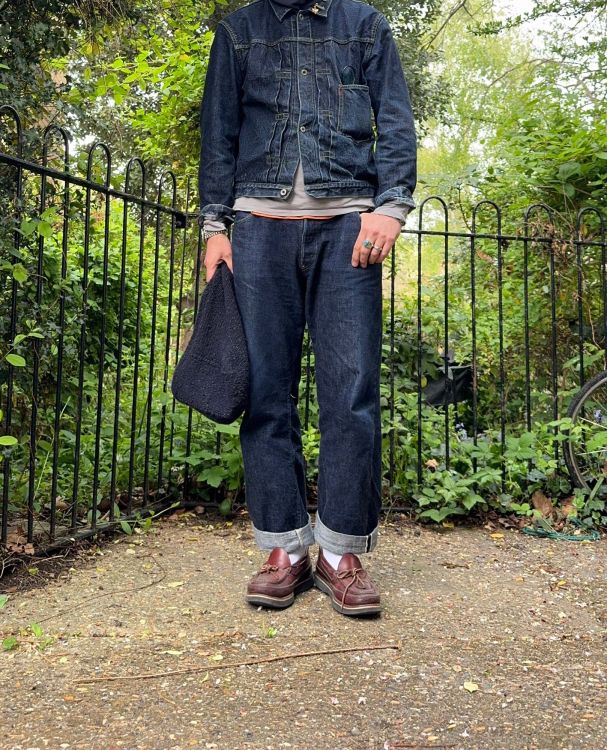
Freewheelers - WW2 tux (newly hemmed by @Mr Black), Ironalls and sweatshirt / Converse Timeline / @Duke Mantee and Rototo not visible
 44 points
 -
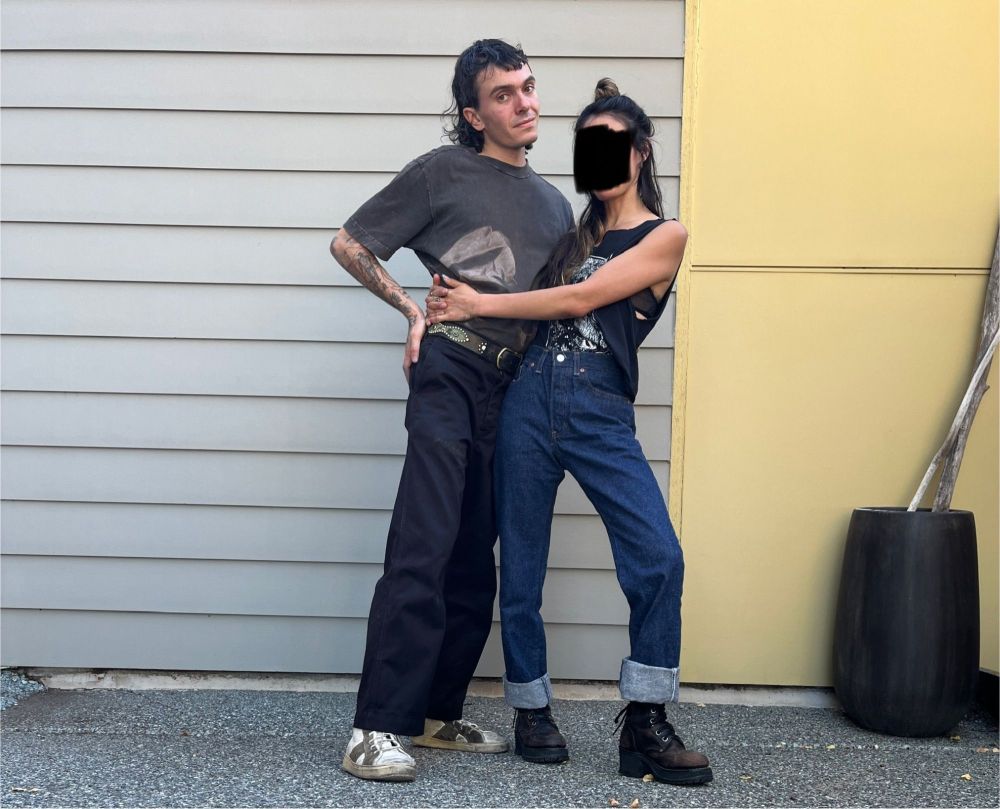
Follow up from the small questions thread (and vintage denim thread) - my partner and I both got some new pants today! I got some buzz chinos that I really like, wider than I imagined but still like the fit, and my partner got some nice dark 80s Levi’s. Don’t focus too much on my terrible haircut lol 😛
 43 points
 -
43 points
-
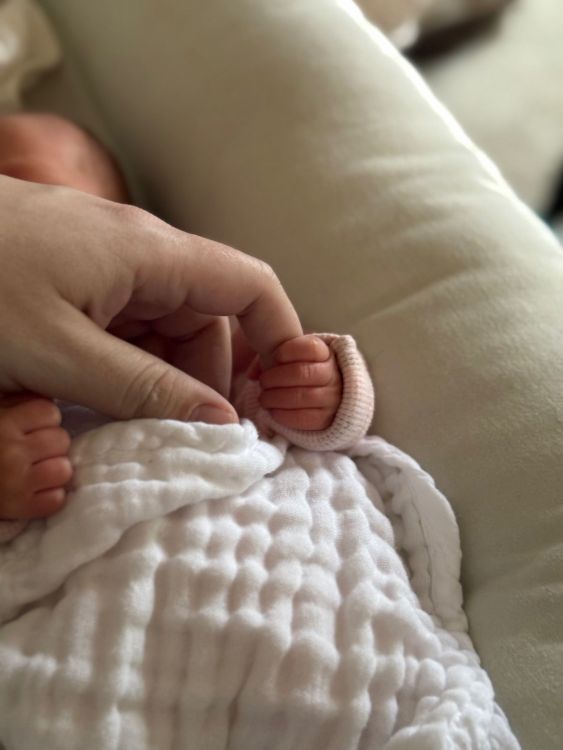
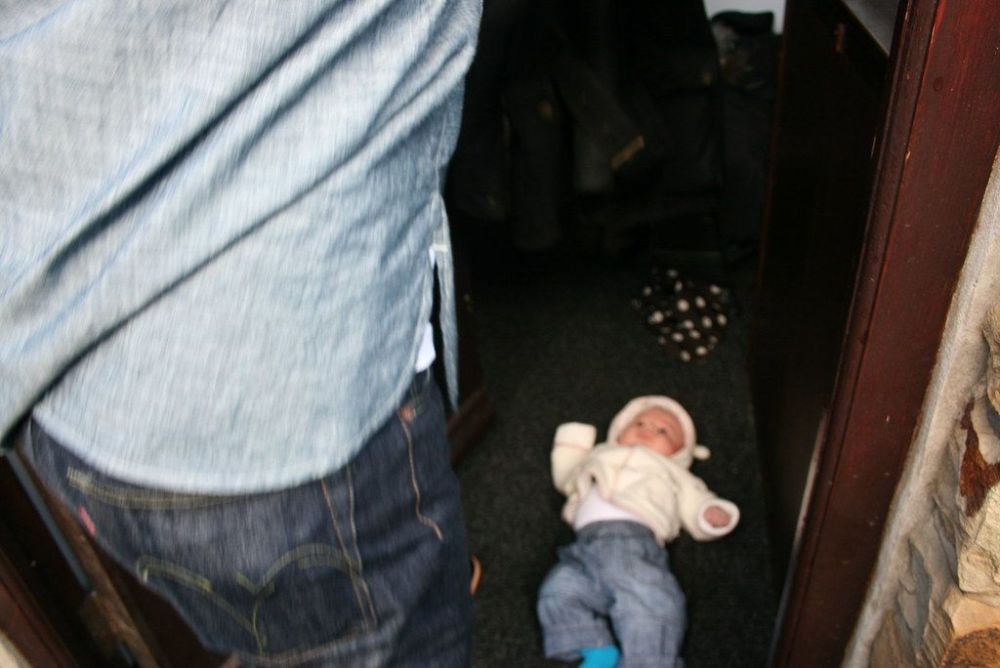
Not today, but a week ago we welcomed our little girl into the world a whole month early! She and mom are healthy and doing great, we’re just adjusting to the inevitable lack of sleep. Happy holidays and new year to all, here’s to dad fades in 2025!
 43 points
 -
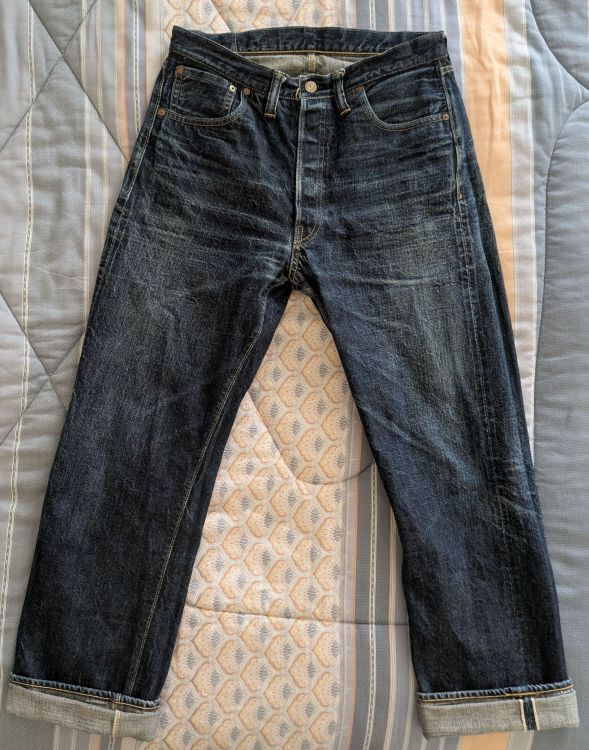
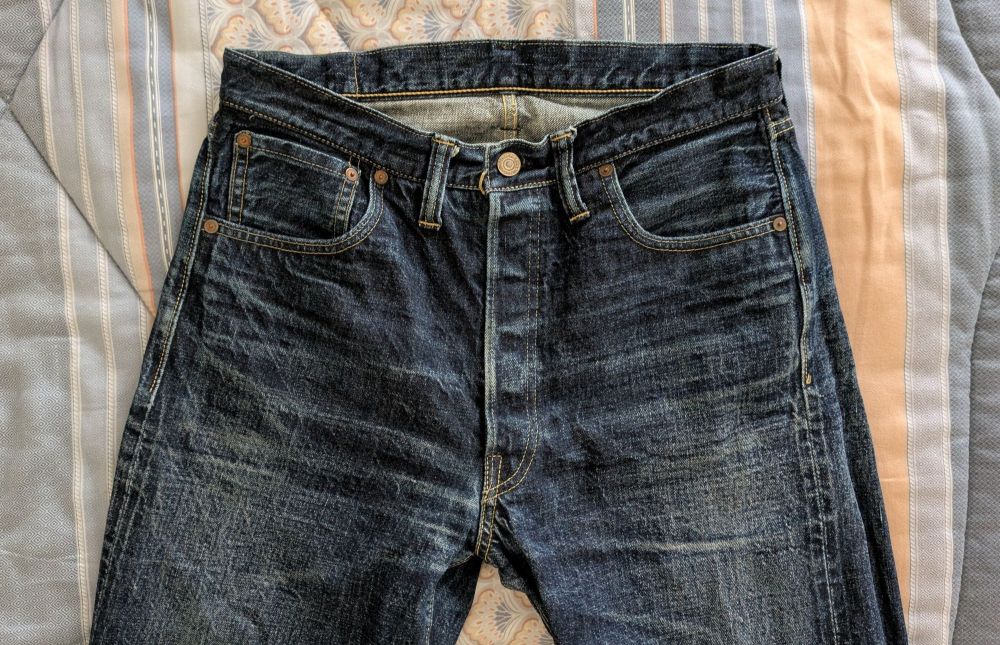
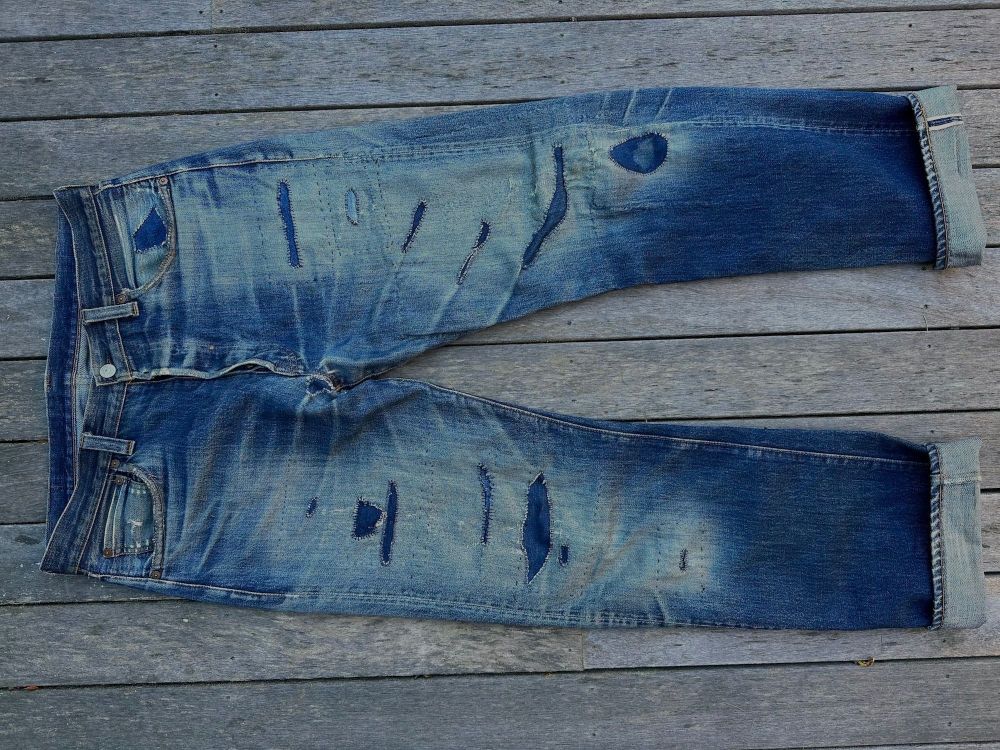
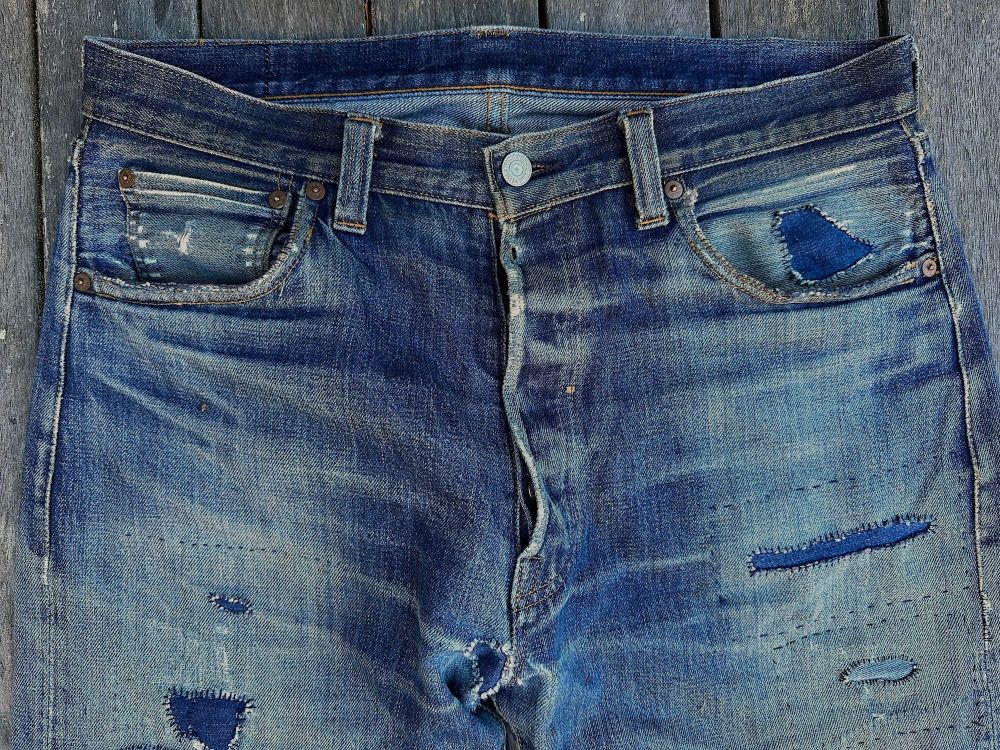
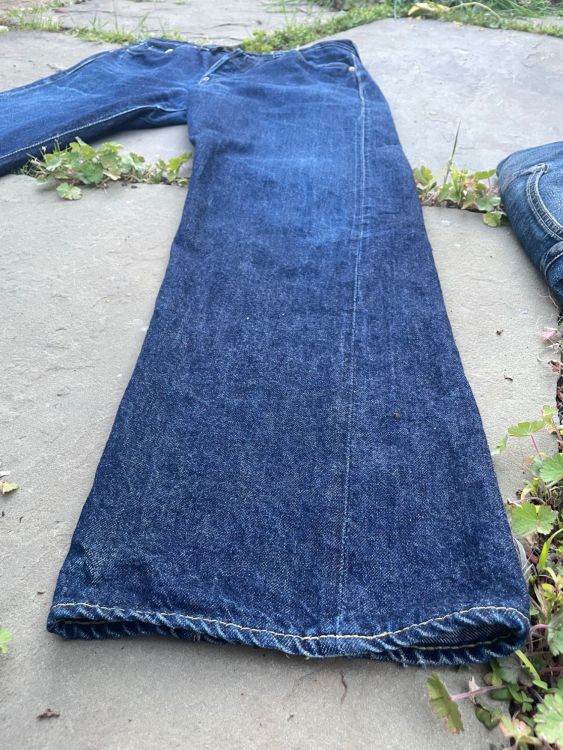
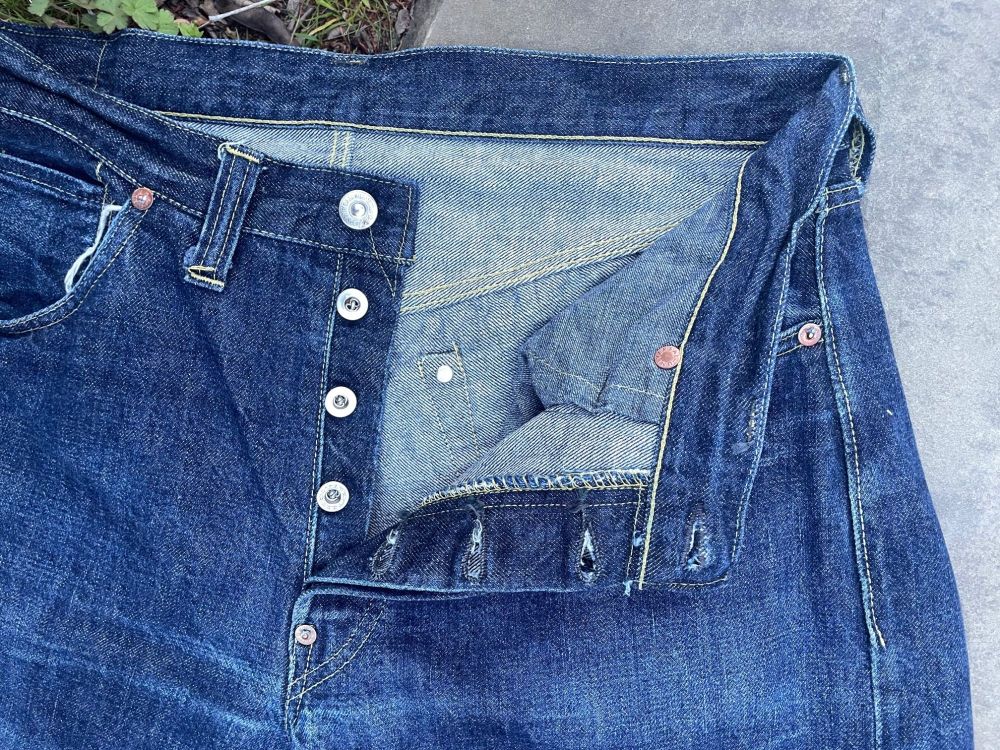
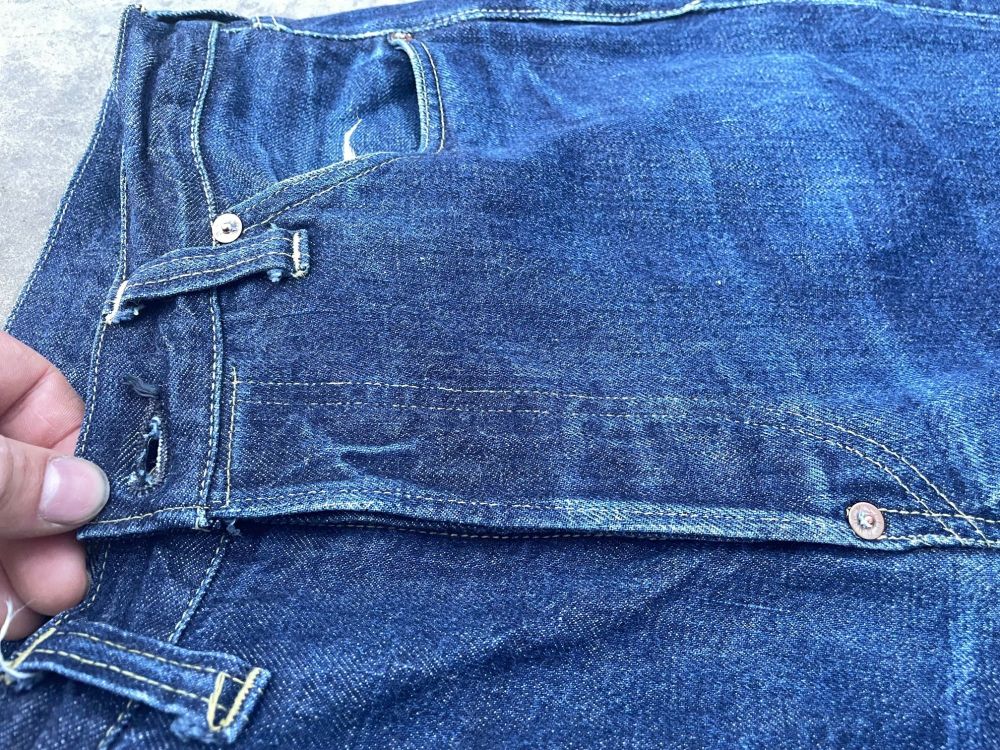
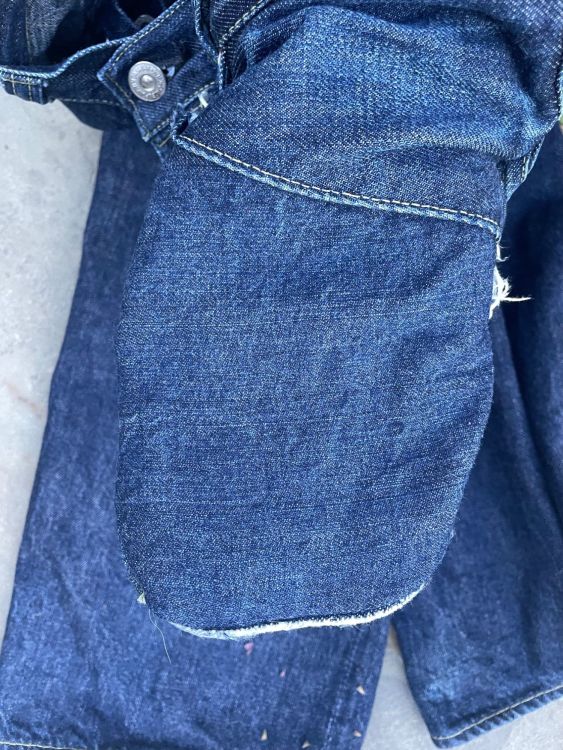
I don’t wear these 1947 jeans as much anymore but they’re looking great. I’ve the last round of repairs on the fabric and stitching fixes, i leave them as only occasional wear so they don’t get too messed up.
 43 points
 -
Memorial Day weekend I was in Tehechapi, CA for an event called Western Swingout. Dancing, vintage clothing, bands (one of which was mine). Jeans are Rising Sun. I think Powerhouse was the name of the model.
 42 points
 -
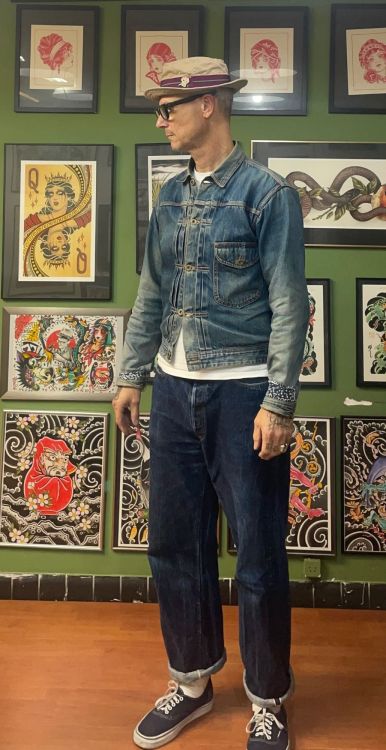
Ooe Yofukuten / Rototo / Tezomeya / Samurai / Converse
 42 points
 -
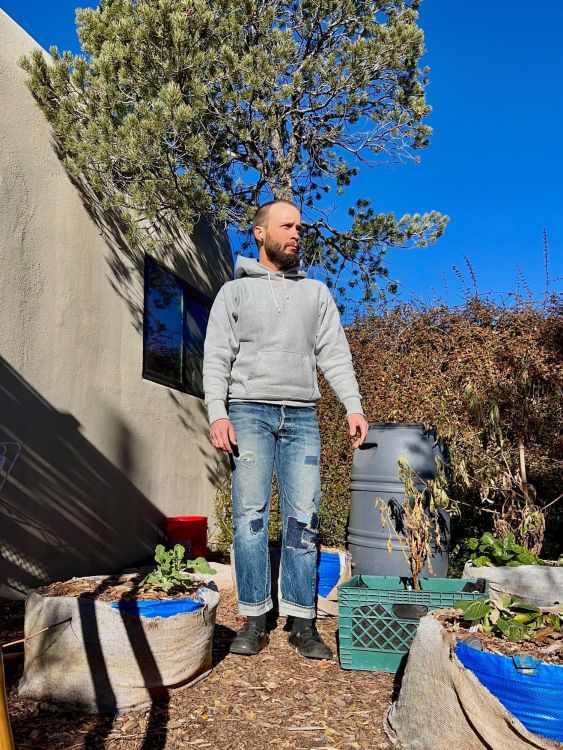
Stopped through the Bay Area on my way back to Seattle and spent an afternoon working on a close friend’s new (to her) Saab.. it was freezing there yesterday!!! im wearing a vintage jacket, rocky mtn featherbed hoodie, duke belt, tender 132p and flat head boots.. and some merino underlayers.. and 2 pairs of socks lol
 42 points
 -
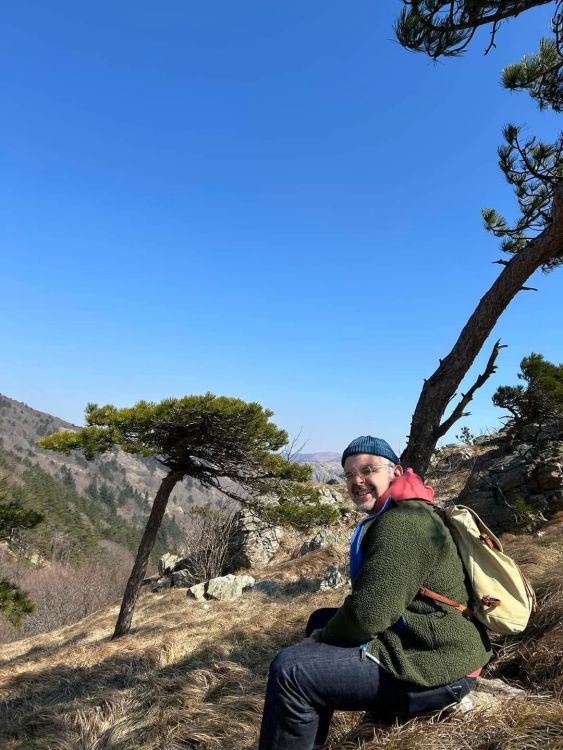
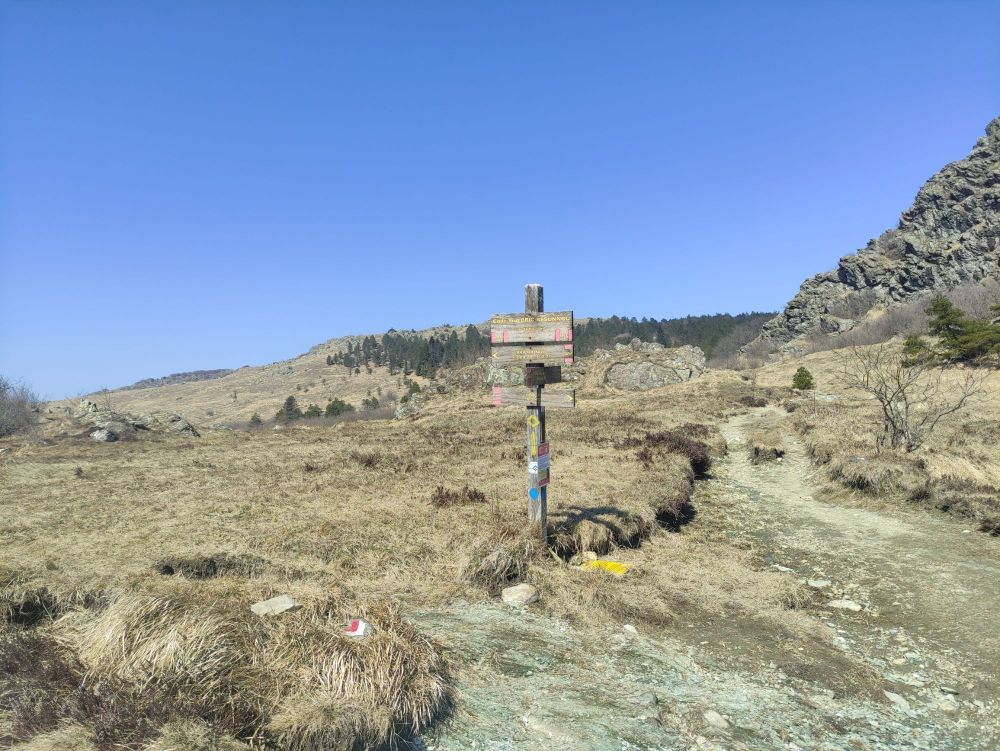
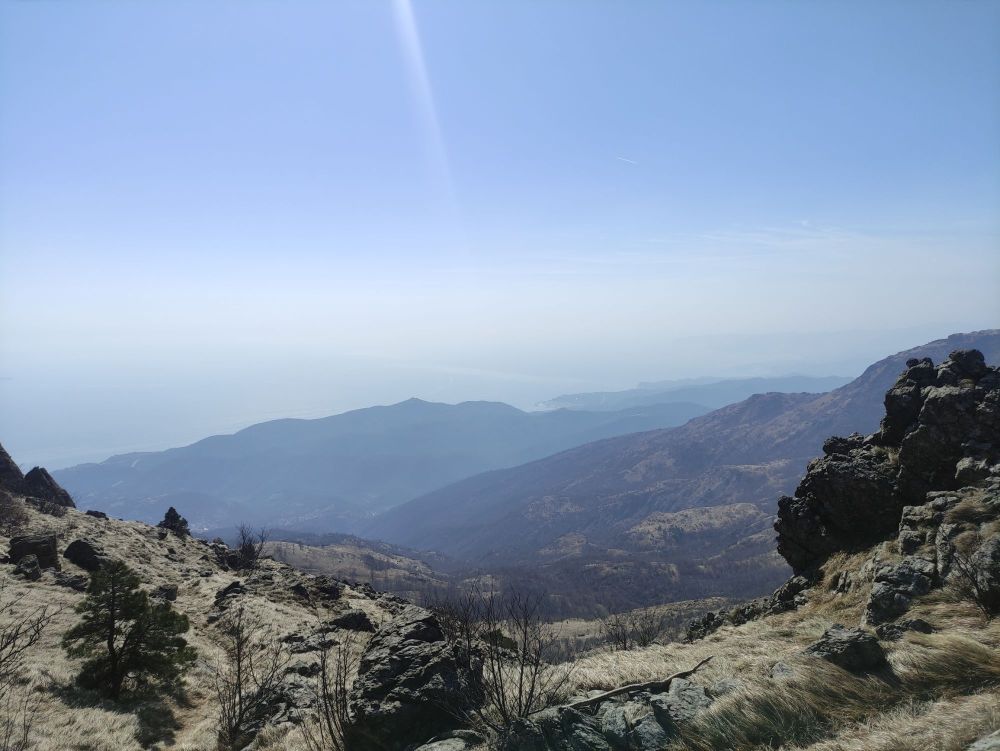
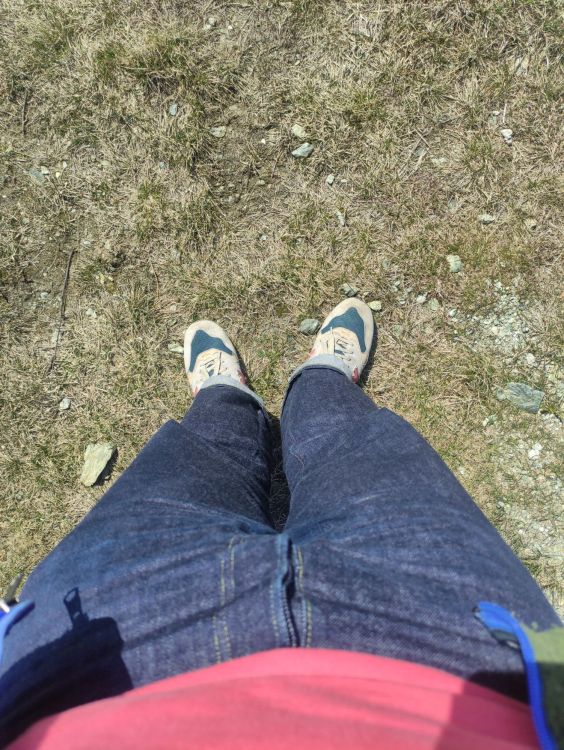
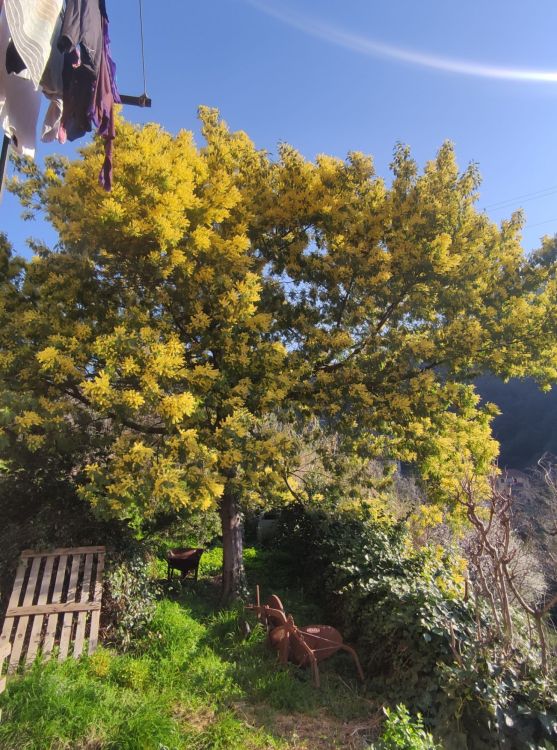
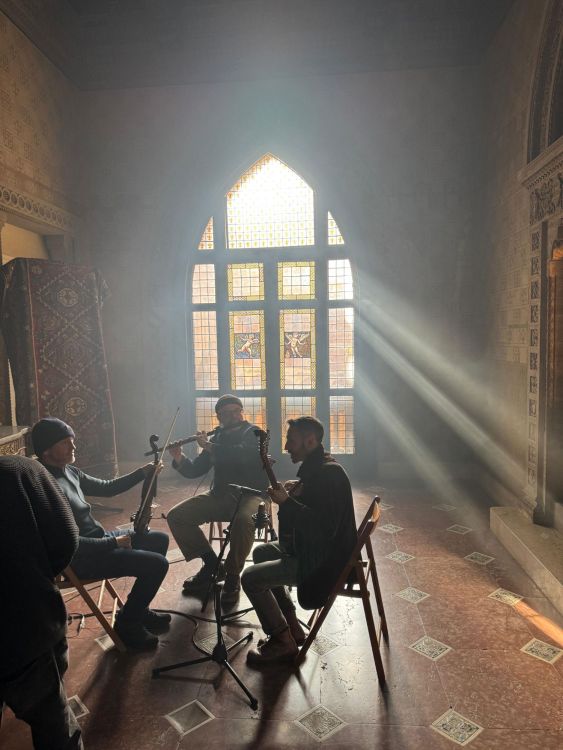
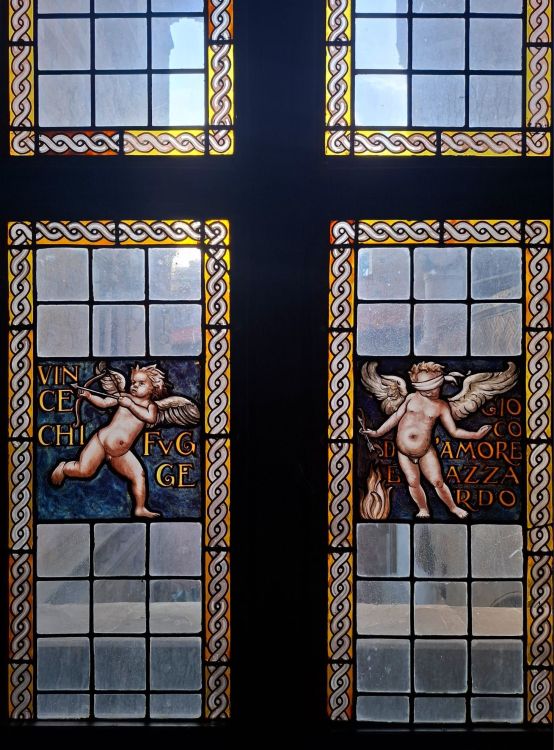
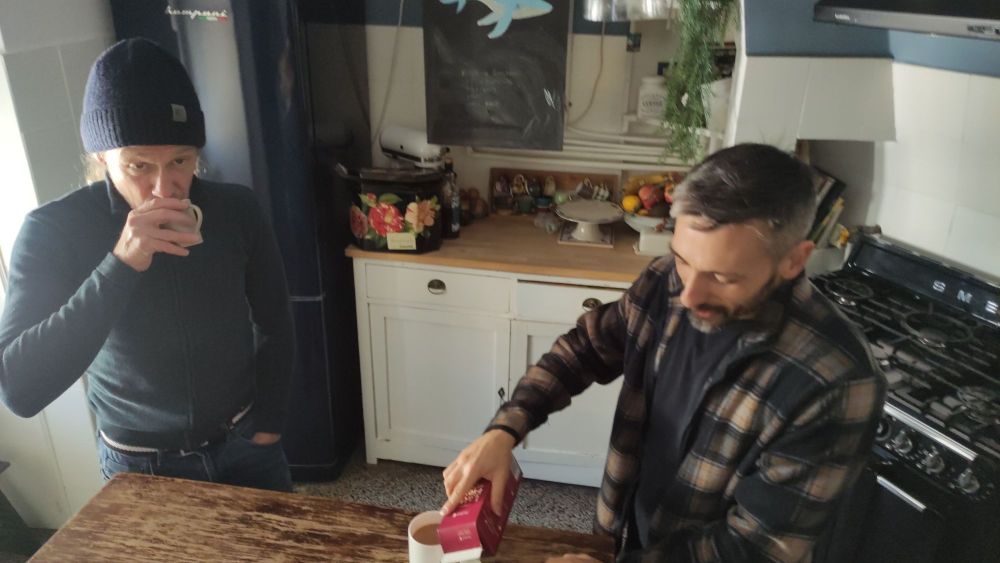
Shame on me, this is my first update! I *LOVE* these jeans, they're flattering and comfortable. I have missed one single day since the beginning, I was sick and stayed in bed most of that day. Here's a little photo dump from the last few days. We shot a couple promo videos in a great venue in Genova, Castello Mackenzie. Rehearsals always start with coffee Our mimosa tree in full bloom right in time for international woman's day Mini hike today


 42 points
 -
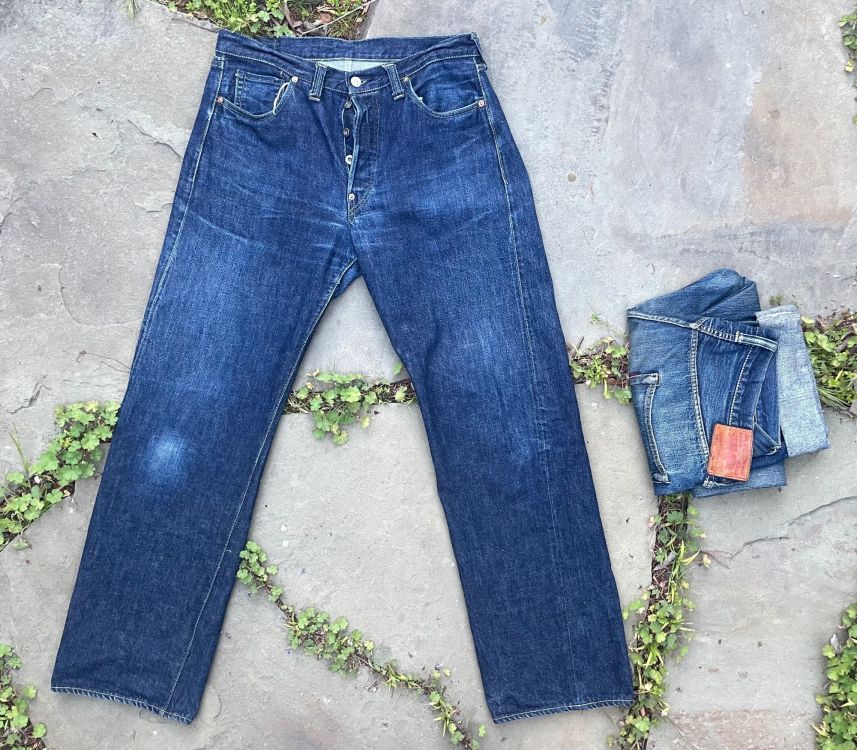
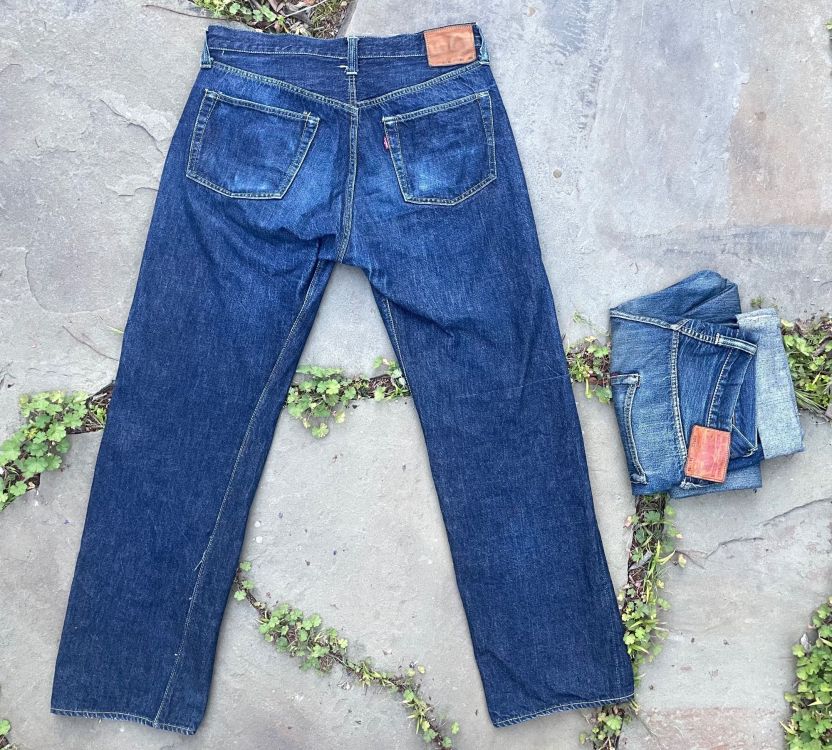
My old LVC 1947 555 501's from the 90's worn and repaired multiple times. They were my first pair of LVC denim so trying to keep them repaired and in service.
 42 points
 -
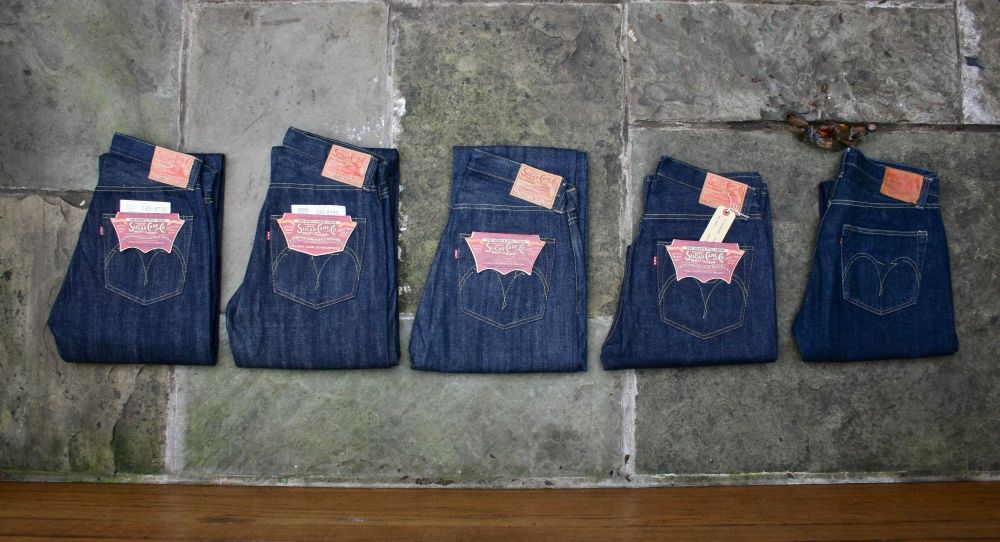
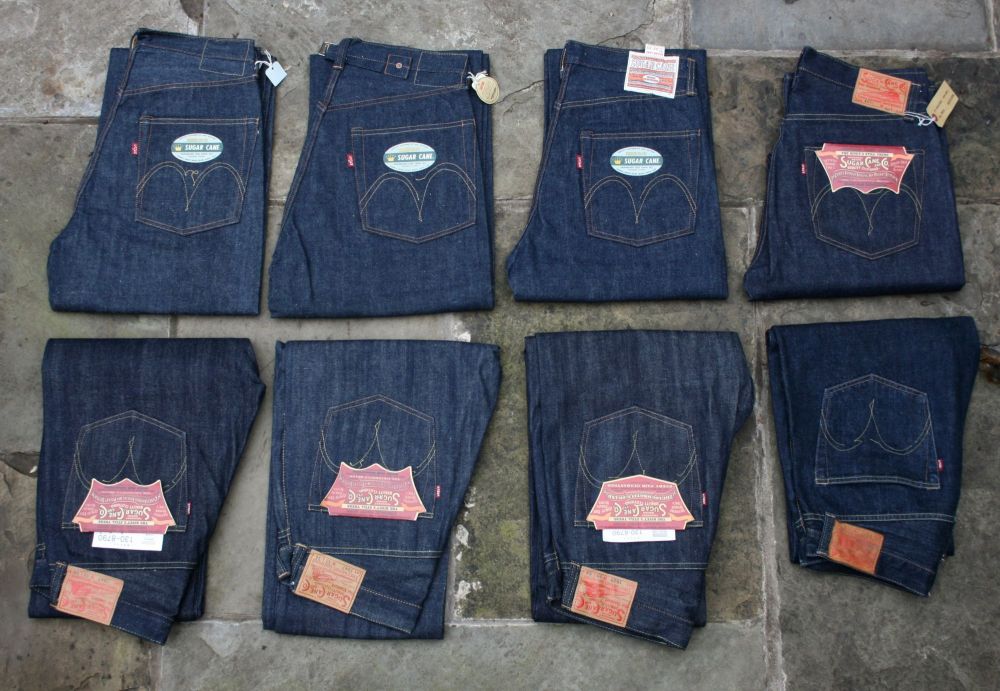
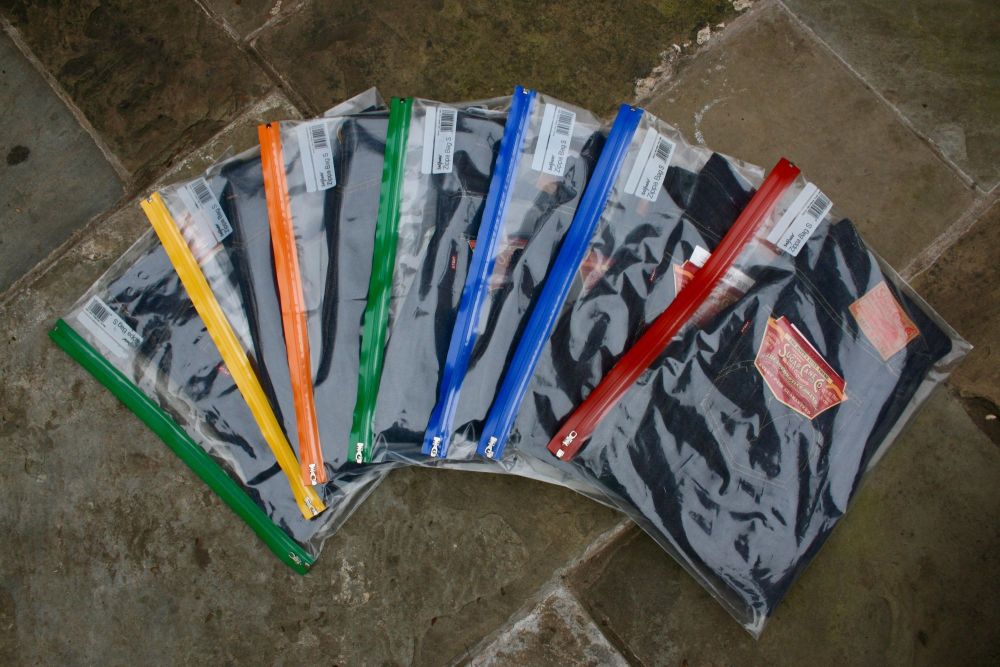
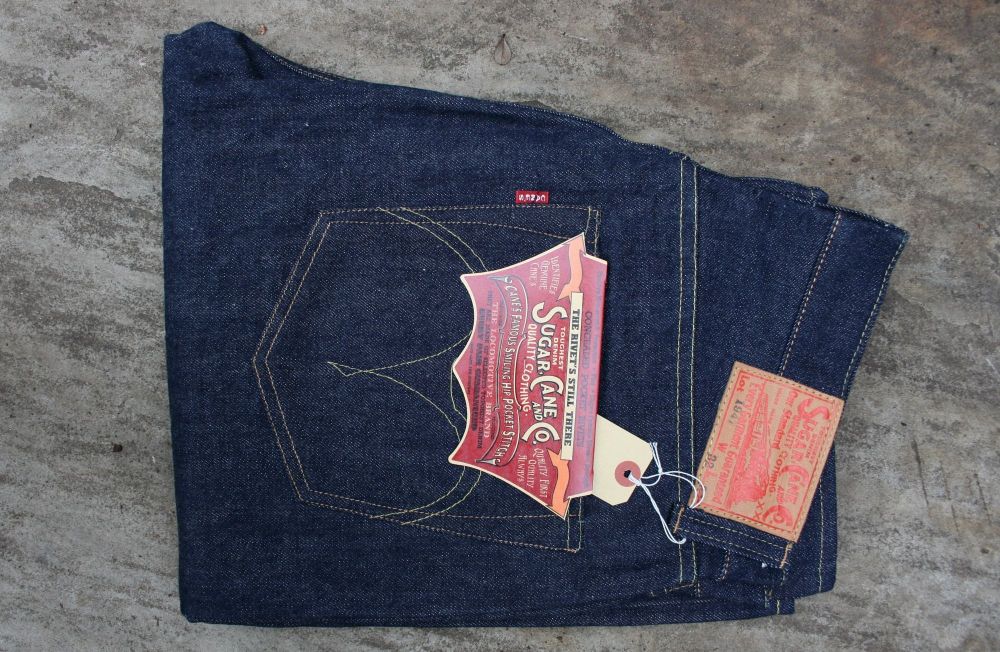
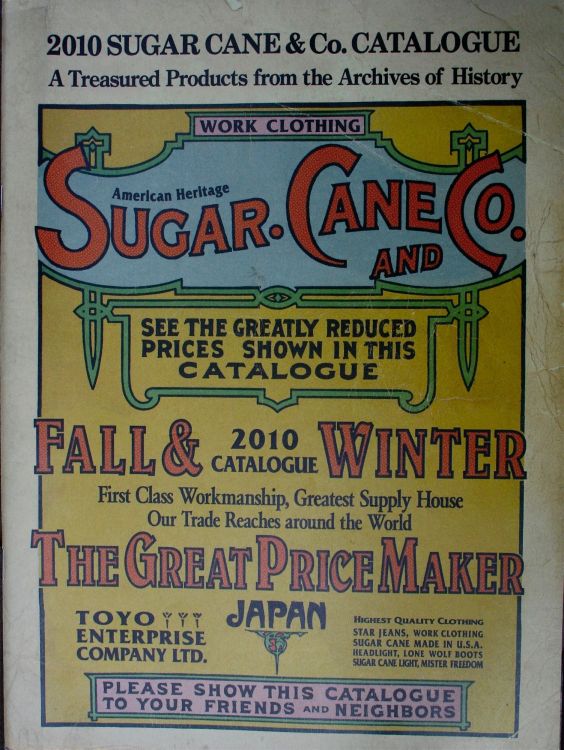
I'm in a reflective mood today.. In the early to mid 90s i was living in a shithole of a bedsit and barely affording my £28/wk rent.. when it came to buying clothes, my budget wouldn't stretch to new so i just bought vintage.. In the days before the internet, i had no clue as to what i was buying other than the fact they were old Levi's and a quarter of the price of the 501s you could buy on the high street.. A couple of years passed and i started to earn a bit more £££s.. i bought a pair of 555 LVC-47s.. in retrospect, this was probably the first time it occured to me that the vintage Levi's i'd been buying previously could be from different eras (ikr? .. you internet kids don't know you're born) around 2003 i bought another pair of LVC and wanted to get them hemmed.. back then I didn't know what a Union Special was, all i knew was i wanted the hem to be the same as the existing hem.. ie- 'not single stitch' .. i took them to a laundrette who did alterations but they said they couldn't do it.. i would have to find someone with a machine that could chainstitch.. i went down to Ted Williams.. a proper old boys tailor on London Rd who said he could chainstitch but it wouldn't look exactly the same because the hem was done with a chainstitching machine rather than a sewing machine with a chainstitch setting.. plus he didn't think his needles would be strong enough to penetrate the layers of denim.. more confused than ever, i found myself down a gennel and up a rickety fire escape to Terrace Tailors on a Sheffield backstreet.. the room had a massive cross on the wall with candles either side and a polaroid of the tailor himself kissing the hand of Pope John Paul II ..? I explained what i wanted and tape measure around his neck. he took me into another room with a rail full of clothing.. top rail was garments waiting to be altered, bottom rail was altered.. (this is the single most significant part of my entire journey through the denimsphere) he pulled out a pair of SC-47s and showed me the hem.. it blew my tiny mind.. i didn't even know Japanese repros existed.. i almost had to go light one of the candles He said they were from a small menswear shop in Sheff called Brother 2 Brother.. he would hem them (a little longer to allow for shrinkage?) using his sewing machine which could chainstitch.. I knew where B2B was, i'd just never been in, they stocked the likes of Maharishi, D&G, Margaret Howell, Dries Van Noten and such.. (high end streetwear through to mid-range fashion labels) this was well before the 2008 heritage boom so 'menswear' didn't yet equate to costly workwear, shops following the JP retail model didn't exist back then.. Nigel Cabourn was still designing highstreet tat for Debenhams rather than pricey Everest-wear. The guys who worked at B2B were always immaculately dressed (in their shiny shoes) i just wasn't (in my tatty randomly sized vtg Levi's, or skateboard jeans from a previous lifetime . i never went in because my pockets were never deep enough to buy anything, the labels were not my steeze and i felt intimidated by the smartly dressed staff, all of whom were a good 10yrs older than me.. but i was desperate to go nerd out over the Sugarcanes.. Niro (the UK distributor of SC) was established as a clothing store in 1986 but i'm not sure exactly when they became the Sugarcane distributor so maybe these SCs came from Niro or maybe they were bought retail by the B2B buyer on a trip to Japan?.. either of these explanations could account for the eye watering price tags.. my questions were many and looking back.. i think they knew as little about these jeans as i did.. they gave me a 2003 Sugarcane Catalogue (to shut me up) which i've kept.. I think this was the first catalogue Sugarcane ever produced, i've never seen anything predating it. it's on the cusp of the SC product codes after they moved on from M .. it's more substantial, more of a yearbook than the magazine type catalogues which would come thereafter.. in the months following i bought a marked down pair of SC-47s from B2B, returned by a customer because they were too small after washing... the sufu sizedown 3 craze was yet to happen A couple of years later, B2B moved premises to a larger retail space underneath the recently opened West One development (across the road from The Designers Republic) a friend of mine did the electrical work for the shopfit.. he got me the 2006 Sugarcane catalogue, it was in here that i first spotted the LoneWolf Mechanic boots.. the 2010 catalogue which i've posted here previously (MF thread.. years ago) came from Vari. I couldn't afford B2B asking price for Sugarcanes so i found myself on the internet.. Hirofumi Udono at Vari was great to deal with, he spoke perfect English and was willing to ship internationally. He lined me up with Hawaii's, Lonewolf boots, Whitesville & Cushman sweats..ect.. i was wearing SC-47s around the time my kid was born in 2009.. (another reason why I’m so attached to them) i didn't do WAYWT back then.. i didn't have the balls but seen here (blurry candid shot) loading the car up with Woolrich Woolen Mills, chambray Upland shirt from the Daiki Suzuki era I found myself here at sufu around 2006/7.. anyway.. enough of all this reminiscing.. Maynard spotted these while searching for his recently acquired SC-66 and gave me a hola.. ..knowing my pathetic inability to resist.. i didn't .. so In a nostalgic denim haze, i've dug out the rest of my SC-47 collection. ..first 4 pairs are raw denim, last pair are current wearers but previously o/w, check out he different hues ..from left, 1991-1997.. 2003-2007 I took this shot of he o/w pair back in 2013 before chucking them on the pile ..i've just got them back from a hem job at soas so i've recreated it A bit more graff, a few extra MMs on the waistline and the JMC sweat is a little more faded 2003 & 2006 Catalogues can be seen here
 42 points
 -
MF/Drake's/MF/FC/Sebago
 42 points
 -
inis meain, cushman, Freewheelers, WMJ, Quoddy
 41 points
 -
Great Lakes / Union Special / Hollows / Word of Mouth / White’s
 41 points
 -
Freewheelers / Big Yank by Anatomica / Fruit of Loom / my favourite belt by @Duke Mantee 😉😁 / WoM 5150 / Russell Moccasins
 41 points
 -
Freewheelers 1922 / Tezomeya / @Duke Mantee / Belafonte / Converse Timeline
 41 points
 -
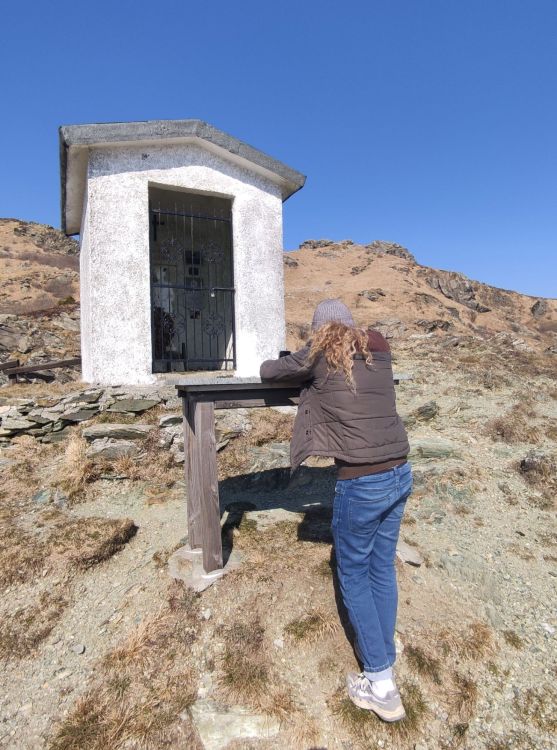
Went to Scotland. Nothing to report
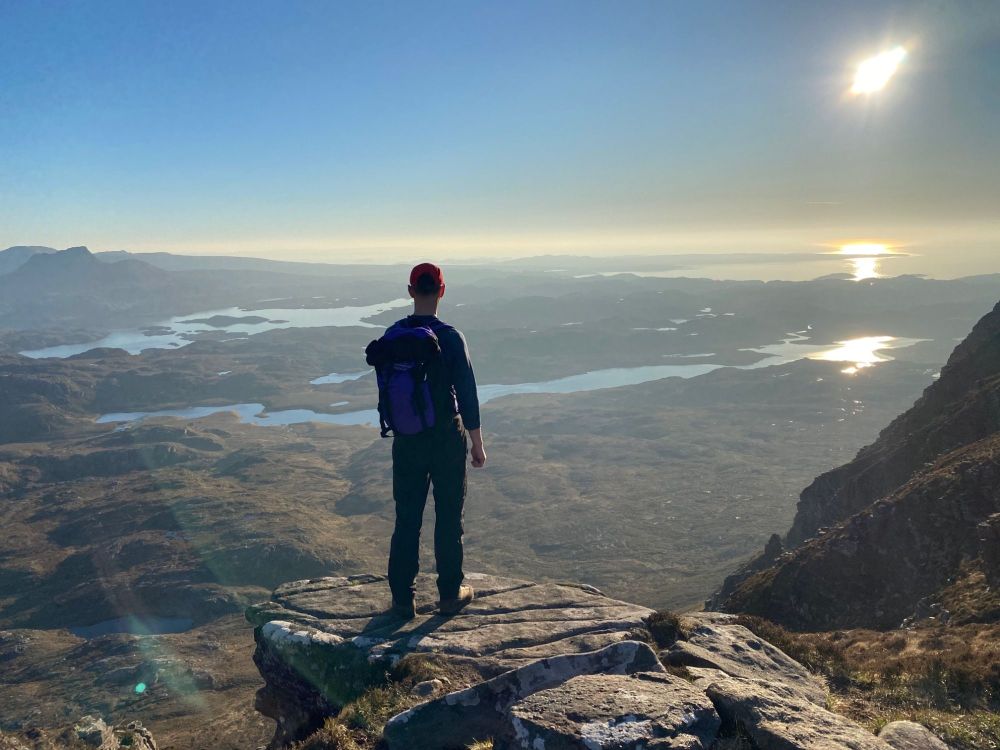 41 points
 -
Obey, Lee, buzz rickson, fullcount, vans
 41 points
 -
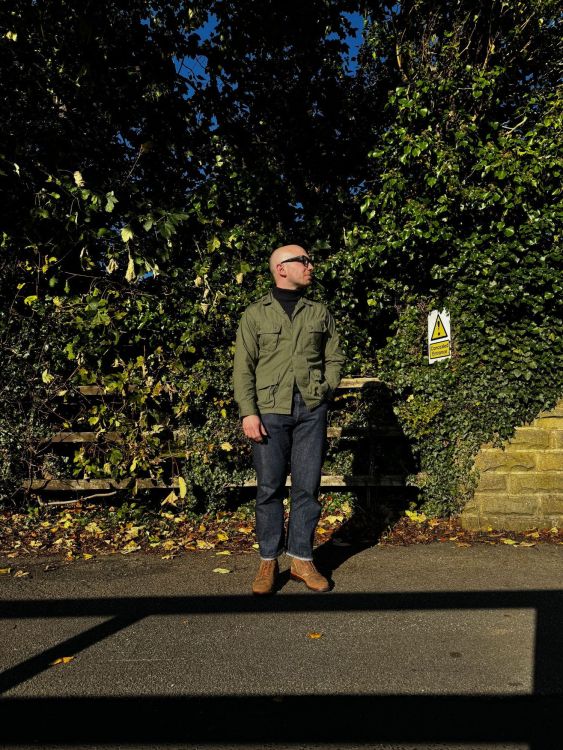
Unseasonably warm weather in our part of California today. Buco, Hollows, FW prospector pants, vintage boots
 41 points
 -
Turned 40 today. Masstard Phigvel Phigvel Wesco
 41 points
 -
Halloween party last night. Paris, Texas became one of me and my girlfriend's favorite movies when we watched it after someone posted stills of it in the iconic denim photos thread.
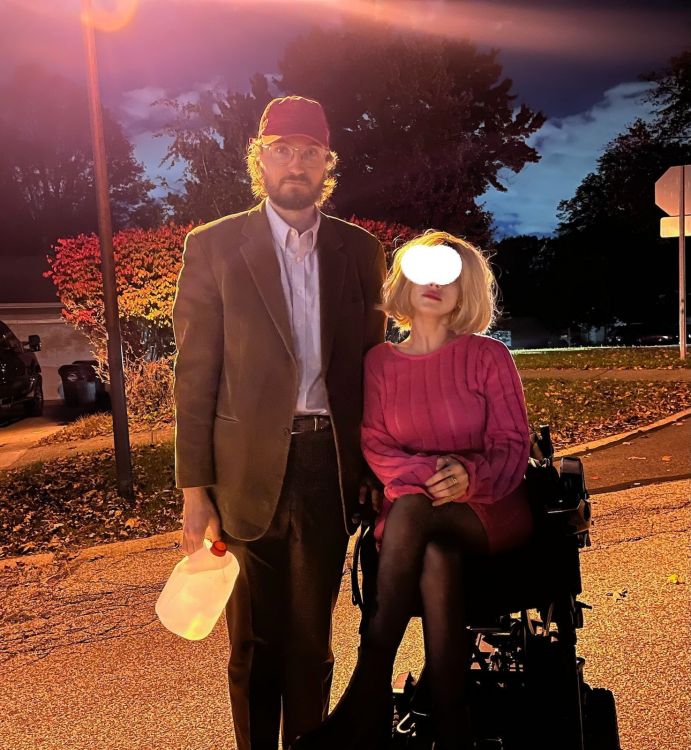 41 points
 -
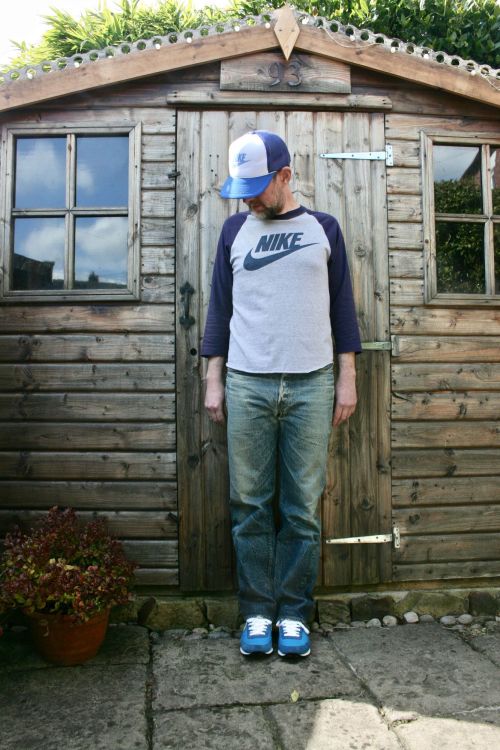
Buzz Rickson Uniqlo jumper Warehouse 1001XX 25th Anniversary John Lofgren M43
 41 points
 -
I'll get the ball rolling as I was up early (if anyone wants to kick it off instead, please let the mods know and swap it over... all good with me ) Wishing you and yours all the very best for 2025!! New year, old gear... Freewheelers / Lofgren
 40 points
 -
nice page thus far peeps: many styles representing: love it my slobbing bucket or fuggit (to cite ol’ rivethead) fit tcb-wom-rw plus tcb pocket / seam deet as it progresses

 40 points
 -
Sugarcane - H&M - 45rpm - Cons
 40 points
 -
tcb / word of mouth 611 / r-mocs elbows up…
 40 points
 -
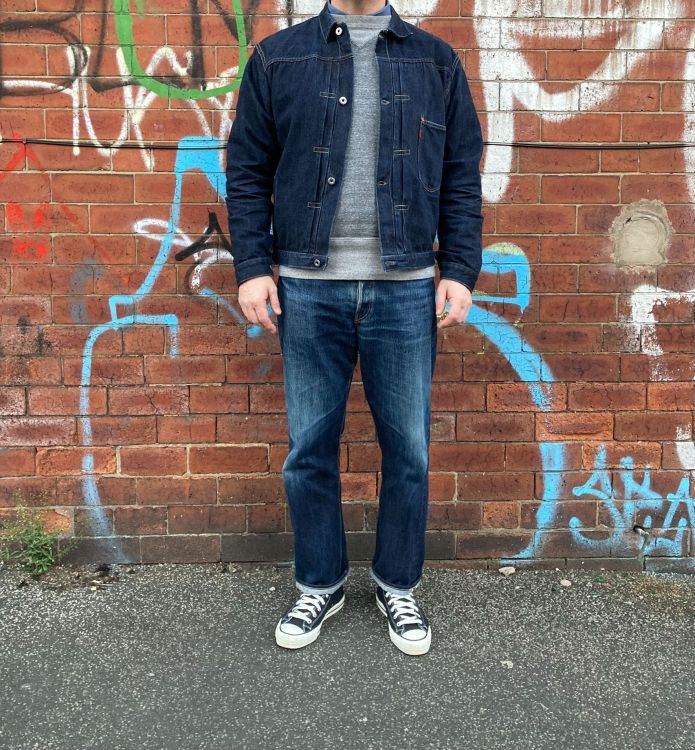
Third wash (‘51 601xx for color reference) …feat. pocket bag update no. 1, and another shot of the loom chatter on the back of the right leg


 40 points
 -
You can't beat an old door. Cap- self made Cheapo wool triangle scarf off ebay. Probs meant for women but hey it's 2025. Tcb chore Buzz m51's YMC
 40 points
 -
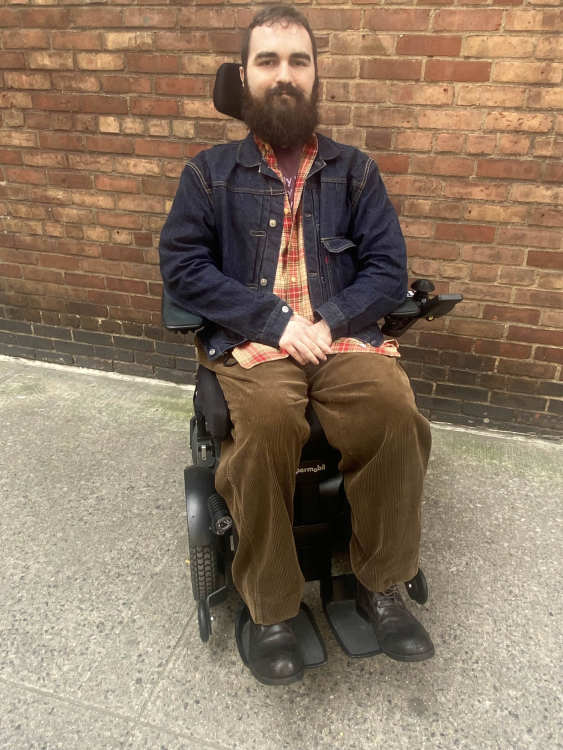
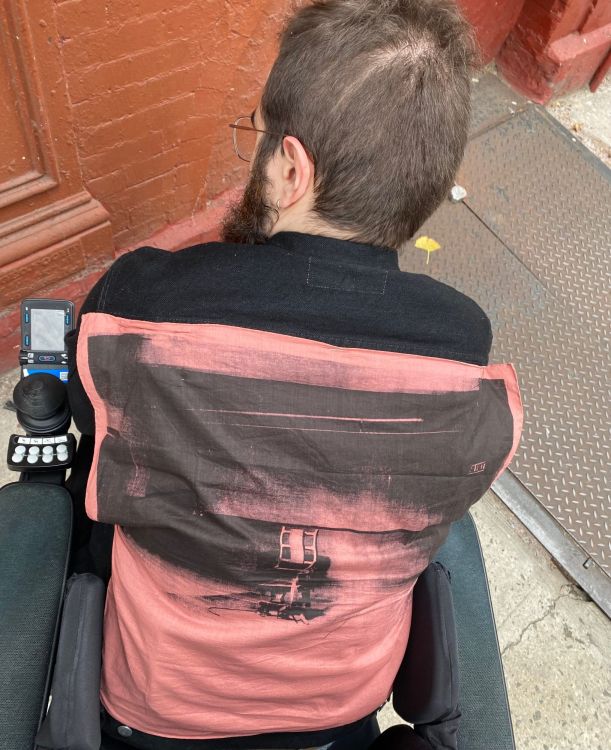
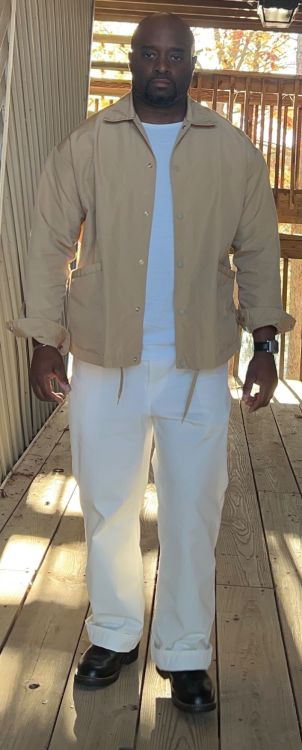
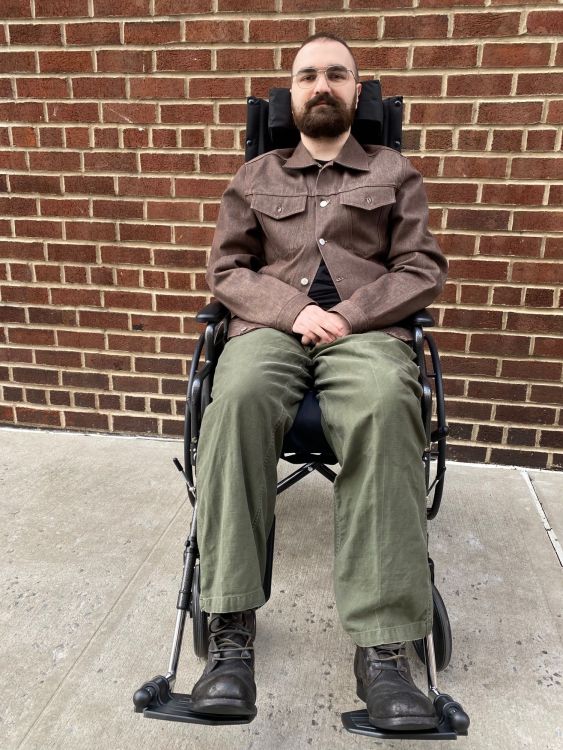
deadstock Helmut Lang brown type 3 from 25 years ago, OG-107, Carpe Diem would have showed this off sooner if my regular chair hadn’t broken down. Only just got a backup manual chair to be able to get out of bed. Waiting on bureaucracy to replace a power cable….
 40 points
 -
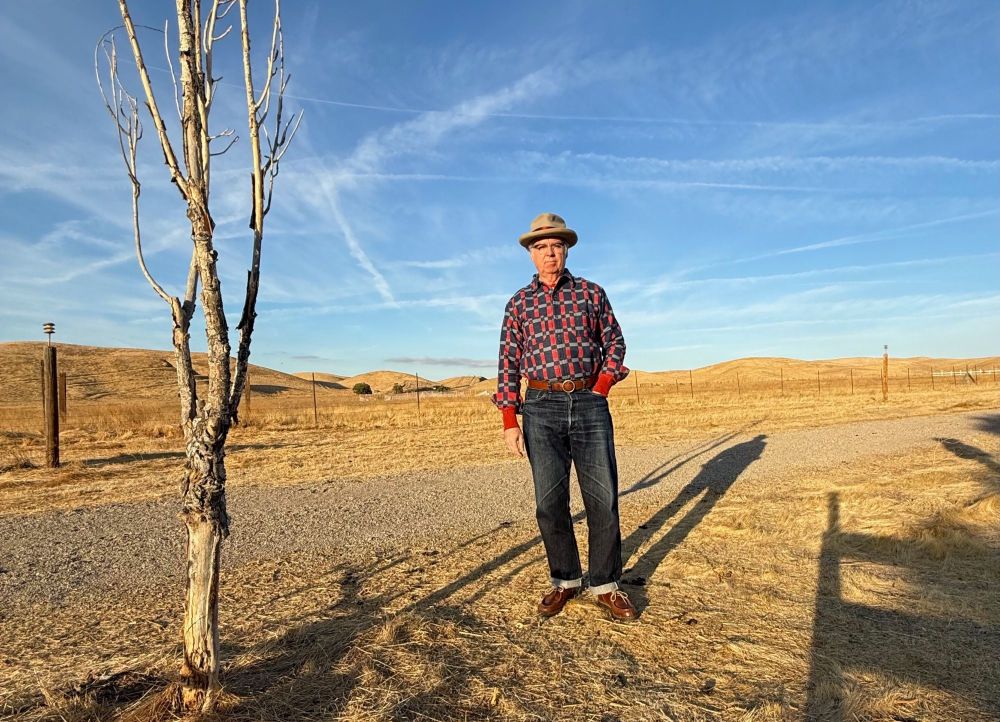
Bottom half same as the last few posts. Newly acquired John Gluckow shirt (from S&S, first time in the new Berkeley store). RMC undershirt. Vintage hat also recently acquired.
 40 points
 -
From a recent vintage market. Pic by @Illcutz Cap- self made Hoodie- warehouse Jacket- style eyes Pantaloons- warehouse
 40 points
 -
Denime - Merz - Ooe - Duke - Nike
 40 points
 -
A very blue day. SC1945 jacket - UES indigo tee - 45rpm Sorahikohime - Nike (with blue swoosh 😉)

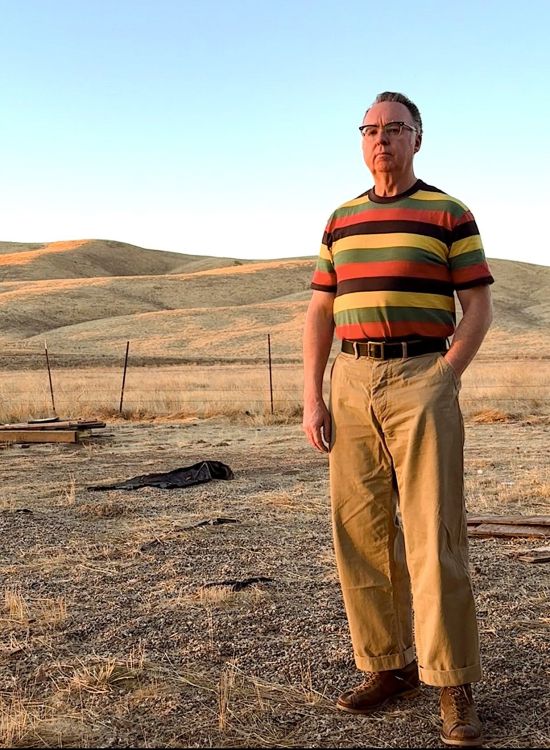
 39 points
 -
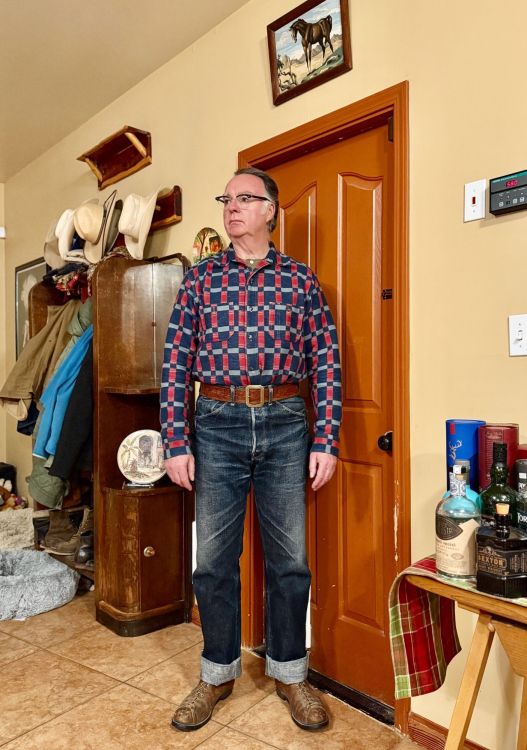
John Gluckow Companion The rest - vintage
 39 points
 -
plus: tcb 1890s tux again with fleabayed russel moccasin monsters and an approximate b_F pose… (suspenders change the drape considerably…)
 39 points


-
Popular Contributors
-
1
-
2

-
3

-
4

-
5
-
6
-
7

-
8
-
9

-
10
-
11
-
12
-
13
-
14

-
15
-
16
-
17
-
18

-
19

-
20

-
21
-
22

-
23
-
24

-
25
-
-
-
-
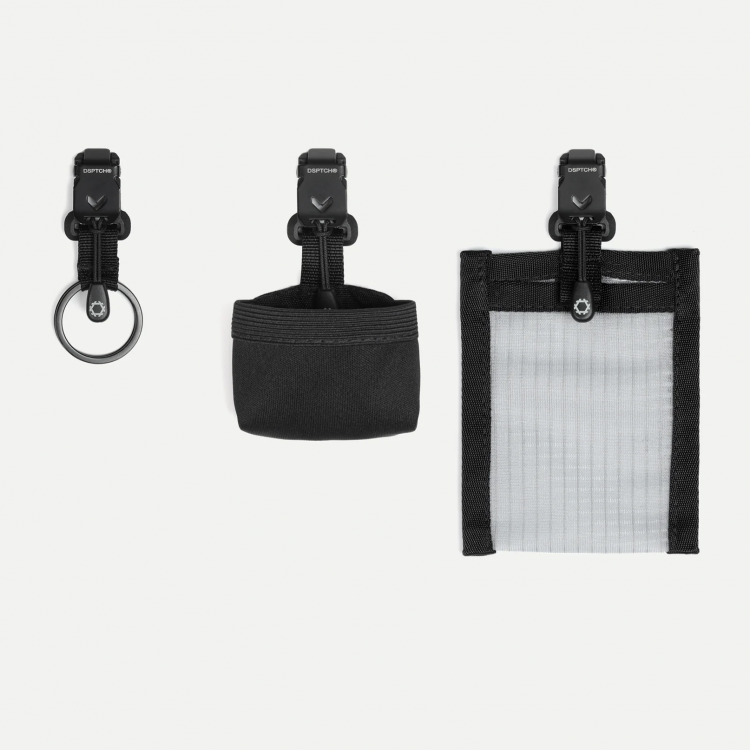
DSPTCH Fidlock Key Chain - Add On
DSPTCH
$US 30