Jump to content

Tender Co. Denim


braille_teeth

Recommended Posts

That's a great project ! If in the future you'll propose denim in size 38-40, I swear that i m buying it !

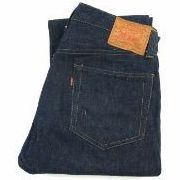
thanks! this seems like a good point to mention sizes. I don't like how with inch sizes garments don't necessarily measure what they're tagged, so I'm sizing 2,3,4,5.

Jeans: 2 (roughly 30" waist), 3 (32"), 4 (34"), 5 (36")

Jackets, Tshirtts, and belts: 2 (S), 3 (M), 4(L)

Link to comment
Share on other sites

thanks! this seems like a good point to mention sizes. I don't like how with inch sizes garments don't necessarily measure what they're tagged, so I'm sizing 2,3,4,5.

Jeans: 2 (roughly 30" waist), 3 (32"), 4 (34"), 5 (36")

Jackets, Tshirtts, and belts: 2 (S), 3 (M), 4(L)

how emasculating!

jk

Link to comment
Share on other sites

^^^ hmm, I hadn't thought of it like that. Women's sizes in the UK start at 6/8, rather than 0/1. Basically though I just didn't want to size based on measurements that might then not be the same as other brands...

Im really looking forward to seeing the leatherwear!

My grandma lives in a small town in Devon, and last spring when I was starting to think about this project I was staying with her for a weekend... We were walking along the river through some fields, and I asked her what the group of old buildings across the river were. She said 'oh that's the tannery'. So we went over to take a look. I ended up staying til Monday morning so I could meet the owner and take a look round. The place, and the leather, are amazing! It's the only oak bark tannery left in Britain, and leather has been continuously produced on the site since Roman times!

Here's the place:

4588261609_a58f14a09b.jpg

4588261533_912f04702e.jpg

The place is a collection of buildings that have grown up over hundreds of years, with loads of interconnecting attics, and bridges between them It was a bit a difficult taking photos inside, because it's so dark in the old rooms. The stairs are all worn down where they've been walked on, and the smell is amazing.

4588881680_ec2f42a7b2.jpg

Link to comment
Share on other sites

The skins arrive from local Devonshire beef cattle, via the local abattoir. They come in on palettes, with (as I was told in a sheepskin tannery I once visited) 'meat on one side, and shit on the other'

4588881630_f89e0e37a7.jpg

4588262859_fe63349845.jpg

First the skins go into lime pits to loosen the hair, and lift off the fat on the inside of skin, when they come out of these pits they look pretty disgusting:

4588883032_8fae18e212.jpg

The skins are now mechanically processed to pull out any remaining hair, on a massive rotary machine. The skins are so big it takes two men to feed them in.

4588261363_0dc90ec5b7.jpg

Link to comment
Share on other sites

Once the hides have been fleshed, they go back into weaker lime pits, where they stay for a few weeks. This loosens the fibres in the skin, and opens them up to take the tanning liquor. These lime pits are in a long room with a pitched roof. The pits are covered with planks, which in turn are covered in a thin greasy layer of beef fat....

4588263087_b3b944f862.jpg

To pull the skins out, the floor sections get pulled up with long hooks:

4588883278_f77d14fc7e.jpg

After a few weeks in the lime the skins are looking a lot more like leather, although still pretty gross. The texture is rubbery and flabby:

4588881340_80c4711f7d.jpg

4588881292_9da350bf66.jpg

The holes in the corners are used to pull the skins out, with the long hooks that the guy in the picture above lifted the floor up with. The hides are sometimes hooked up onto the wall by these holes, to inspect the surface. After this they are cut down, leaving little leather ends hanging off the wall:

4588260993_562ba2e22a.jpg

Link to comment
Share on other sites

oak bark comes to the tannery from coppiced woodland in Somerset, the neighbouring county:

4588260823_7a7c50e4c7.jpg

4588880980_b71a21de78.jpg

Because oak-bark liquor is a much weaker tanning solution than chemical tans, teh process is much slower, but I think gives a much more nuanced leather.

For the first stage of tanning, the skins go into relatively shallow 'handler' pits, so called because the hides are regularly moved around so that the liquor strikes all over the skins evenly:

4588883322_387d2df4df.jpg

these pits are fed from the river, which also powers the water mill, which runs a lot of the machinery:

4588883484_d9c2804be5.jpg

4588882696_1ff4c00b90.jpg

Link to comment
Share on other sites

the hides stay in the hander pits for 2-3 months, then they go into the 'deep pits', where they stay for about a year. The deep pits contain a much more concentrated tanning liquor.

4588883146_464a46eec7.jpg

there's much more scum on the surface of the deep pits than on the handlers- I guess this because the liquor is that much stronger:

4588262995_c51026cd3c.jpg

Link to comment
Share on other sites

When the hides come out of the deep pits, they look much nicer, and smell incredible. I don't if it's technically the right definition, but I'd say at this point they seem like they've moved from being 'skin' to 'leather'.

They hang dry in the long interconnecting attics across all the buildings.

4588261677_9c4892d918.jpg

4588262129_b082a5ae1a.jpg

the smell, and the warm steamy atmosphere up here is absolutely incredible. Malcolm, the guy who was showing me around, just left me to wonder through these rooms...

4588882078_0f42d0e265.jpg

4588261817_4f3e0bf465.jpg

4588882150_563e5633f1.jpg

Link to comment
Share on other sites

:)thanks Lance! I'm aware that this might all seem a bit self indulgent to post up so many photos, but as long as people are interested I'll carry on...

when the hides are semi-dry, and still supple, they get flattened under brass rollers:

4588261749_a38cb875b8.jpg

4588263387_eac16ce4a6.jpg

they then hang back up to dry through completely, but now flatter:

4588262185_cc6d0a6f97.jpg

The leather is now shaved down to the desired thickness, on a big lathe:

4588261293_1db987b8f8.jpg

having said that, for TENDER's belts, I want the leather as thick as possible. The natural tan colour is around 6mm. The black has to be slightly thinner, as the black stain is pressed into the leather, which squashes it to 5mm.

I also saw this other interesting-looking piece of machinery, although to be honest I'm not sure what it's used for

4588262467_ae51455316.jpg

4588262405_208354dd70.jpg

4588262333_f1c829bbdc.jpg

Link to comment
Share on other sites

The leaher is now ready for finishing. The first thing to do is 'currying' the leather, which involves 2 men greasing the leather laid flat on a slate table. They use a mixture of mutton tallow (fat) and fish oil, which is rubbed in first with heavy brushes, and then with cloths (similar to polishing shoes I guess)

4588260903_a59aa4f097.jpg

(sorry for the lack of action shots by the way, the people at the tannery are incredibly accomodating and friendly, but most of the guys are a little camera-shy!)

The curried leather is hung up again to dry, well spaced:

4588260607_6ae8cac5bb.jpg

Stain is painted on hot (the colour is boiled up in tin cans), and then hung out to dry on. Several layers of stain go into the leather, and it's then pressed in:

4588882756_27dde1c85e.jpg

Link to comment
Share on other sites

that's the leather process pretty much done. Obviously because it take around 18 months start-to-finish I wasn't taking away any of the actual hides that I saw being produced, so Malcolm took me up to the store room, to pick out some nice leather. TENDER's belts are cut from 'stirrup butts' which are the pieces along each side of the spine of the cow. This is the thickest, most even (and hence most exensive) part if the leather, and is used for equestrian stirrups, which need to support the weight of a rider.

You can see the 'bloom' on the leather. After it's been left for a while some of the currying grease works its way out onto the surface of the leather- it rubs away and doesn't leave a mark.

4588883384_93d49e4a15.jpg

next we went into the packing room, via some more store-rooms, where I found leather waiting to be cut for shoe soles:

4588881456_d3902a4792.jpg

4588261165_d62562c7ac.jpg

any unusable edges of the leather get trimmed off with a sharp knife

4588883612_f915ac85a8.jpg

4588262523_5da9c98db9.jpg

the leather is rolled up

4588262801_56d25fe941.jpg

4588262725_094158c91a.jpg

and I'm back on the train to visit my belt factory (pics to come)...

Link to comment
Share on other sites

There was an episode of "Dirty Jobs" that showed a similar process, except the skins were turned into parchment and drumheads. It's so refreshing to see small companies like Tender work with local craftspeople toward making a quality product. Thanks for the posts, Bill!

Link to comment
Share on other sites

Here's how the belt buckles and jeans/jacket buttons are made... They're all cast in solid brass in Devon, using the lost-wax method. This is one of the oldest casting methods, which gives a lovely castinf with good definition, but which needs a new mould to be made for every single piece cast, so it's not good for high volume. Here's how it works:

First I had a computer-cut hard wax model made from my spec:

4609159070_b6bf8e884d_o.jpg

the extra bar ^^ across the back of the buckle will be cut off, but allows the molten wax to flow right to the ends of the buckle.

These 3 pieces are set into a soft rubber (secret recipe), which is allowed to dry and then cut open (the original wax is broken out and thrown away). Here's how the rubber mould looks:

4608552883_dc80bcf97b_o.jpg

4608555585_b319b66206.jpg

4608555995_0d2e68dd93.jpg

I asked why the cut is so messy, and it's really clever- if they cut the mould open cleanly they'd have to make very accurate marks so that it could be lined up again perfectly, but instead they cut it rougly with a scalpel- this way the scalpel cuts match up perfectly and it can't get mis-aligned.

I needed 3 cast pieces (2 buckle parts and a button), but they're all small, so Steve, the caster, made up a single mould in 3 layers:

4608552643_767c411e1d_o.jpg

Note the channels running off from the main casting shapes- these allow the molten wax to be poured in, and air to escape so that there aren't any bubbles which would weaken the casting. The channels run off into holes in the side of the mould- like this:

4608555487_08ebd0cfb7.jpg

Link to comment
Share on other sites

once the mould is made, soft wax castings need to be made. First the raw wax gets melted down in a pan (looks like peas:))

4609159498_3e4311afea_o.jpg

the molten wax is poured down the holes in the rubber mould and allowed to set, then the mould is opened and the wax castings are taken out and cleaned up (sorry no photos of this).

To save time when doing the real brass castings, as many waxes as possible are joined together onto a central wax trunk:

4608612691_5f24d07064.jpg

Steve melts the wax castings on to the trunks with a blow torch:

4609160376_84fe9f4764_o.jpg

these are handle rings for restoration of an antique chest of drawers (I think):

4609218922_bde8d54c03.jpg

Link to comment
Share on other sites

now the actual casting mould is made, out of plaster. Again I'm afraid I don't really have pictures of this section, but first they mix up plaster of paris with a kitchen mixer, set slow so that no bubbles get into the mix:

4608556225_53a8282340.jpg

and we're ready for the brass! It comes in in ingots:

4609161314_8b45c311b8.jpg

4609160828_8f1f7c884e_o.jpg

which are sawn into manageable chunks:

4608554303_a11b269504.jpg

leaving a pile of brass dust:

4609161172_af4669f22f.jpg

and a box of cut brass:

4609161452_e8872b6c6e.jpg

which is melted down in a ceramic crucible:

4609162946_0b04458ba3.jpg

Link to comment
Share on other sites

the crucible is heated in an oven, and pulled out with big pincers, then poured into the plaster mould, as with the wax (again no pictures unfortunately I haven;t been able to make it down on a casting day yet). When the brass has cooled and hardened (slowly- too fast and it could crack) the plaster is broken open. What comes out though is an exact copy of the wax 'tree', but in brass. The castings are then sawn off, leaving the central trunk, which will be melted down again for a future casting:

4608555393_c164f8f274.jpg

Now the castings are ready, but are still unusable, as they have big sticks of sprue left on them (the brass that filled the channels where the brass was poured into the mould):

4608663773_ff2f7b9637.jpg

this is cut off, one by on, by hand:

4608555263_753d075d27.jpg

and the rough edges get smoothed off on a rotary grinder:

4608552995_2e207dbc81_o.jpg

4609160698_5a02441cac_o.jpg

finer grinding marks are taken off with a more delicate, lubricated, grinder:

4608556121_713f9efbe6.jpg

and the castings are finally put through a vibrating box full of wet marble chips, which take off any last sharp edges and give the brass a lovely shine:

4608555021_83a26752e5.jpg

Link to comment
Share on other sites

posting up these pictures has reminded me how ridiculously time-consuming this process is just to get a button (and it's not scaleable in production- individual waxes have to be made for every button or buckle part, and each one has to be sawn off and cleaned up one by one), but it does give lovely results I think.

Most of Steve's customers are in restoration of one sort or another:

4608555897_a12d1691fd.jpg

4608555701_b12fb5bc13.jpg

and I couldn;t be happier with the results!

4608697735_1b30f9a236.jpg

Link to comment
Share on other sites

Bill all this detail is fantastic.

The button is great, first thing I thought when I took it out the pack was it looked kinda aztecian, which is cool as it echos the indigo you use for the over dye!

I cant wait to see some pics of the finished belts, they'll be great.

Keep it coming....

Link to comment
Share on other sites

glad you're enjoying the process!

on the logo, it's explained on the website, but it started with this image:

4609455344_2b4af323bf.jpg

My grandfather worked for magazines, and he had some brilliant old source books. This image is a mortised cut, which were generic graphics which printers would design, to be filled with whatever text the customer wanted for their advertisement. This one's encouraging young men to go off to Nevada to seek their fortune. Given as how this is really the start of jeans as we know them, I thought it was perfect, plus I really like the image, with the weird devil-moon-goat face holding the flag at the back. And then within the text is this:

4609455470_408576e5b0.jpg

which I really liked! As Viv says, it does look quite Mayan/ancient (particularly in brass I think), which again I think suits this project in other ways.

Link to comment
Share on other sites

^^ thanks! very glad you're interested. The first collection is just being finished off at the moment (I spent all weekend printing out swingtag labels and sewing on buttons), and should be delivered to shops early June. I'm working on a slimmer fit at the moment, which'll go into the second season

Link to comment
Share on other sites

  • 2 weeks later...

Sorry for the lack of updates- I've been crazy bus, plus my laptop fell apart...

Some belt-making photos today:

Here's John in Northampton making a belt out of the unstained tan oak bark leather from the tanning pics.

First we tried cutting the belt on a rotary saw:

4644348138_c0f80ff105.jpg

but the leather is so thick, and heavy, that it worked out easier to cut with a good old scalpel and ruler:

4644348392_daff6a52b2.jpg4644326612_da17076441_o.jpg

Then the holes get punched with a pneumatic press:

4643713219_a3a052be3a_o.jpg

just next to the press in the rotating mop that John uses to buff the leather edges, so he did that at this point:

4643712863_b720b87118_o.jpg

I'm leaving the edges raw (no paint or anything), but a quick sweeep over a cotton buffer just takes off the rougher fibres from the leather and softens the corners very slightly

Back to the workbench, and the double width hole which the buckle prong will go through gets tidied up by hand:

4644327786_2ccb234f90_o.jpg

and the holes which the buckle stitch will go through are punched with an awl

4643712761_6a347b2490_o.jpg

Link to comment
Share on other sites

the end of the belt that will wrap over the buckle needs to be split down, on a lathe:

4643712003_629ba10cb1_o.jpg

and the unneeded split is cut off:

4643713327_bfb3633e63_o.jpg

This is a lot harder than it looks- I had a go... because you're only splitting off a short section of the leather you need to push it in and pull it back out at just the right rate so that you get a smooth incline rather than a rough step, which would make a lump next to the buckle, and might break

Before the buckle goes on the keeper needs to be cut:

4643711419_a03b727995_o.jpg

and fastened to itself with faberge clips (massive staples!)

4643712241_f0a07846a7_o.jpg

4644326480_e1f68278ba_o.jpg

Link to comment
Share on other sites

now the buckle gets sewn on, by hand, through the 4 holes punched at the beginning. The thread is tubular knitted and heavily waxed, so that when it sinks into the leather it sets solid and won't fray. It's called tiger thread.

4643712647_3efac37368_o.jpg

The first stitch fixes the buckle to the belt, and the second stitch hold the keeper in place:

4644325994_3f6cd8e789_o.jpg

The thread gets tied off tight:

4644327238_e1d6c53212_o.jpg

and the ends of the waxed thread are melted together with a soldering iron so they won't fray:

4644327900_9a32785c2f_o.jpg

Link to comment
Share on other sites

finally the back of the belt is stamped with the foil block I had made up:

4643711645_a15103c5d7_o.jpg

using a silver foil on a heat press:

4644326848_018d9b68d0_o.jpg

and last of all the size number is stamped in by hand:

4644327096_8aa80e4357_o.jpg

and that's a TENDER hand-cut oak bark tanned leather belt with a hand cast solid brass buckle:)

Link to comment
Share on other sites

Join the conversation

You can post now and register later. If you have an account, sign in now to post with your account.

Guest
Reply to this topic...

×   Pasted as rich text.   Paste as plain text instead

  Only 75 emoji are allowed.

×   Your link has been automatically embedded.   Display as a link instead

×   Your previous content has been restored.   Clear editor

×   You cannot paste images directly. Upload or insert images from URL.

×
×
  • Create New...